Pattern Description:
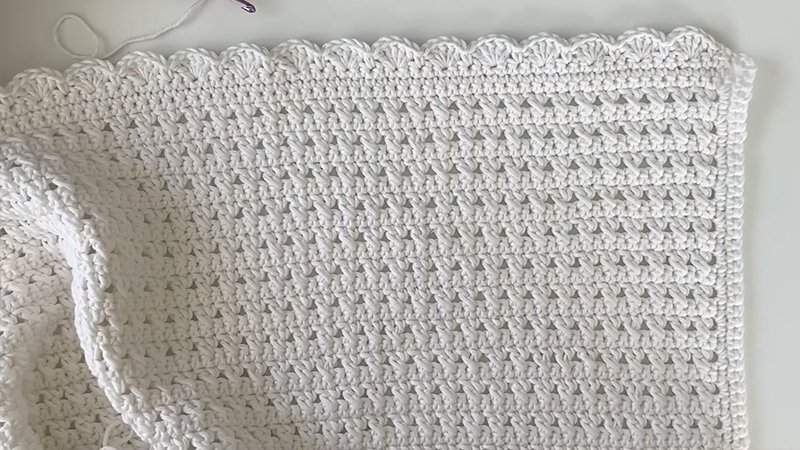
This pattern is for a simple, white blessing blanket featuring an open, uniform crossed double crochet stitch pattern with a scalloped border.
Designed as a treasured keepsake heirloom for a baby’s blessing, it is intentionally kept smaller for easier storage.
Materials Needed & Measurements:
- Yarn: Bernat Softee Cotton, 3 skeins in Clear White.
- Yarn Weight: Light (3).
- Hook: Size G 4.00 mm.
- Notions: Tapestry needle, scissors.
- Measurements:22 x 22 inches.
- Gauge: 17 stitches and 13 rows = 4 inches, taken from the blanket.
Stitches & Abbreviations Used:
- Single Crochet (SC): Insert your hook, yarn over (YO) and pull up a loop, YO and pull through two loops on hook.
- Double Crochet (DC): YO, insert your hook, YO and pull up a loop, YO and pull through two loops, YO and pull through remaining two loops.
Instructions for Making the Baby Kate’s Crochet Blessing Blanket Pattern:
To create this meaningful blanket, follow these detailed crochet instructions:
Foundation Chain:
- Begin by creating a chain of 89 stitches. It is noted that you have flexibility and can use any odd number of chains to achieve your desired width.
Main Blanket Body:
The body of the blanket is formed by repeating a sequence of two rows:
- Row 1 (Single Crochet Row):
- Start by working into the second chain from the hook.
- Work 1 Single Crochet (SC) into this initial stitch.
- Continue to work 1 SC into each remaining chain across the entire row.
- At the end of the row, Chain 2 (CH 2) and turn your work. Upon completion, this row should consist of 88 stitches.
- Row 2 (Crossed Double Crochet Row):
- Note that the turning chain at the beginning of this row counts as the first stitch.
- Beginning in the third stitch from the hook (after the turning chain and skipping one stitch as per instructions), you will perform the signature crossed double crochet.
- Skip the very next stitch after the turning chain.
- Work 1 Double Crochet (DC) into the following stitch.
- Now, loop back and work 1 DC into the stitch you previously skipped. This action creates the “crossed” effect.
- Repeat this sequence from * across the row: Skip one stitch and DC into the next stitch. Then, immediately work a DC into the stitch you just skipped..
- Conclude the row by working 1 DC into the final stitch of the row.
- At the end of this row, Chain 1 (CH 1) and turn your work.
- Row 3 (Single Crochet Row):
- Beginning in the first stitch of the row, work 1 SC into each stitch across the entire row.
- Ensure that the last SC is precisely worked into the top of the turning chain from the previous Row 2.
- At the end of this row, Chain 2 (CH 2) and turn your work.
- Repeating for Blanket Length:
- To achieve the desired size for the main body of the blanket, continue to repeat Row 2 and Row 3 consecutively until your blanket measures square.
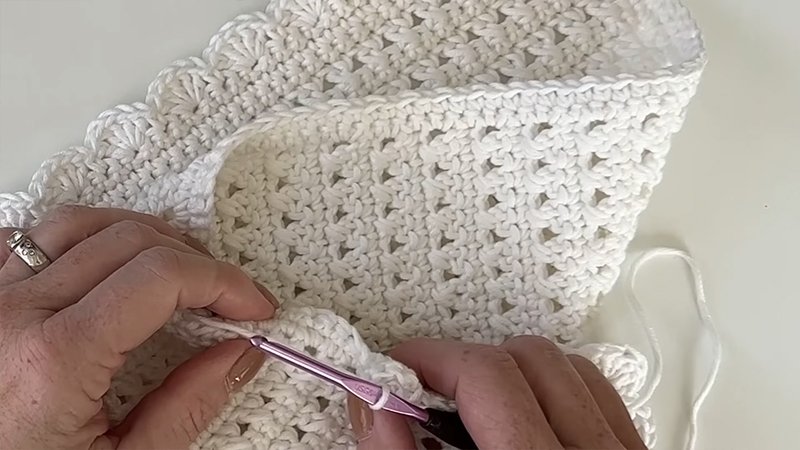
Border:
Once the main body of the blanket is complete and you have finished with a Row 3 instruction, you will proceed to add the decorative scalloped border.
- Round 1 (Foundation Border Round):
- After completing your final Row 3, Chain 1 and turn your work.
- Work 1 SC into each stitch along the top edge of the blanket.
- For each of the blanket’s corners, work the sequence [SC, CH 2, SC] into the corner space.
- Along the sides of the blanket (the raw edges created by the rows), work 1 SC for each single crochet row end and 2 SC for each double crochet row end.
- When you return to your starting SC, Chain 2.
- Join with a Slip Stitch (SL ST) to the starting SC to close the round.
- Chain 1 (CH 1) and turn your work.
- Round 2 (Single Crochet Border Round):
- Work the sequence [SC, CH 2, SC] into the chain 2 space that was formed in the corner from the previous round.
- Continue by working 1 SC into each SC around the entire perimeter of the blanket.
- Ensure you consistently work [SC, CH 2, SC] around each chain 2 space in the corners as you come to them.
- Join with a SL ST to the starting SC.
- Chain 1 (CH 1) and turn your work.
- Round 3 (Scalloped Edge Round):
- Begin this round by working an SC into the first stitch of the round.
- Repeat the following sequence around the entire border: Skip one stitch, then work 5 Double Crochets (DC) into the next stitch (this forms a shell or scallop). Next, Skip one stitch, and then work a Single Crochet (SC) into the following stitch.
Important Tip for Corners:
As you near the corners, try to anticipate where your stitches will fall. You may need to skip 2 stitches, or in some cases, not skip any stitches at all, when creating the 5 DC shell, to ensure that the shell is positioned neatly around the CH 2 spaces of the corners.
- After completing the sequence around the entire blanket, join with a SL ST to the starting stitch.
- Finally, tie off your yarn and meticulously weave in all loose ends for a clean finish.
By following these instructions, you will create the “Baby Kate’s Crochet Blessing Blanket,” a beloved heirloom that embodies simplicity, uniformity, and the special tradition of a blessing blanket for a new baby.
Download Free PDF: