Pattern Description:
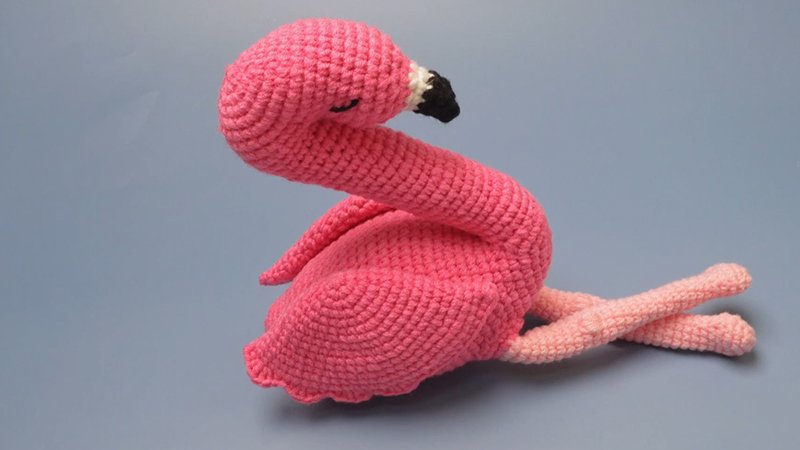
This is an easy, beginner-friendly free crochet pattern for “Vicky the Flamingo” Amigurumi, suitable for any yarn.
It includes a full video tutorial and allows you to craft a cute mini Amigurumi gift in just a few hours.
The pattern can be adapted to create larger or smaller versions by using a thicker or thinner yarn and a crochet hook.
Materials Needed & Measurements:
- Yarn and Colors Must Have Pink cotton color: 035 – 15 gram
- Yarn and Colors Must Have Yellow cotton color: 014 – 5 gram
- Yarn and Colors Must Have Black cotton color: 100 – 2 gram
- Yarn and Colors Must Have white cotton color: 001 – 2 gram
- Synthetic Poly Filling
- Crochet hook size 2.5 mm
- Safety eyes 1 pair: 7 mm
For Chenille Super Bulky version (16 cm / 6 inch):
- Pink, Yellow, Black, and White Chenille yarn (similar can be found on YARNSUB)
- Synthetic Poly Filling
- Crochet hook size 5.0 mm
- Safety eyes 1 pair: 15 mm
General Supplies:
- Scissors
- Tapestry needles with blunt point, nr. 16 or 17
- Pins
Additional Hook Recommendations:
- For Blanket yarn, an 8.0 mm crochet hook is recommended.
- For Bulky Velvet yarn, a 3.5 mm crochet hook is recommended.
Abbreviations:
- Rnd: Round
- st: stitch
- sc: single crochet
- sl st: slip stitch
- dec: decrease
- inc: increase
- ch: chain
- hdc: half double crochet
Instructions for Making the Flamingo Pattern:

Body:
Begin with pink yarn for the flamingo’s body:
- Rnd 1: Start by making 8 sc stitches into a magic ring. At the end of this round, you will have 8 stitches (8).
- Rnd 2: Inc in each of the 8 stitches from the previous round, performing an increase 8 times. This will result in 16 stitches (16).
- Rnd 3: Work (1 sc, then inc in the next st) and repeat this sequence 8 times around the round. You will have 24 stitches (24).
- Rnd 4: Work (1 sc in each of the next 3 st, then inc in the next st) and repeat this sequence 6 times. This round will contain 30 stitches (30).
- Rnd 5: Make 1 sc in all 30 st around the round, maintaining 30 stitches (30).
- Rnd 6: Work (1 sc in each of the next 4 st, then inc in the next st) and repeat this sequence 6 times. You should have 36 stitches (36).
- Mark the 8th and 15th stitch of round 8 with a piece of yarn. These marks will indicate where to insert the safety eyes later.
- Rnd 7-9: Make 1 sc in all 36 st for three consecutive rounds (Rnd 7, 8, and 9), maintaining 36 stitches (36).
- Rnd 10: Work (1 sc in each of the next 4 st, then dec) and repeat this sequence 6 times. This will reduce your stitch count to 30 stitches (30).
- Rnd 11: Work (1 sc in each of the next 3 st, then dec) and repeat this sequence 6 times. You will now have 24 stitches (24).
- Insert the safety eyes between rounds 8 and 9, precisely into the stitches you marked earlier. A tip provided suggests that the eyes might appear incorrectly placed when crocheting the tail, but this will resolve once the tail is stuffed.
- Rnd 12: Work (1 sc in each of the next 2 st, then dec) and repeat this sequence 6 times. Your stitch count will reduce to 18 stitches (18).
- Rnd 13: Work (1 sc in the next 1 st, then dec) and repeat this sequence 6 times. You will have 12 stitches (12).
- Rnd 14-16: Make 1 sc in all 12 st for three consecutive rounds, maintaining 12 stitches (12).
- Rnd 17: Make a sl st in the next st, then ch 4. Starting in the second ch from the hook, make 1 sc in each of the next 3 ch. Then, starting in the sc where you made the sl st, work (1 sc in the next st, then inc in the next st) and repeat this sequence 6 times. This complex round will result in 24 stitches (21 + 3ch). If you need more help with this step, refer to the full video tutorial.
- Rnd 18: Make 1 sc in each of the next 3 st, then inc in the next st. Follow with 1 sc in each of the next 7 st, then inc in the next st. Continue with 1 sc in each of the next 4 st, then inc in the next st. Finish by making 1 sc in each of the next 7 st. This round will have 27 stitches (27).
- Rnd 19-20: Make 1 sc in all 27 st for two consecutive rounds, maintaining 27 stitches (27).
- Stuff the body with fiberfill and continue adding stuffing as you proceed with the next rounds.
- Rnd 21: Make 1 sc in the next st, then dec 3 times. Follow with 1 sc in the next st, then (1 sc in the next st, then dec in the next st) and repeat this sequence 6 times. Finish with 1 sc in the next st. This round will reduce your stitches to 18 (18).
- Rnd 22: Dec, then 1 sc in the next st, then dec, followed by 1 sc in each of the next 13 st. You will have 16 stitches (16).
- Rnd 23: Dec 8 times around the round. This will leave you with 8 stitches (8).
- Fasten off, leaving a yarn tail. Use your tapestry needle to weave the yarn tail through the front loop of each remaining stitch and pull it tight to close the opening.
Beak:
Start with black yarn for the first part of the beak:
- Rnd 1: Start by making 4 sc stitches into a magic ring (4).
- Rnd 2: Make 1 sc in the next 1 st, then inc in the next 2 st, and finish with 1 sc in the next 1 st. This will give you 6 stitches (6).
- Change to white yarn for the remainder of the beak. To change colors, hide the new yarn behind the last stitches in the first color. The color change is made in the last stitch before you start crocheting in the second color. Hide the first color behind a few stitches when crocheting with the new color. A video on how to change color is also available.
- Rnd 3: Make 1 sc in each of the next 2 st, then inc in the next 2 st, and finish with 1 sc in each of the next 2 st. You will have 8 stitches (8).
- Rnd 4: Make 1 sc in all 8 st, maintaining 8 stitches (8).
- Fasten off with a sl st, leaving a long tail for sewing.
- Stuffing the beak is optional; it may not be needed if using sport-weight cotton yarn due to its small size.
- Sew the beak onto the flamingo Amigurumi, placing it between the eyes on rounds 8-10.
Wings(Make 2):
Work both wings using pink yarn:
- Rnd 1: Start by making 6 sc stitches into a magic ring (6).
- Rnd 2: Inc 2 times, then make 1 hdc, 1 dc, and 1 hdc all in the next st. Follow this with inc 3 times. This round will result in 13 stitches (13).
- Fasten off cleanly, leaving a long tail for sewing.
- Sew the wings to the side of the body, positioning them between rounds 17 and 22.
Leg(Make 2):
Work both legs using yellow yarn:
- Rnd 1: Start by making 5 sc stitches into a magic ring (5).
- Rnd 2-7: Make 1 sc in all 5 st for six consecutive rounds, maintaining 5 stitches (5).
- Rnd 8: Inc 5 times around the round. This will give you 10 stitches (10).
- Rnd 9: Make 1 sc in all 10 st, maintaining 10 stitches (10).
- Fasten off with a sl st, leaving a long tail for sewing.
- Stuffing the legs is optional; it may not be needed if using sport-weight cotton yarn because the leg is small.
- To shape the foot, flatten round 9 and sew it together. Then, fold the foot up and sew rounds 7 and 8 together to achieve the desired foot shape.
- Sew the legs onto the body on rounds 22 and 23, leaving an interspace of 2 stitches between them.
Your cute flamingo is now finished!
Download Free PDF: