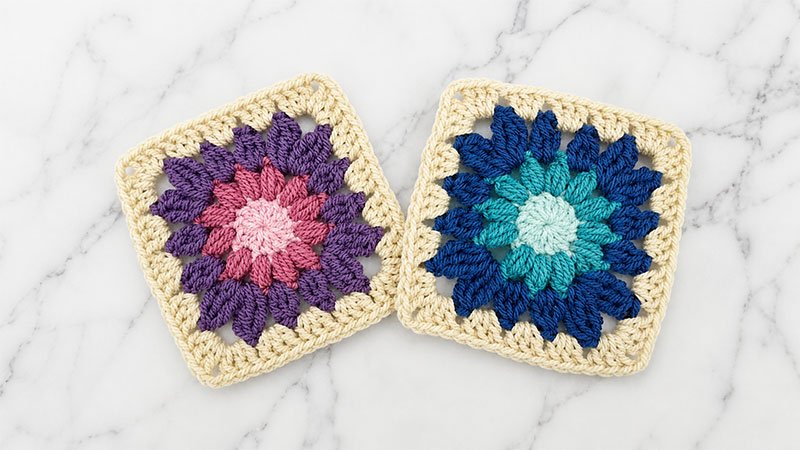
This 6-inch Mini Gerbera Flower Granny Square transforms scrap Aran yarn into a beautiful floral motif.
Perfect for advanced beginners, the pattern features a 3D puff-stitch center that blooms into an elegant, squared-off finish.
Ideal for blankets, bags, and stash-busting projects, it adds vibrant, textured charm to any crochet collection.
Pattern Overview
-
Skill Level: Advanced Beginner
-
Finished Size: Approx. 6″ × 6″ (15.2 cm × 15.2 cm)
-
Gauge: Not critical for this project. Just maintain a consistent, even tension.
Materials Needed
-
Yarn: Aran weight (Medium / Category 4) yarn. This is a fantastic stash-buster project! (Example yarn used: Paintbox Yarns Simply Aran). You will need 3 colors:
-
Color A: Flower Center
-
Color B: Flower Petals
-
Color C: Background/Squaring Color
-
-
Hook: 6.0 mm (Size J-10 US / 4 UK)
-
Notions: Tapestry needle for weaving in ends, scissors.
Special Stitches & Terminology Guide
Before you begin, here is how to execute the special stitches used in this pattern:
-
Magic Circle (MC): An adjustable yarn loop used to start working in the round without leaving a hole in the center.
-
Puff Stitch (puff): Yarn over (YO), insert hook into the specified stitch, YO and pull up a loop (3 loops on hook). [YO, insert hook into same stitch, YO and pull up a loop] 2 more times. You should now have 7 loops on your hook. YO and pull through all 7 loops. Chain 1 to close the puff stitch (note: the closing chain is often separate from the pattern’s actual chain spaces).
-
3-Double Crochet Cluster (3-dc cluster): YO, insert hook into the indicated space, YO, pull up a loop, YO, pull through 2 loops (2 loops left on hook). Repeat this process 2 more times in the same space. You will have 4 loops on your hook. YO and pull through all 4 loops.
-
3-Treble Crochet Cluster (3-tr cluster): YO twice, insert hook into the indicated space, YO, pull up a loop, [YO, pull through 2 loops] twice (2 loops left on hook). Repeat this process 2 more times in the same space. You will have 4 loops on your hook. YO and pull through all 4 loops.
Step-by-Step Written Instructions
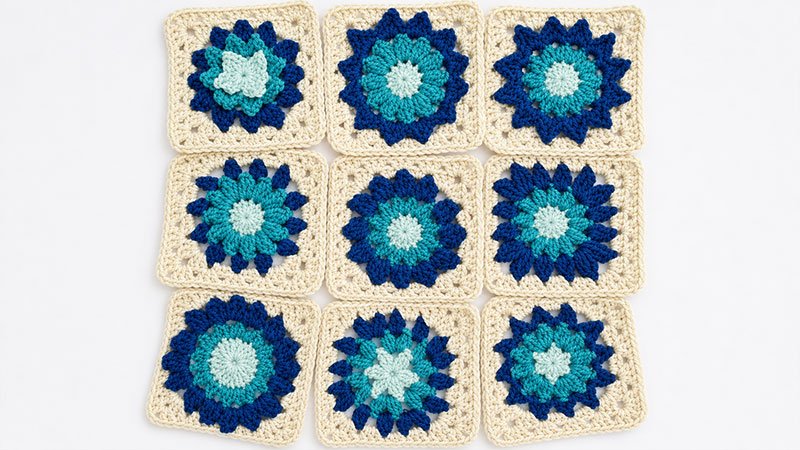
The Flower Core
Using Color A, begin by creating a Magic Circle (MC).
Round 1:
-
Chain 2 (this serves as a turning chain and does not count as a stitch).
-
Work 12 double crochets (dc) directly into the center of your Magic Circle.
-
Pull the yarn tail firmly to close the center hole.
-
Join with a slip stitch (sl st) into the top of your very first double crochet.
-
Fasten off Color A.
-
(Stitch count: 12 dc)
The Inner Petals
Attach Color B to any double crochet stitch from Round 1.
Round 2:
-
Chain 1 (does not count as a stitch).
-
Work
[1 Puff Stitch, chain 1]into the exact same stitch where you joined. -
Move to the next stitch and work
[1 Puff Stitch, chain 1]. -
Repeat this sequence
[1 Puff Stitch, chain 1]in every remaining stitch around. -
To finish, slip stitch into the top of the very first puff stitch to close the round.
-
Fasten off Color B.
-
(Stitch count: 12 puff stitches, 12 ch-1 spaces)
The Outer Petals & Corner Shaping
Attach Color C to any chain-1 space from the previous round.
Round 3:
-
Chain 1, then slip stitch into the next chain-1 space to position your yarn perfectly.
-
Work a 3-dc cluster right into this space.
-
The Repeat Sequence:
-
Chain 2.
-
In the next space, create a corner by working:
[3-tr cluster, chain 3, 3-tr cluster]all into that single space. -
Chain 2.
-
Work a 3-dc cluster into the next space.
-
Chain 2.
-
Work a 3-dc cluster into the following space.
-
-
Repeat that entire sequence around 3 more times. On your final repeat, stop after the second corner is made, chain 2, work one last 3-dc cluster, then slip stitch into the top of your first 3-dc cluster to join.
-
(Stitch count: 8 3-dc clusters, 8 3-tr clusters, interspersed with chain spaces)
Squaring the Flower
Round 4:
-
Chain 1, then slip stitch into the next chain-2 space.
-
Chain 3 (this counts as your first double crochet).
-
The Repeat Sequence:
-
In the corner chain-3 space, work:
[3 double crochets, chain 2, 3 double crochets]. -
Work 3 double crochets into each of the next three chain spaces along the flat edge.
-
-
Repeat this sequence around the square. For the final side, work 3 double crochets into the next corner, 3 double crochets into the next two spaces, and place 2 double crochets into the very first chain space (combining with your starting chain-3 to make a group of 3).
-
Slip stitch into the 3rd chain of your starting chain to join.
-
(Stitch count: 15 stitches per side, with a ch-2 space at each of the 4 corners)
(Note: If you skip directly from Round 4 to Round 5, you will achieve the final border size below).
Round 5:
-
Chain 1 (does not count as a stitch).
-
Work 1 half double crochet (hdc) into every single stitch along the sides.
-
When you reach a corner chain-2 space, work:
[2 hdc, chain 2, 2 hdc]directly into the space to neatly turn the corner. -
Continue this pattern all the way around the square.
-
Slip stitch into your first half double crochet to complete the round.
-
(Stitch count: 19 stitches per side, with a ch-2 space at each corner)
Finishing Up
Cut your yarn, leaving a short tail. Pull the yarn through the final loop to secure it. Using your tapestry needle, carefully weave all your loose yarn tails into the back of your stitches to ensure your square won’t unravel when washed. Block your finished square to get perfectly crisp 90-degree corners!