

Pattern Description:
The Blueberry Pie Log Cabin Variation Quilt Pattern results in a beautiful throw quilt approximately 52’’ x 64’’.
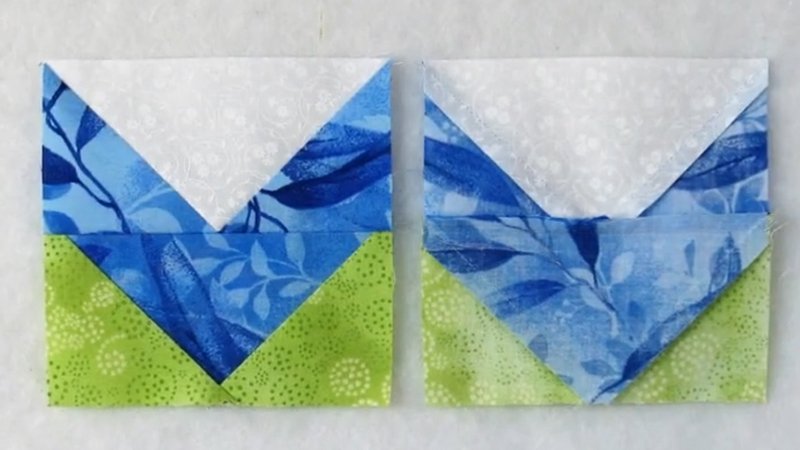
This design uses a super-quick log cabin piecing technique, making it jelly roll friendly as it utilizes 2 1/2’’ strips. The 2-toned blocks are sewn and arranged to intentionally resemble blueberry pies.
Materials Needed & Measurements:
The finished quilt size is approximately 52’’ x 64’’. You will need 33 light colored strips (including 4 for the border) and 17 dark colored strips in total. All cutting is done in 2 1/2’’ x WOF (width of fabric) strips.
Yardage and Materials Required:
| Fabric | Description | Amount Needed |
| Fabric 1 | (Tac Tac Dot – Taupe) | 1 1/4 yard (Cut 15 strips) |
| Fabric 2 | (Packed Floral – Blue) | 1/4 yard (Cut 3 strips) |
| Fabric 3 | (Diamond Check – Taupe) | 1/2 yard (Cut 6 strips) |
| Fabric 4 | (Tic Tac Dot – Light Navy) | 1/2 yard (Cut 6 strips) |
| Fabric 5 | (Calligraphy – Taupe) | 1 yard (Cut 12 strips, 4 are for borders) |
| Fabric 6 | (Diamond Check – Dark Navy) | 3/4 yard (Cut 8 strips) |
| Backing fabric | 3 1/4 yards | |
| Binding fabric | 1/2 yard | |
| Batting | A rectangle at least 58’’ x 70’’ |
Instructions for Making the Blueberry Pie – Log Cabin Variation Pattern:
Cutting Instructions (All strips are 2 1/2’’ x WOF):
All cutting is done in 2 1/2’’ x WOF (width of fabric) strips.
- Cut 15 strips from Fabric 1 (light).
- Cut 3 strips from Fabric 2 (dark).
- Cut 6 strips from Fabric 3 (light).
- Cut 6 strips from Fabric 4 (dark).
- Cut 12 strips from Fabric 5 (light), noting that 4 of these strips are reserved for the borders.
- Cut 8 strips from Fabric 6 (dark).
Tip: While 4 strips of Fabric 5 are needed for borders, it is suggested that you may only need 3 border strips and may prefer to cut those after sewing the blocks together and measuring to achieve an exact fit. Cutting can be accomplished quickly using tools like the Accuquilt Go with a 2 1/2’’ strip die, or traditionally with a rotary cutter and ruler.
Sewing the 48 Log Cabin Blocks
Use a 1/4’’ seam allowance for all steps. The goal is to sew a total of 48 blocks.
Steps for Piecing:
- Sew one Fabric 1 strip to one Fabric 2 strip. Repeat this process to create 3 strip sets. Press the seam allowance toward the darker fabric (Fabric 2).
- Sub-cut each of the 3 strip sets into units that measure 2 1/2’’ wide by 4 1/2’’ tall (note that the height may slightly differ if your seam allowance is not perfectly exact).
- Take 6 of these 2 1/2’’ x 4 1/2’’ units and sew them to one Fabric 3 strip, without cutting the Fabric 3 strip beforehand. Placement is essential: Ensure the long Fabric 3 strip is positioned on the bottom, and the darker fabric (Fabric 2) on the cut unit is facing toward you as you feed the pieces into your sewing machine. Repeat this process to sew all 48 units to the 6 Fabric 3 strips.
- Open the newly sewn units and press the seams away from the strip (toward the darker fabric, Fabric 2). Sub-cut the units apart to create 48 larger units.
- Sew 8 of these new units to a Fabric 4 strip. Again, ensure the strip is on the bottom, with Fabrics 2 and 3 lined up with the strip edge, and the darker Fabric 2 closer to you. Repeat this until all 48 units are sewn to the 6 Fabric 4 strips.
- Press this seam toward the darker fabric (which is the strip, Fabric 4, in this step). Cut the 48 units apart.
- Continue adding pieces to each quilt block unit in the same manner as the previous steps. The subsequent pieces added, in order, are Fabric 5, Fabric 6, and finally Fabric 1 is repeated for the last strip.
- Pressing Tip: Continue to press all seams toward the darker fabric until the very last piece is added. After adding the final Fabric 1 strip, press that seam toward the long Fabric 1 strip.
The completed blocks should be approximately 8 1/2’’ square.
Assembly:
- Lay out the 48 completed blocks in the intended arrangement, which is designed to make them look like blueberry pies.
- Sew the blocks together to form rows.
- Sew the finished rows together to complete the quilt top.
Adding Borders:
- Measure the height of the quilt top at the center and along both side edges. Use the measurement from the middle of the quilt to piece together 2 border strips (using Fabric 5 strips) for the sides of the quilt.
- While the original quilt did not include a top border, you may add one if desired.
Finishing:
- Sandwich the finished quilt top with the backing fabric and the batting.
- Quilt the layers as preferred. Straight line quilting in a grid, using a walking foot, is one method mentioned.
- Bind the quilt using the binding fabric. An all-machine binding method can be used for this step.
Download Free PDF:


