Crochet bucket hats have surged in popularity, becoming a must-have accessory for fashion enthusiasts and casual wearers alike.
With their unique blend of style and functionality, these hats offer sun protection while adding a touch of personal flair to any outfit.
Crafting your own crochet bucket hat not only showcases your creativity but also allows you to tailor the design to your specific taste.
This beginner-friendly crochet pattern guides you through every step, making it easy to create a stylish piece that reflects your individuality.
Whether you’re lounging at the beach or exploring urban landscapes, a handmade bucket hat elevates your look.
So gather your materials and prepare to dive into the meditative world of crochet, where each stitch brings you closer to crafting a one-of-a-kind accessory that’s as comfortable as it is chic.
1. Easy Crochet Bucket Hat
Creating an easy crochet bucket hat starts with making the circle top using single crochet stitches. Beginners will find it helpful to focus on simple increases in each round.
After forming the top, it’s time to crochet the bucket portion, which involves working in single crochet continuously without additional increases.
Next, to add the brim, crocheters will create more rounds, decreasing the frequency of increases, giving the hat its signature slope.
Following these straightforward steps allows anyone to craft their own stylish bucket hat with minimal effort and time.
2. Sunny Bucket Hat

Crafting a sunny bucket hat begins with a simple circle top made from single crochet stitches. Beginning with a magic ring, increases are added gradually to form a flat circle.
Following the top’s completion, the hat’s body is crocheted in continuous rounds, avoiding any extra increases.
To create the brim, more rounds are added with a decreasing pattern, giving the hat its beloved slope. This accessible pattern ensures a quick yet stylish outcome that’s perfect for sunny days, making it an ideal project for beginners and seasoned crocheters alike.
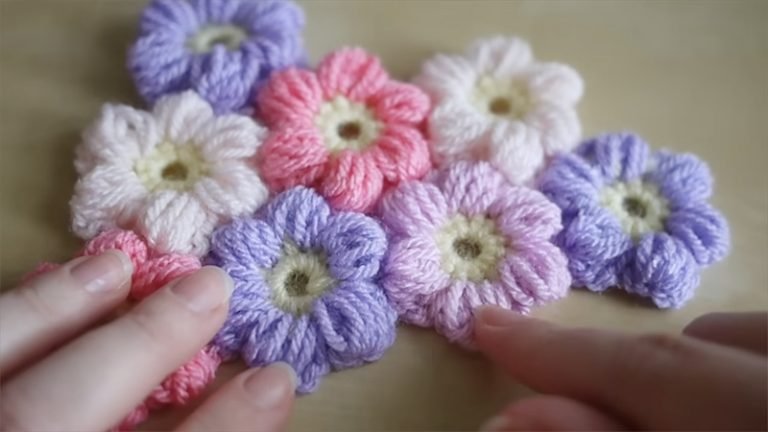
3. Lily Flower Power Bucket Hat

Creating the Lily Flower Power Bucket Hat is simple and fun. Begin with a foundation of single crochet stitches to form the top of the hat.
After establishing this base, continue by working in the round to construct the hat’s body, making sure to keep the tension even.
Once the desired height is reached, add the brimming edge through additional rounds, gradually decreasing stitches to achieve that classic slope.
This pattern allows creativity, especially in color selection, so feel free to play around with vibrant hues that reflect your personality.
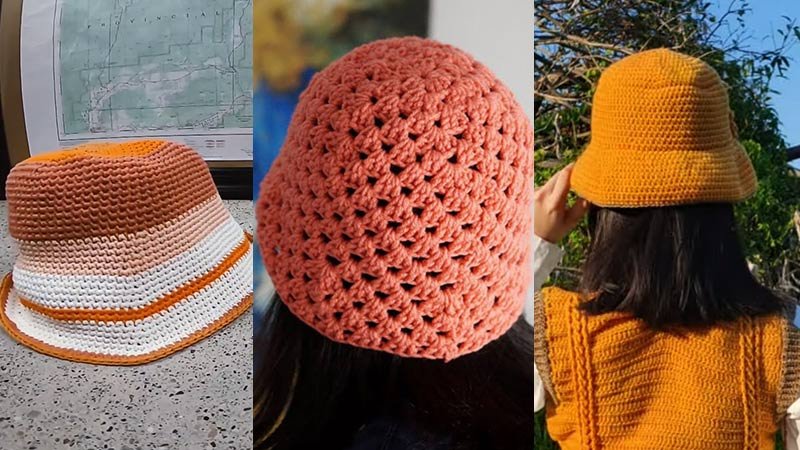
4. Red Heart Crochet Granny Stripes Bucket Hat

Creating the Red Heart Crochet Granny Stripes Bucket Hat is a delightful project that showcases vibrant colors. Begin with a foundation of single crochet stitches, then transition into the granny stripe pattern for a bold look.
Choose summer colors for a light vibe or autumn tones for a cozy feel. After forming the body, add the brim with more rounds, including a gradual decrease for the signature slope. This stylish design is perfect for any adventure, making it a standout accessory.
5. Sunseeker Bucket Hat

Creating the Sunseeker Bucket Hat begins with a simple foundation of single crochet stitches. Crafters should start by forming a magic ring and gradually increasing stitches to build the circular top.
Next, they can continue working in spirals to form the body of the hat, ensuring there’s no need for further increases.
6. Oh Snap! Crochet Bucket Hat

To start the Oh Snap! Crochet Bucket Hat, begin by creating a magic ring to establish the foundation.
Next, crochet single stitches to build up the circular top, gradually increasing stitches to achieve the desired size. Once the top is complete, continue by crocheting the body in spiral rounds without further increases.
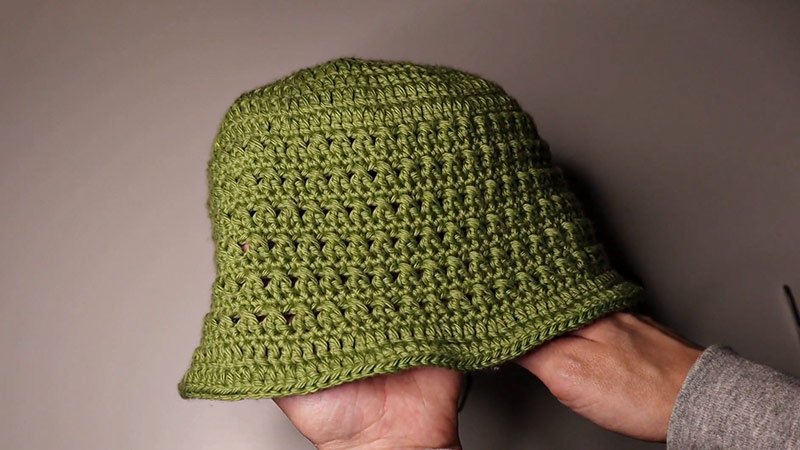
7. Basketweave Bucket Hat
Creating a basketweave bucket hat adds texture and style to any wardrobe. Start by forming a magic circle and working single crochet stitches to create the top.
After establishing the base, begin alternating between single and double crochet stitches to achieve the basketweave effect. Continue working in rows or rounds until reaching the desired height.
Next, crochet the brim by increasing stitches as needed to create a defined slope. Finish with a few rounds of decreases to perfect the shape. This charming pattern ensures a unique and eye-catching accessory that showcases your skills.
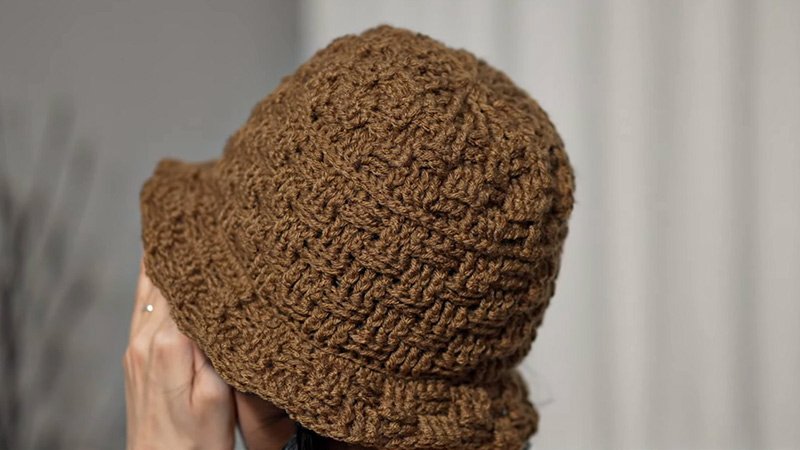
8. Crochet Bear Bucket Hat
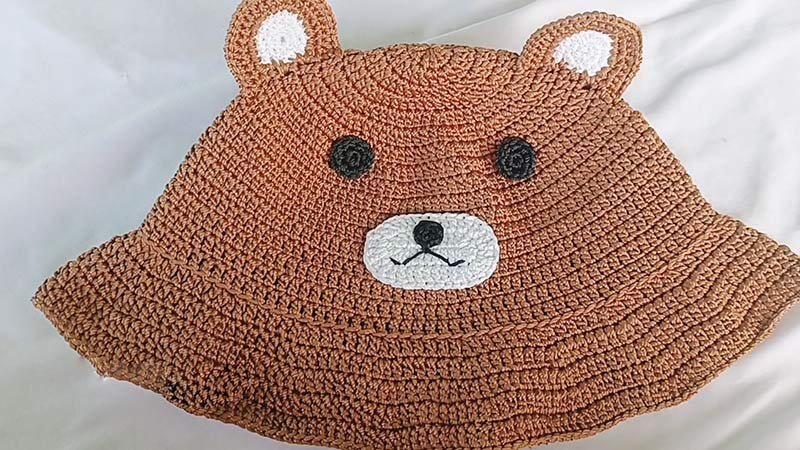
Craft a charming Crochet Bear Bucket Hat with its delightful ears that add a playful touch. Using super bulky yarn, this quick project suits intermediate crocheters. Begin by following the seamless spiral method to form the circular base, ensuring a snug fit.
9. Crochet Bucket Hat for Beginners

Starting with the circular top, crafters use single crochet stitches, gradually increasing each round. Following this, the bucket portion is formed by crocheting continuously in single crochet, keeping it simple and straightforward.
For the brim, additional rounds create a slope, featuring less frequent increases to achieve that classic bucket hat shape.
With this beginner-friendly pattern, anyone can enjoy crafting a stylish accessory while learning valuable crochet techniques along the way.
10. Checkerboard Bucket Hat

Creating a checkerboard bucket hat adds a playful twist to the classic design. This pattern begins with a foundational magic ring, establishing a sturdy base.
From there, crafters increase their stitches to form the circular top, maintaining a tight tension for a polished look.
Alternating colors creates the checkerboard effect as you work in rounds. Once the desired height is reached, transform the brim with a series of rounds that incorporate a gentle decrease.
This approach ensures the hat maintains its stylish slope while showcasing your creativity and mastery of crochet.
11. Crochet Granny Square Bucket Hat

Creating a Crochet Granny Square Bucket Hat is a fun and colorful project. Start by making granny squares using your favorite yarn colors. Each square can showcase different shades, allowing for a personalized touch.
After crafting several squares, join them together in a circular fashion to form the hat’s body. Transitioning to the brim involves adding rounds of single crochet stitches for definition.
Finally, finish off by weaving in loose ends for a neat appearance. This granny square design is both stylish and breathable, perfect for sunny days.
12. Wildflower Bouquet Bucket Hat

Crafting the Wildflower Bouquet Bucket Hat begins by creating a magic ring, which serves as the foundation. Using bright, cheerful cotton yarn, crafters crochet single stitches to build the circular top and increase stitches gradually for a smooth finish.
Next, they work in continuous rounds to form the body, ensuring even tension throughout the project. Once the height is achieved, they switch to adding a wide brim, including a series of stitches that gently decrease for a beautiful slope.
This design allows for creative flair, as users can mix and match colors to reflect a vibrant wildflower look.
13. Lily Summer Stripes Crochet Bucket Hat

Craft the Lily Summer Stripes Crochet Bucket Hat by starting with a foundation ring of single crochets. Once the top is formed, continue with vibrant yarns to create stripes that pop.
Crafters will appreciate the lightweight design, making it perfect for warm weather outings. Follow the pattern’s circular technique without additional increases to establish the body seamlessly.
Finally, finish off with a stylish brim that features decreasing rounds for an elegant slope. This pattern showcases personal style, offering endless color combinations for a unique summer accessory.
14. Sunray Bucket Hat
The Sunray Bucket Hat is a delightful choice that brings warmth and style to sunny days. Begin with a magic ring to set the foundation, using single crochet stitches to form the top.
Increase stitches gradually for a smooth circular shape. Work in continuous rounds to build the body, ensuring it fits snugly without additional increases.
For the brim, add rounds featuring gentle decreases to achieve that iconic slope. This accessible pattern makes it enjoyable even for beginners, while the resulting hat radiates sunshine and creativity.