Pattern Description:
This quick and simple quilt pattern, a variation of Ashley’s “two by four” tutorial, utilizes 2 ½” wide jelly roll strips or scraps.
It creates rectangular blocks for a fresh, modern layout. This budget-friendly, scrappy design is easy for beginners and ideal for busting your fabric stash.
Materials Needed & Measurements:
- Finished Quilt Size:
- 56″ x 63″ (achieved with 9 rows and 7 blocks in each row).
- 56″ x 64″ (if the blocks are laid on their side, configured as 8 rows of 8 blocks each).
- Finished Block Size: 7″ x 8″. For the 56″ x 63″ layout, blocks are effectively 8″ wide by 7″ high.
- Material Requirements:
- Strips: 63 strips, each measuring 2 ½” x width of fabric (WOF), for the 56″ x 63″ quilt.
- Strips: 64 strips, each measuring 2 ½” x width of fabric (WOF), if you are laying the blocks on their side for the 56″ x 64″ quilt.
- One strip equals one block.
- The “width of fabric” typically refers to approximately 44″ wide quilting fabric, so strips are often 2 ½” x 44″. It is important to use almost the entire length of the strip. The pattern is designed for “jelly roll strips”.
Abbreviations Used:
- BC → Block Construction
- FBS → Finished Block Size
- QA → Quilt Assembly
- LO → Layout
- SN → Seam Nesting
- FQS → Finished Quilt Size
- FQ → Finishing the Quilt
- Q → Quilting
- SLQ → Straight Line Quilting
- FMQ → Free Motion Quilting
- T&N → Tips & Notes
- SB → Stash Busting
- BF → Budget-Friendly
Instructions for Making the Jelly Strip Stash Buster Quilt and Tutorial Pattern:
Block Construction (BC)
This pattern utilizes a method where each set of two strips makes two blocks.
- Strip Pairing: Select two 2 ½” x WOF strips that you wish to combine for a block.
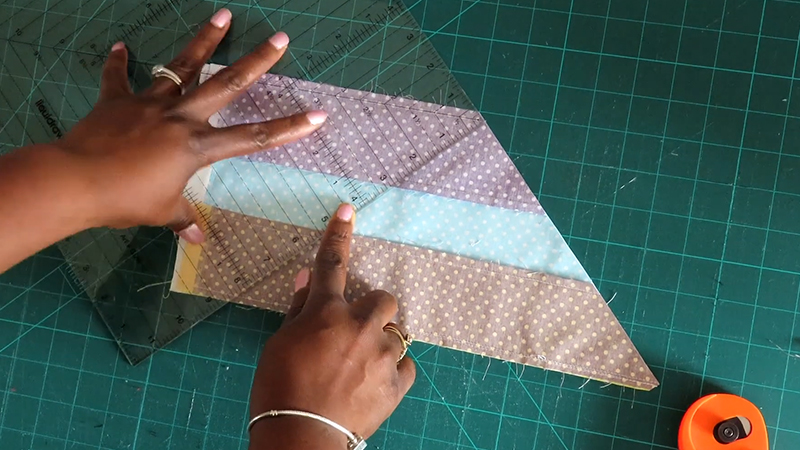
- Sewing Strips: Sew these two strips together along their long edges with a ¼” seam allowance.
- Sub-cutting: From the sewn pair of strips, you will cut segments to form the individual blocks. The pattern implies that these segments will eventually yield the FBS of 7″ x 8″.
- The original “two by four” tutorial, on which this is based, involved cutting 4-inch segments, as indicated by a user’s question about cutting 4 ½” segments instead. While the precise cutting instructions for the jelly roll version aren’t explicitly detailed with measurements beyond the final block size, the process involves making two blocks from each pair of strips.
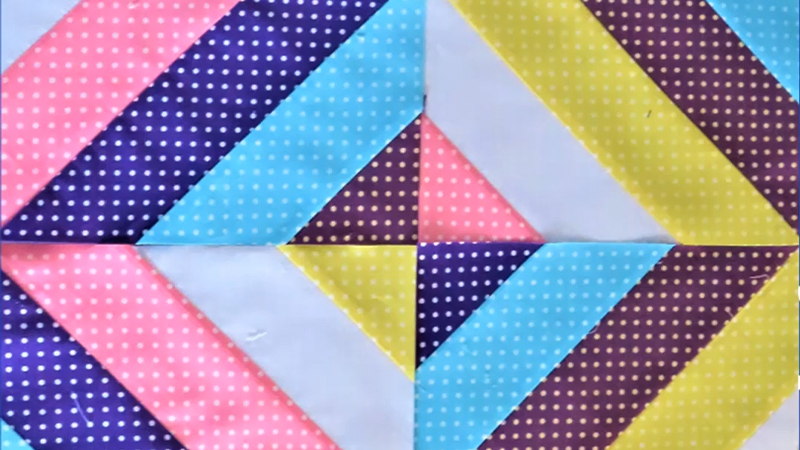
- Forming Blocks: Once segments are cut, arrange and sew them to form the 7″ x 8″ finished blocks. The design cleverly uses rectangles to give a familiar layout a fresh appeal.
- Crucial Tip: Ensure that each set of two strips is processed to create two finished blocks. One user initially made only one block per two strips, resulting in larger blocks and a smaller, 4×4 quilt. If you have 64 strips, you will make 32 pairs, and each pair should yield two blocks, totaling 64 blocks.
Quilt Assembly (QA) & Layout (LO)
Once all blocks are constructed, the quilt can be assembled:
- Block Arrangement: Lay out your blocks on a design wall or floor to finalize your preferred arrangement.
- Option 1 (56″ x 63″ FQS): Arrange your 63 blocks into 9 rows with 7 blocks in each row. In this orientation, the blocks are effectively 8″ wide x 7″ high.
- Option 2 (56″ x 64″ FQS): If you lay the blocks on their side, you can do 8 rows of 8 blocks each, using 64 blocks.
- Seam Nesting (SN): To ensure seams lay flat and match up nicely, you can rotate adjacent blocks. This allows the seams to “nest” together.
- Pressing Seams: The author typically presses seams to one side, but notes that pressing them open is also an option.
- Sewing Rows: Sew the blocks together in rows.
- Sewing Rows Together: Join the completed rows to form the quilt top.
Finishing the Quilt (FQ)
After the quilt top is assembled, you will need to complete the quilting process:
- Basting: Layer your quilt top with batting and backing fabric, then baste them together.
- Quilting (Q): You have several options for quilting this project:
- Straight Line Quilting (SLQ): This is a popular and effective choice for simple designs.
- Free Motion Quilting (FMQ): If you prefer, free motion quilting would also look great.
- General advice: “Really anything looks great on a simple quilt like this…you can’t go wrong with anything!”.
- Binding: Once quilted, trim the edges square and bind your quilt to enclose all raw edges.
Tips & Notes (T&N)
- Stash Busting (SB): This quilt is highly recommended as a SB pattern, perfect for utilizing those “wandering strips that just hang out with nowhere to go”.
- Budget-Friendly (BF): It’s considered a BF project, allowing you to save money by using what you already have.
- Beginner-Friendly: The tutorial is praised for being “simple, budget-friendly, and big on wow factor,” making it “doable” for beginners.
- Size Versatility: The quilt size is “easy to change up,” making it suitable for a lap, crib, or throw size. With 40 strips, one user made a nice lap or crib size.
- Donation Quilt: This pattern is a “great quilt for donations” because it’s fast to make and looks appealing.
Download Free PDF: