

Materials Needed & Measurements:
- Suggested Yarn: Scheepjes Stone Washed (DK) in color 801 (or equivalent DK yarn)
- Yarn Measurements: Approximately 100-200 yards
- Gauge: Approx. 18-20 sc per 4 inches
- Hook Size: 3.5mm (E)
- Finished Pattern Size: Based on starting chain and repeats (7 sts + 1 per repeat)
- Other Tools:
- Darning needle
- Scissors
- Stitch marker (optional)
Abbreviations Used:
- sc – Single Crochet
- dc – Double Crochet
- tr – Treble Crochet
- ch – Chain
- sl st – Slip Stitch
- st(s) – Stitch(es)
Stitching Instructions for Making the Wavy Crochet Border Pattern:
Row 1:
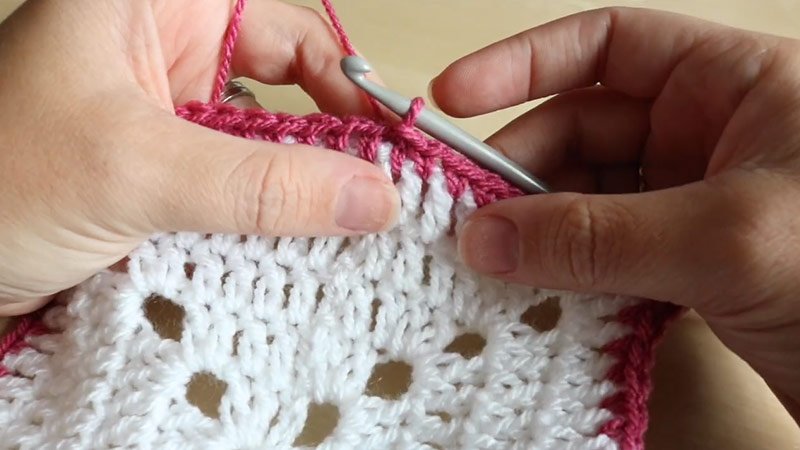
- Start by chaining any multiple of 7 stitches + 1. For example, if you want a border with 3 repeats of 7 stitches, chain 22 (3 * 7 + 1 = 22).
- In the second chain from the hook, work sc 1 (single crochet).
- Continue working sc 1 in each of the next 5 chains, so you should have a total of 6 single crochets in the first 6 chains.
- Now, ch 7, and turn your work around.
- Skip the next 5 sc (from the previous row), then work sc 1 in the next sc (this brings you to the 7th stitch in the previous row).
- Turn again and work in the ch-7 space: sc 6 (single crochet 6 times in the chain-7 space), then ch 5 (chain 5 stitches), and finish with sc 6 again.
- Now, work sc 1 in each of the next 7 foundation chains (this keeps the pattern consistent with the previous row).
- Repeat from … (starting at the chain-7 space) for the entire row, and when you reach the end, finish by working 1 sc in the last foundation chain.
Row 2:
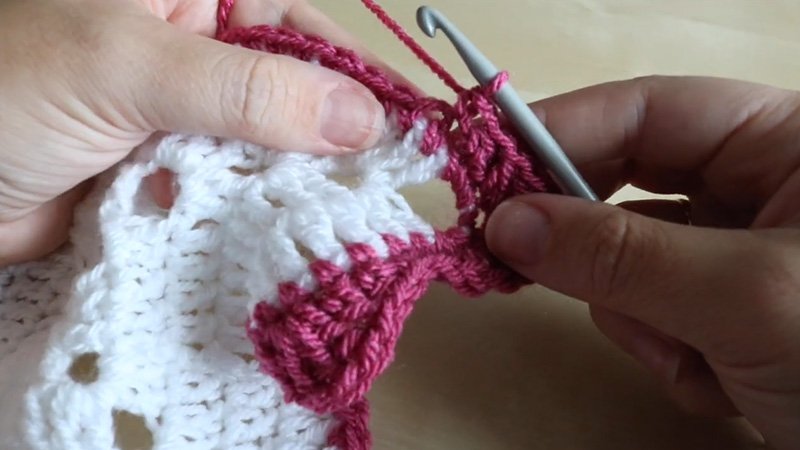
- Chain 4 (this counts as the first double crochet and a chain space), and turn your work.
- Skip the first single crochet (sk first sc) to create space for the stitches that follow.
- Now, for the main part of the wave, skip the next 6 single crochets, then in the next ch-5 loop (the space formed by the previous row’s chains), work the following:
- dc 1 (double crochet once),
- ch 3 (chain 3),
- sl st 1 in the first of the ch 3 you just made (this creates a small loop inside the chain-3 space).
- Repeat this process 4 times in the same ch-5 loop to form the wave.
- After the 4th set of dc, ch 3, and sl st, work dc 1 in the same ch-5 loop.
- Skip the next 6 sc, and then tr 1 in the next sc (treble crochet into the next single crochet).
- Repeat from … (skipping 6 sc and working dc, ch 3, sl st in the ch-5 space) to the end of the row.
- Work the last tr (treble crochet) in the final ch-1 space.
Finishing:
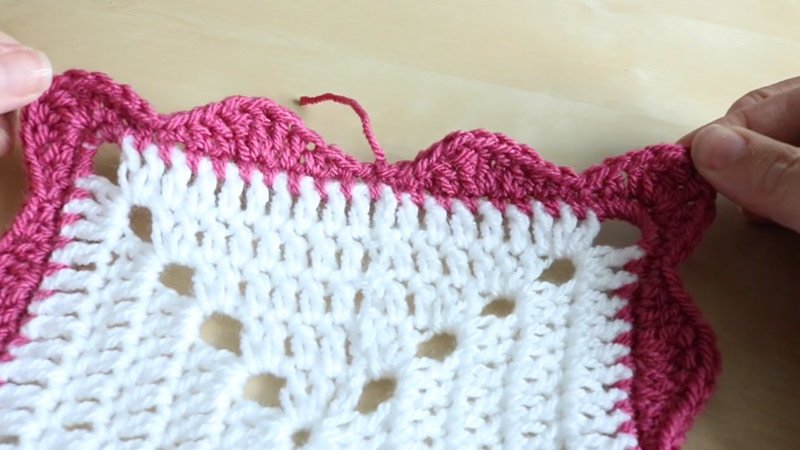
- Once you have completed the second row, fasten off the yarn by cutting it and pulling the tail through the last loop on your hook to secure it.
- Use a darning needle to weave in all the yarn ends. Weave them into the stitches in an inconspicuous way to avoid any loose ends.
- If you’re attaching this wavy crochet border to a finished piece, you can either:
- Slip stitch the edges of the border together, or
- Use a surface stitch to sew the border onto the main piece in a neat and even way.
Congratulations! You’ve now completed your Wavy Crochet Border. Enjoy the beautiful, decorative edge you’ve added to your project.
Download PDF


