Skill Level: Easy-Intermediate
Add a touch of texture and charm to your crochet projects with this simple yet eye-catching Bobble Border Pattern. Whether you’re edging a baby blanket, a shawl, or even a garment, this border offers a pop of playful detail that’s easy to learn and satisfying to stitch.
Materials Needed:
- Yarn: Scheepjes Stone Washed (DK weight, 78% cotton, 22% acrylic; 130m / 50g)
- Hook: 3.5 mm (E-4) crochet hook
- Notions:
- Tapestry needle (for weaving in ends)
- Scissors
- Measuring tape
Yarn Requirements”:
- For a baby blanket (30″ x 30″): approx. 50g (1 skein)
- For a throw (50″ x 60″): approx. 100g – 150g (2-3 skeins)
This pattern is quite yarn-efficient and can be adjusted easily to suit any size or type of project.
Finished Measurements:
- The bobble border adds a height of approximately 1.5 inches (4 cm) to your project.
- Perfect as a decorative edge for blankets, shawls, scarves, or even handmade cardigans and sweaters.
Stitches & Abbreviations (US Terms):
- ch – chain
- sc – single crochet
- dc – double crochet
- bo – bobble stitch (see special stitch below)
- sl st – slip stitch
- st(s) – stitch(es)
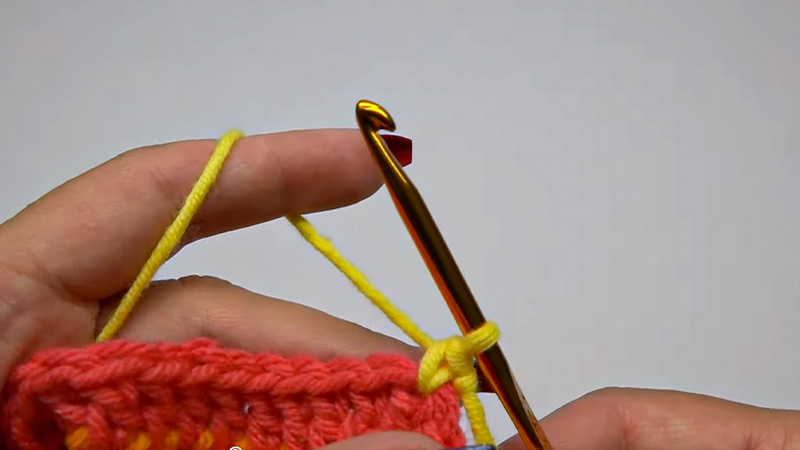
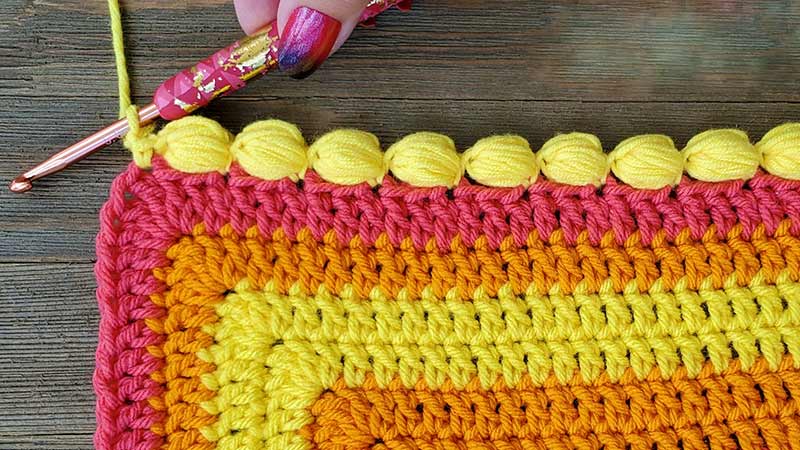
Special Stitch: Bobble (bo)
Bobble (bo): Yarn over, insert hook into stitch, yarn over, pull up a loop, yarn over, pull through two loops. Repeat this 5 times in the same stitch (you’ll have 6 loops on your hook). Yarn over one last time and pull through all 6 loops. Push the bobble to the front of your work.
Pattern Notes:
- Begin your border only after the main body of your project is complete.
- The bobble border can be worked along one edge or around all four sides of your project.
- When turning corners, you can either space bobbles more closely or insert additional sc stitches for a smoother curve.
Stitching Instructions for Making the Bobble Border Pattern:
Row 1 – Base Row:
- Join yarn to the edge of your project with a sl st. Ch 1, then sc evenly along the entire edge, placing 3 sc in each corner stitch to help the piece lie flat.
- Sl st to the first sc to join.
- Tip: Work one sc per stitch on flat edges, and one sc per row-end on vertical sides.
Row 2 – Bobble Row:
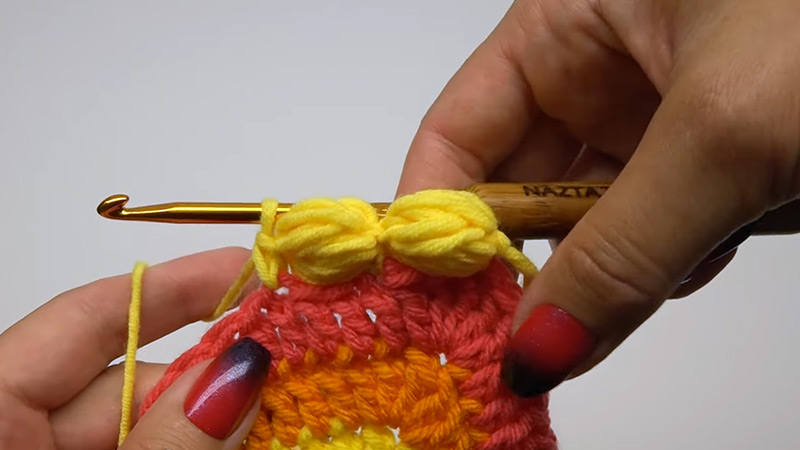
- Ch 1, sc in next 2 sts, bo in next st – repeat from to around.
- Adjust the number of sc between bobbles based on your desired look and your project’s size.
- Ensure even spacing to keep the design symmetrical and balanced.
Row 3 – Finishing Row:
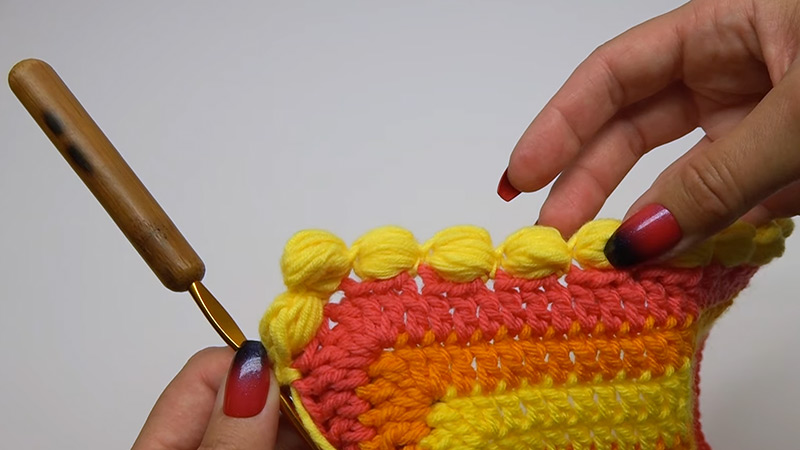
- Ch 1, work sc in each st around to secure and flatten the bobbles.
- Sl st to the first sc, fasten off, and weave in all ends with a tapestry needle.
Finishing Instructions:
- After completing your border, gently steam block or wet block the edge to shape and smooth out the bobbles.
- Use a tapestry needle to weave in all loose ends securely.
- For extra flair, consider adding a final decorative round using sl sts or crab stitch (reverse sc) in a contrasting color.
Download PDF