
Pattern Description:
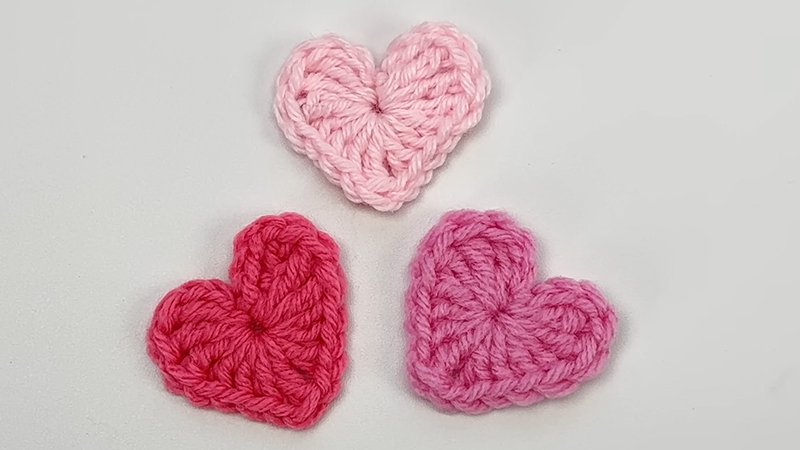
This is an easy and beginner-friendly crochet heart pattern that creates adorable, plump heart motifs.
It’s ideal for utilizing scrap yarn and works up quickly. The project is also suitable for crochet therapy or managing anxiety due to its portability.
Materials Needed & Measurements:
- Yarn: Red Heart Super Saver in Red (or any color desired), or any yarn you like.
- Yarn Weight: Not explicitly stated, but “Red Heart Super Saver” typically refers to worsted-weight yarn.
- Hook: G/4.mm hook.
- Notions: Scissors, Yarn needle.
Stitches & Abbreviations Used:
- Sl St = slip stitch
- Ch = chain
- Tc = treble crochet (yarn over 2, yarn over, pull through 2, yarn over, pull through 2, yarn over, pull through the last 2 sts)
- Dc = double crochet (yarn over 1, yarn over, pull through 2, yarn over, pull through the last 2 sts)
- Mc = magic circle
Instructions for Making the Cute Heart Crochet Pattern:
Follow these steps carefully to crochet your cute heart pattern:
Step 1: Create the Magic Circle and Initial Chain
Begin by creating a locking magic circle (Mc).
Once your magic circle is formed, Ch 3 into the circle. This chain will count as your first stitch or contribute to the height of your work.
Step 2: First Set of Treble Crochets
Into the magic circle, make 3 Tc. Remember the Tc definition: yarn over twice, insert hook, yarn over, pull through 2, yarn over, pull through 2, yarn over, pull through the last 2 loops.
Step 3: First Set of Double Crochets
Next, into the same magic circle, make 4 Dc. Recall the Dc definition: yarn over once, insert hook, yarn over, pull through 2, yarn over, pull through the last 2 loops.
Step 4: The Heart’s Point
To create the distinct point at the bottom of the heart, you will Ch 1, then Tc 1 into the magic circle, and then Ch 1 again. This single Tc, flanked by chain stitches, forms the bottom center of your heart.
Step 5: Second Set of Double Crochets
Continuing in the magic circle, make 4 Dc. This mirrors Step 3 and begins forming the second half of the heart.
Step 6: Second Set of Treble Crochets
Now, in the magic circle, make 3 Tc. This mirrors Step 2 and completes the shaping of the second “lobe” of the heart.
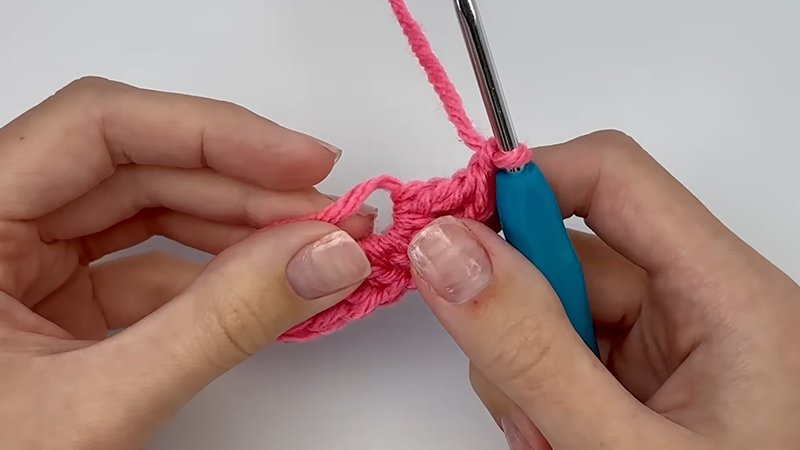
Step 7: Final Chain and Slip Stitch
To finish the heart’s shape and secure it, Ch 3 and then sl st into the magic circle. This anchors the final stitches and closes the round.
Finishing and Securing Your Heart
Once you have completed all the crochet stitches, the final steps involve closing your magic circle and neatly securing your yarn ends.
Closing the Magic Circle:
- If you used a locking Magic Circle (Mc): You will need to pull your locking Mc closed.
- If you used a regular Magic Circle (Mc): Take the tail end from your magic circle and weave it with a needle through all the center stitches. Then, secure the ends.
Weaving in Ends:
- For added security, it is recommended to weave in both ends using your yarn needle. After weaving them in sufficiently, snip the extra yarn.
Suggestions for Using Your Crocheted Hearts
These little hearts are incredibly versatile, and the “sky is the limit” for what you can do with them.
Here are some ideas:
- Decorations: Sew them onto clothing like a hat or a bag, or attach them to a tag.
- Gifts: Make a bunch of them and fill a small jar to give to a loved one, or attach them to a Valentine.
- Bookmarks: To create a bookmark, decide this beforehand to leave a nice long tail. Make a tight knot with both ends, then make another knot about two inches from the ends. Thread a few beads up to this knot and knot the other side to prevent them from shifting.
- Necklaces: Similar to the bookmark, give yourself long tails that provide the desired length for your necklace. Make a tight knot with both ends, then make another knot about an inch from the loose yarn ends.
These quick-to-make hearts can add a charming touch to many projects and gifts.
Download Free PDF:


