Pattern Description:
This free pattern lets you sew Mama Kass, an 11″ tall sock kangaroo, complete with a felt pouch to hold her baby joey, Baby Kaden.
Designed for avid beginners to intermediate makers, the project combines sock sewing, felt crafting, and simple embroidery, making it a charming gift for Mother’s Day, baby showers, or any handmade keepsake occasion.
Materials Needed & Measurements:
For Mama Sock Kangaroo:
- Plain cotton sock, crew length, 1 pair
- Button eye 8mm dome-shaped, black, 2; or equivalent button
- Fabric scraps of about 10″ x 4.5″ or 2 pcs of charm square (5″ x 5″)
- Brown and Yellow embroidery floss
- Poly-fill stuffing material
- Sewing threads (matching colors)
For Felt Baby Kangaroo:
- Brown felt, 4″ x 6″
- Beige felt, 2.5″ x 1.5″
- Button eye 4mm dome-shaped, black, 2; or equivalent button
- Brown embroidery floss
- Poly-fill stuffing material
- Sewing threads (matching colors)
Pattern Templates:
- Sock Kangaroo & Baby Kangaroo Pattern Templates
Tools:
- Sewing machine (hand-sewing is also an option)
- Long Sewing Needle (about 2″), tapestry needle and pins
- Water Soluble Fabric Marker
- Scissors
- Blunt point tweezers
- Spray bottle filled with water
- Printer and card stock for templates
Instructions for Making the Mama Kangaroo And Joey Pattern:
Preparation
Begin by gathering all the necessary materials and tools. It’s recommended to prewash your sock material before sewing. Download, print, and carefully cut out the provided pattern templates for the sock kangaroo.
As an optional step, you can remove the elastic strings from the ribbing of one sock to ease tension and make the material more pliable for use.
Drawing and Sewing the Pieces
Turn your prepped socks inside out and align them as indicated in the pattern’s illustration. Pin them together securely, then use a water-soluble fabric marker to sketch and trace the pattern templates onto the socks.
Specifically, the sock from which elastic strings were removed should be positioned as the left sock.
Once traced, sew along the dashed red lines shown on the pattern template and then cut out the pieces along the blue lines.
Stuffing and Shaping
Turn all the sewn pieces right-side out. Stuff each piece firmly with poly-fill stuffing material. After stuffing, sew to close any openings. It’s important to shape the various parts:
- Head: Form the head so the nose is pointy and the back is round.
- Body: Stuff the bottom half densely, shaping it round at the bottom and slender at the top, resembling a pear.
- Feet: Ensure the feet are flat and wide.
- Tail: The tail should be arched at the tip. If you wish to erase the fabric markings while working, you may spray some water on the pieces.
Sewing the Ears
Take the sock piece reserved for the ears, cut it, and open it flat. Trace the ear pattern onto the wrong side of this fabric.
Place it on another sock piece with the right sides facing each other and pin. Stitch around the sewing lines, leaving an opening at the bottom to turn the ear right-side out.
Once turned, sew to close this opening. Using yellow embroidery floss, sew running stitches near the edge of the ear, being careful not to pierce the needle through the sock material itself, but rather stitching on the fabric and the seam allowance inside the ear. Fold the ear and sew the bottom together.
To attach the ears to the head, draw a horizontal line at the end of the “toe seam line” on the headpiece to mark the ear’s bottom seam line.
The triangle on the template indicates the sewing line for the ear to the head. Ensure the ear positions are mirror images of each other.
Align the bottom join line of the ear to the drawn line, pin the ear to the head, and sew it securely. Repeat this process for the other ear.
Attaching Eyes and Sewing the Mouth
Sew the 8mm dome-shaped black button eyes to the head. The ideal position is approximately 1/2″ to 3/4″ below the ear. Pinch the fabric at these positions to confirm they are where you desire the eyes to be, then mark them.
When sewing an eye, pull the thread down to the bottom of the head and tighten it to make the eye sink into the head, securing it with a few more stitches. Repeat for the second eye.
For the nose, use brown embroidery floss. Begin sewing from the bottom of the head, coming out at point 1, going in at point 2, coming out at point 3, and going in at point 4, finally ending the sewing at the bottom of the head. Set the head aside.
Creating and Attaching the Pouch
Cut the pouch piece, allowing a 3/4″ seam allowance at the top and 1/4″ for the rest. Double-fold the top edge and topstitch it with decorative stitches.
Use a running stitch to gather the curved edge of the pouch. Place the template on it, align the top edge, and pull the thread to tighten and draw the seam allowance inward. Iron the crease line to set it.
Finally, position the pouch on the bottom half of Mama Kass’s body, pin it, and sew it securely, remembering to leave the top edge of the pouch open.
Forming the Arms
The arms are created by sewing indent lines on the body. Mark a 1.5″ long line on both sides of the body to indicate the arm position.
Mark similar lines at the back of the kangaroo. Stitch across these two lines, leaving a longer thread loop between the stitches.
Gently pull this loop to tighten the stitches and form the arm. Stitch across the arm in an upward direction to provide more secure sewing. Repeat this process to create the second arm.
Attaching the Feet and Tail
Position the feet below the body, ensuring the wider width of the feet faces the front. Pin the feet in place and sew around the points where each foot touches the body. For the tail, sew it to the center bottom of the body.
The tail serves as a crucial “support” that enables the sock kangaroo stuffed animal to stand on its own without toppling backwards.
Joining the Head to the Body
Mark two small circles on the bottom of the head and the top of the body; these are the points where they will be joined.
Place the head onto the body, align their center lines, pin them together, and sew securely all around to complete the Mama sock kangaroo.
Final Touches for Mama Kass
Spray Mama Kass with water to erase any remaining blue markings from the fabric marker. If needed, gently shape her while she is still wet. Set her aside to dry.
Baby Kangaroo Stuffed Animal Instructions
Preparation and Cutting
Gather the materials and tools specifically for the baby kangaroo. Using the water-soluble fabric marker, trace the baby kangaroo template onto the brown and beige felt pieces. Carefully cut out these pieces with approximately a 1/8″ seam allowance.
Sewing and Stuffing Baby Kaden’s Pieces
Stack and align the earpieces, headpieces, and body pieces respectively, with their right sides facing each other.
Sew around these pieces using a smaller stitch length, making sure to leave an opening for turning them right-side out.
After sewing, turn all pieces right-side out. Stuff the head and body firmly and densely with poly-fill stuffing material until they are robust.
Assembling the Ears, Eyes, and Nose
For the ears, turn the raw edges at the bottom inward and sew to close the opening. Fold the ear and sew its bottom.
Repeat this for the second ear. Place the finished ears onto the head of the baby kangaroo, pin them, and sew them in place.
Sew the 4mm dome-shaped black button eyes to the head, pulling the thread tightly to sink the eyes. Sew the nose using brown embroidery floss.
Joining the Head to the Body
Place the head onto the body, align their centers, pin them together, and sew to complete the baby kangaroo stuffed animal.
Final Touches for Baby Kaden
Spray the baby kangaroo with water to erase any fabric marker markings. Set him aside to let him dry.
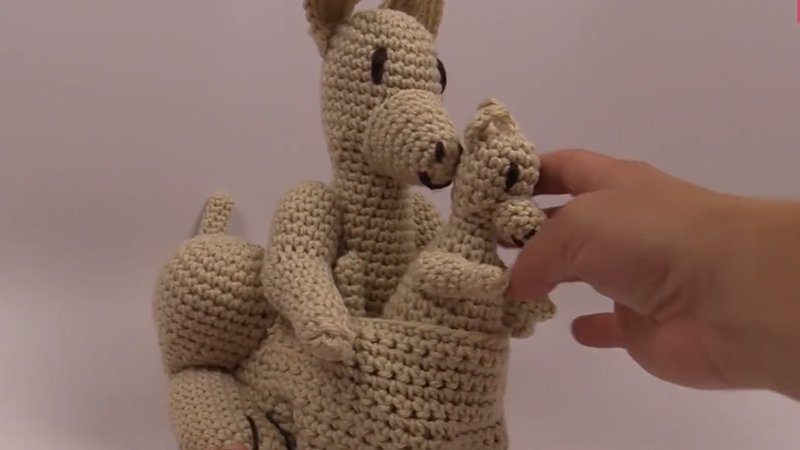
Once both Mama Kass and Baby Kaden are complete, you can place Baby Kaden comfortably in Mama Kass’s pouch.
Enjoy creating this adorable mommy-kiddo sock kangaroo duo!