
Pattern Description:
Creating a handmade plushie sheep is a delightful sewing project, suitable for both beginner and intermediate crafters.
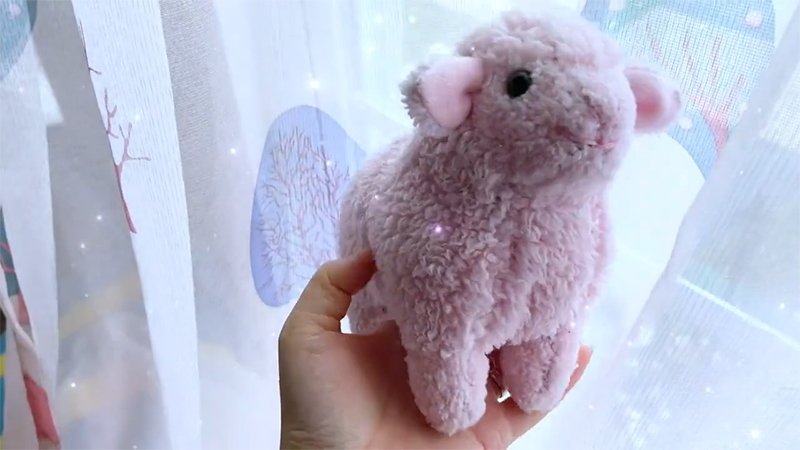
This pattern is designed to produce a plump, soft, and cuddly sheep with a curly coat. It includes special details for trimming the fur on the face, ears, and legs, along with guidelines for substituting alternative fabrics for creative customization.
By carefully following the steps outlined below, you can successfully craft a plushie sheep that is approximately 18 centimeters tall, sturdy, and full of personality.
Materials Needed & Measurements:
- Fur fabric: Wavy-haired fur fabric is recommended for the sheep’s coat.
- Cloth for inside ear: Felt cloth was used as an example.
- Eyes: Approximately 1 centimeter in size.
- Polyester fiberfill.
- Embroidery thread.
- Other cloth may be used for the face and legs, such as short-haired fur fabric for a black face or felt for a white face.
Instructions for Making the Plushie Sheep Pattern:
Step 1: Preparing the Pattern
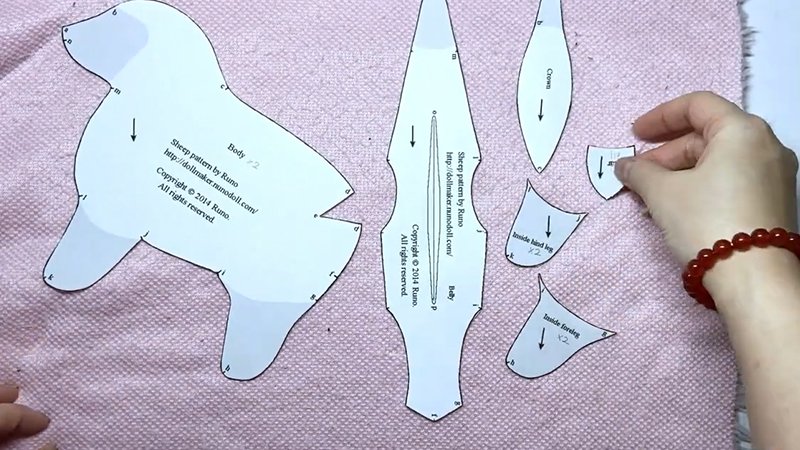
- Print the Pattern: Download and print the pattern on A4 paper with margins set to the smallest possible size.
- Cut Out the Paper Templates: Carefully cut along the lines of both sheets. Ensure each piece is labeled clearly (body, ear, belly, crown, inside legs).
- Add Seam Allowance: Extend the edges of each paper piece outward by 0.5 cm before tracing onto fabric. This step is essential for accuracy.
Tip: If you’re using thicker fur fabric, it helps to trace the pattern on the back side of the fabric to ensure precision when cutting.
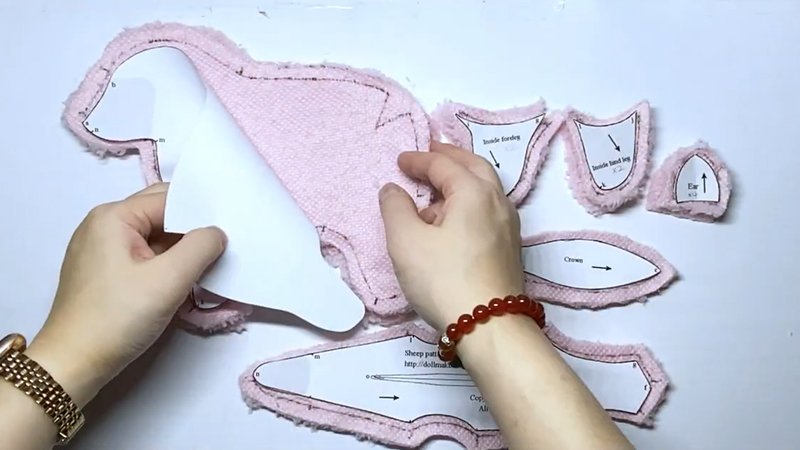
Step 2: Cutting the Fabric
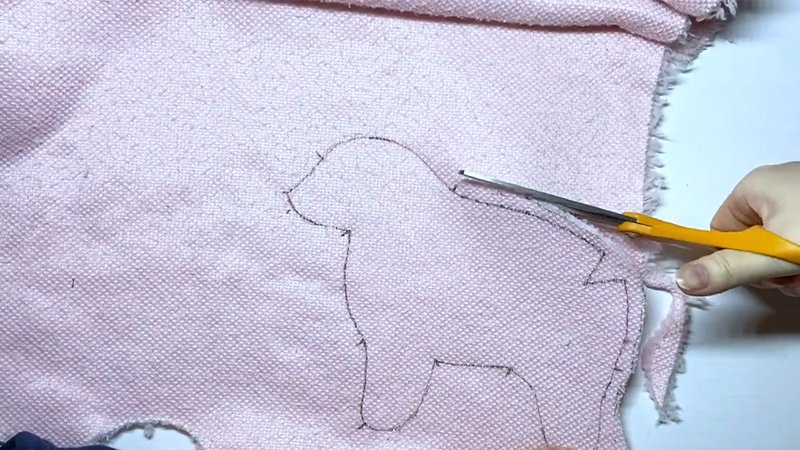
Using your prepared templates, cut out the corresponding shapes from your chosen fabrics:
- Main Body: Two mirrored pieces from curly fur.
- Belly: One piece from fur or felt, depending on your texture preference.
- Crown (Head Top): One piece from the same fur fabric as the body.
- Ears: Two outer ear pieces from fur and two inner ear pieces from felt.
- Legs: Four pieces each for the outer and inner legs.
When working with fur fabric, cut only the backing with small scissors or a craft knife, avoid cutting through the pile. This preserves the natural fluff along the edges and prevents shedding.
Step 3: Trimming the “Pink Parts”
The pattern highlights certain sections- face, ears, and legs that require trimming if made with long-haired fur. Carefully trim the pile in these areas so the features appear neat and distinct.
- Face: Trimming prevents the sheep’s facial details from being buried under fur.
- Ears and Legs: Shorter fur makes sewing these narrow sections easier and helps them keep their shape.
If you substitute other fabrics (felt or short-pile fur), trimming is unnecessary. This option also gives your sheep a creative twist, felt faces look cartoon-like, while short-haired fur adds realism.
Step 4: Assembling the Ears
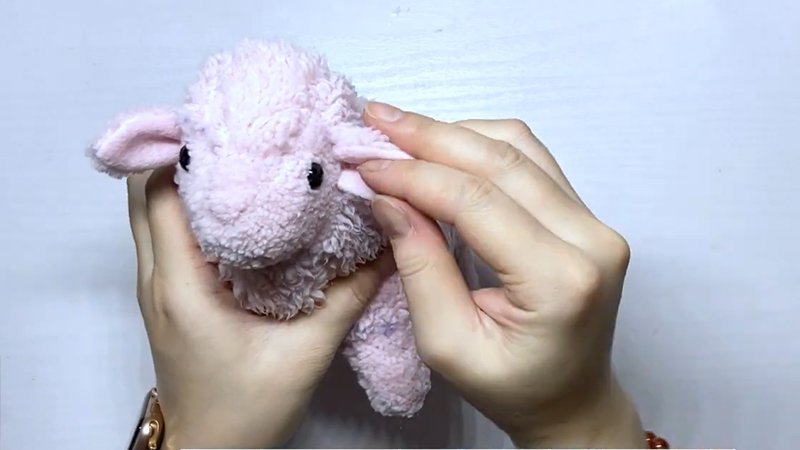
- Place one inner ear (felt) and one outer ear (fur) together with right sides facing.
- Sew around the curved edges, leaving the straight edge open.
- Turn the ear right side out and lightly press with your fingers.
- Repeat for the second ear.
At this stage, you may choose to fold the base slightly to give the ears a natural curve before attaching them to the head.
Step 5: Sewing the Head
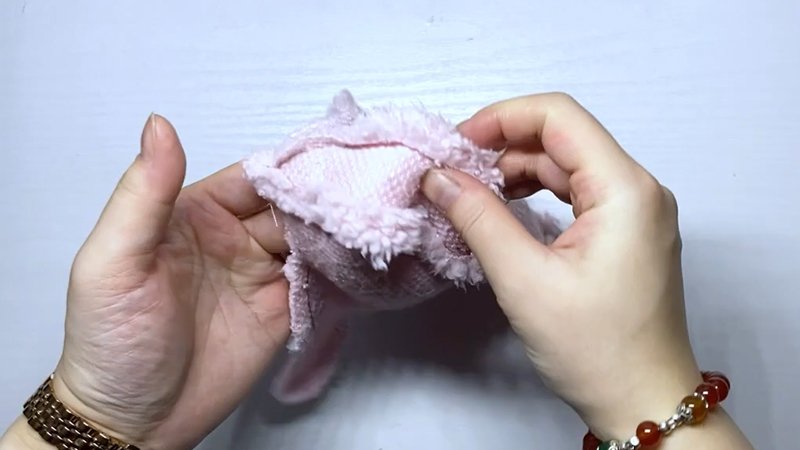
- Begin by attaching the crown piece to the two body pieces at the top seam.
- Insert the ears between the crown and body pieces, pinning them securely in place.
- Sew carefully along the seam, ensuring the ears are stitched firmly into position.
- Leave the bottom of the head open for stuffing.
Step 6: Constructing the Body
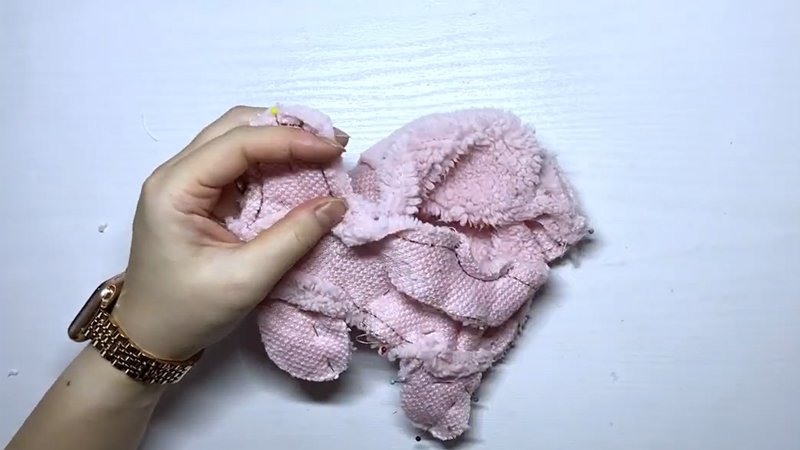
- Pin the belly piece to the two body sides, aligning edges carefully.
- Sew along the seams, leaving an opening at the back for stuffing.
- Attach the inside and outside leg pieces together in pairs, then sew them to the body at the designated points.
The absence of wire makes this step simpler, but it’s still important to reinforce the seams for durability.
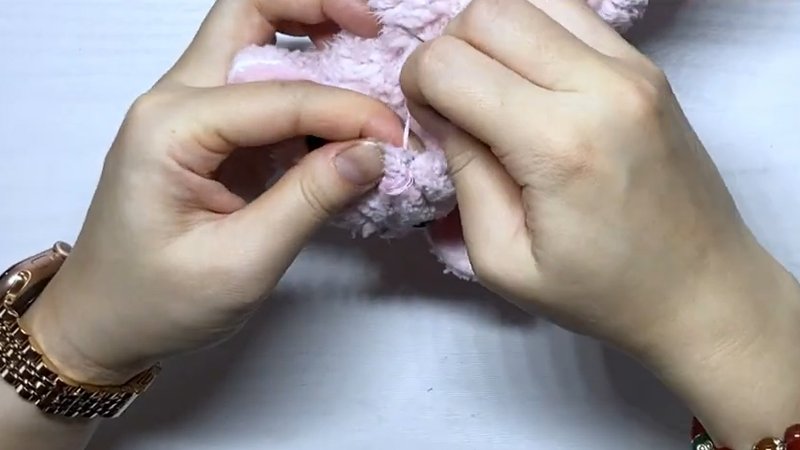
Step 7: Stuffing the Plushie

- Begin by stuffing the legs firmly, shaping them as you go.
- Move on to the body, gradually adding polyester fiberfill until the sheep appears plump and rounded.
- Finally, stuff the head, shaping it so the crown remains smooth.
- Sew the opening in the back closed with an invisible ladder stitch.
Stuffing evenly is crucial. Overstuffing may distort the shape, while understuffing will leave the sheep floppy. Aim for a soft but firm feel.
Step 8: Adding the Details
- Eyes: Attach the eyes symmetrically on the face. Safety eyes should be inserted before fully closing the head seam, while glued or embroidered eyes can be added later.
- Muzzle: Use embroidery thread to stitch a small nose and mouth. A simple “Y” shape works well.
- Finishing Touches: Gently brush or fluff the fur to enhance its curliness. Trim any uneven areas for a polished look.
Creative Variations
One of the joys of this pattern is its adaptability. By experimenting with different fabrics and colors, you can create unique versions of the sheep:
- Classic White Sheep: Use curly white fur with a felt face.
- Black-Faced Sheep: Combine curly white fur with short-haired black fabric for the face and legs.
- Pastel Sheep: Try pink, blue, or lavender fur for a whimsical twist.
- Miniature Sheep: Print the pattern at a smaller scale to make pocket-sized versions.
Final Thoughts
This plushie sheep pattern is both simple and versatile, making it ideal for crafters who enjoy bringing soft toys to life.
The project highlights several important sewing techniques, adding seam allowances, trimming fur, attaching ears, and shaping through stuffing, while remaining accessible for beginners.
The finished sheep, with its rounded body, curly coat, and expressive face, is perfect as a child’s toy, a handmade gift, or even a decorative piece.
Download Free PDF:


