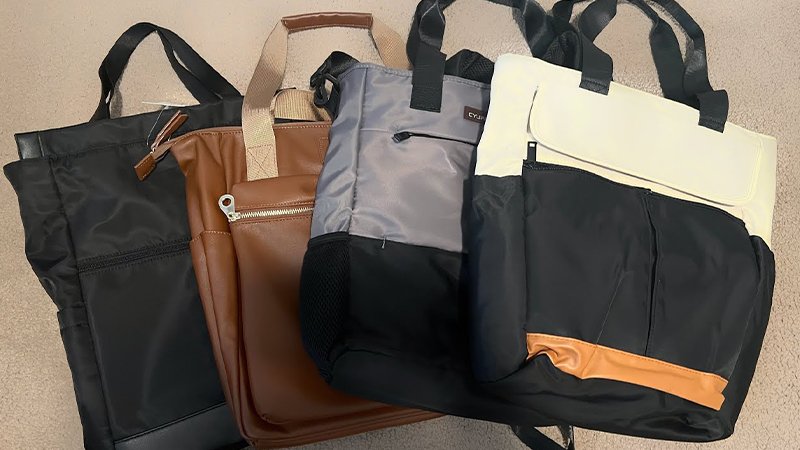
Pattern Description:
Create a versatile, lightweight bag that effortlessly converts between a tote and a backpack. Perfect for kids, teens, and adults, it features a hidden zippered pocket, magnetic snap closure, and easy-to-adjust straps.
This beginner-friendly sewing pattern includes clear step-by-step instructions, templates, and helpful tips, making it simple to craft a stylish, functional bag that’s ideal for everyday use, school, or travel.
Materials Needed & Measurements:
Approximate Finished Size: 16 inches tall by 19 inches wide (not including the straps).
Fabric and Interfacing
- Bag Exterior Fabric: 1 1/2 yards quilting cotton or home decor weight fabric.
- Bag Lining Fabric: 1 yard quilting cotton.
- Medium Weight Fusible Interfacing: 2 yards.
Notions and Tools
- Zipper: 1 zipper, 13 inches or longer. (The internal welt zipper pocket is designed to be 12 inches wide).
- Magnetic Snap Closure: 1 required.
- Fabric Marking Pen (such as a Frixion pen).
- Chopstick or other turning tool.
Instructions for Making the Convertible Backpack Tote Pattern:
1. Prepare Fabric and Darts
If using fusible interfacing, fuse pieces to the exterior fabric cut from the templates. Prepare darts by folding fabric wrong sides together, placing the template on top, and marking dart points.
Sew each dart carefully; there are eight in total, two on each front and back piece (both exterior and lining). Press front darts toward the center, back darts toward the sides.
2. Attach the Magnetic Snap
Position one half of the snap on the front lining, centered and 1¼ inches below the top edge, and the other half on the back lining in the same position. Set aside.
3. Sew the Hidden Zipper Pocket
Draw a 12-inch by ½-inch rectangle on the wrong side of an 18″ x 14″ pocket piece, 1 inch from the short and side edges.
Place this pocket piece on the exterior back, 2 inches below the top edge. Sew around the rectangle, cut carefully down the center and to each corner, then push the pocket through the opening.
Position the zipper underneath, extending slightly past the ends, and topstitch close to the opening. Fold and sew the pocket edges together without attaching to the bag exterior.
4. Make the Casing for Straps
Fold a 3″ x 20″ strip in half lengthwise, press, fold edges to the center, and fold in half again to create a neat casing. Topstitch along both long edges.
Pin to the bag back, 1 inch above the zipper, and stitch along the topstitch lines and lines marked 4 inches from each end to form two 2½-inch openings for the straps.
5. Construct the Bag Front and Straps
Attach the strap extenders to the front exterior and lining pieces. Place exterior and lining front pieces right sides together, pin around curved top edges and straps, and sew with a ¼-inch seam allowance.
Turn right side out and press. Topstitch around the edges, marking angled lines on strap ends to guide stitching later.
6. Assemble the Bag
Lay the bag back exterior and lining flat, then position the front piece on top. Thread each strap through its casing opening, align strap ends with the bottom corners, and pin securely. Sew along topstitch lines and angled marks, reinforcing where straps will bear weight.
Separate exterior and lining layers of the front piece, match front and back exterior pieces together, and lining pieces together.
Pin sides and bottom, leaving a 6-inch opening in the lining for turning. Sew all around with a ¼-inch seam allowance.
Turn the bag right side out, press edges, and close the lining opening. Press the top edges and topstitch where needed.
7. Finishing Touch:
Smooth the lining inside, press all edges for crisp lines, and give the bag a final topstitch around the top to ensure a clean, professional finish.