
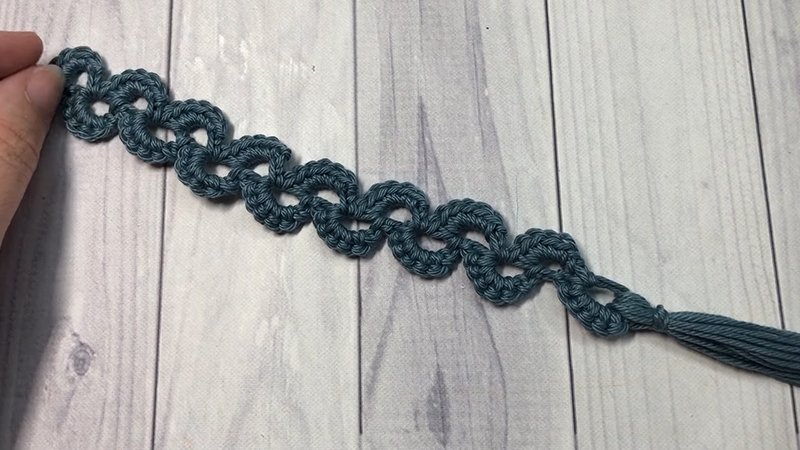
Pattern Description:
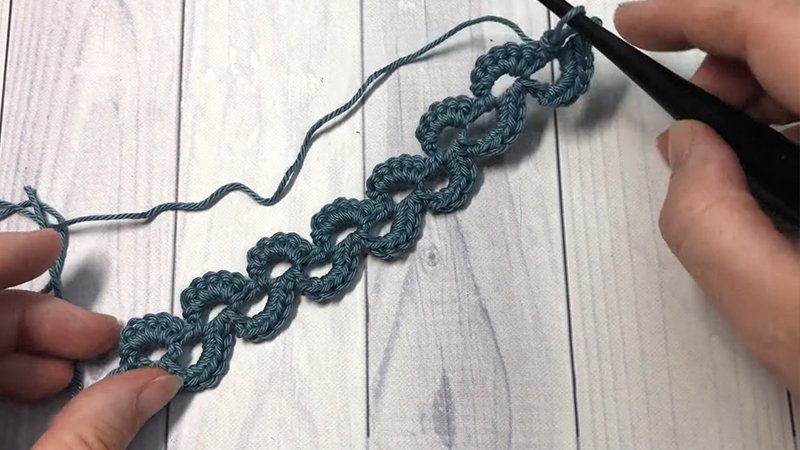
The Crescent Bookmark crochet pattern is an easy, delicate lace design. It is described as being pretty and working up super quickly using a lightweight yarn.
The size of the bookmark is easy to adjust. While a tassel may be added to the end, the bookmark also looks great without one.
Materials Needed & Measurements:
| Category | Details | |
| Skill Level | Easy | |
| Finished Size | Approximately 0.5 \times 10.5 inches, excluding tassel | |
| Yarn | Patons Grace (100% Mercerized Cotton). The designer prefers working bookmarks in a 100% cotton yarn. | |
| Yarn Weight | Light Weight (3). The yarn skein details are $1.75 oz, 50 g; 136 yds, 125 m. | |
| Yarn Quantity | You will need approximately 20 yards | |
| Hook | Size F/5 (3.75 mm) hook. The designer uses a 3.75 mm crochet hook, specifically mentioning a wooden streamline hook in Ebony by Furls Crochet in the video. | |
| Notions | Yarn Needle. Tassel (optional, to be made and attached if desired). |
Abbreviations Used:
- Ch – Chain
- Rpt – Repeat
- Sc – Single Crochet
- Sk – Skip
- Yo – Yarn over
- dc – double crochet
- tr – treble crochet
- st(s) – stitch(es)
- rep – repeat
- sp – space
- sk – skip
Instructions for Making the Crescent Bookmark Pattern:
Step 1: Foundation Chain
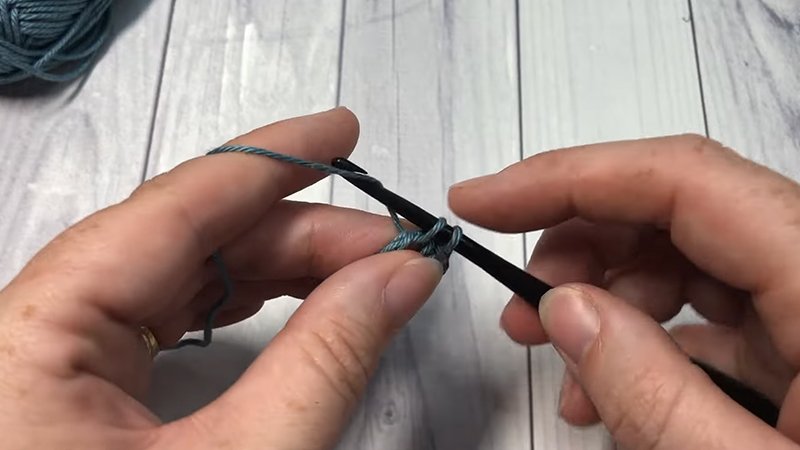
Begin by chaining 34 ch (or any multiple of 8 + 2 to adjust length). This base determines the final length of your bookmark, so feel free to make it longer or shorter.
Step 2: Row 1 – Foundation Lace
- In the 6th ch from hook, work 1 dc (this counts as the first crescent arch).
- Ch 1, sk 1 ch, dc in next ch.
- Rep from to across the row.
- Turn your work.
This creates the foundation row of open spaces that will form the lace arches.
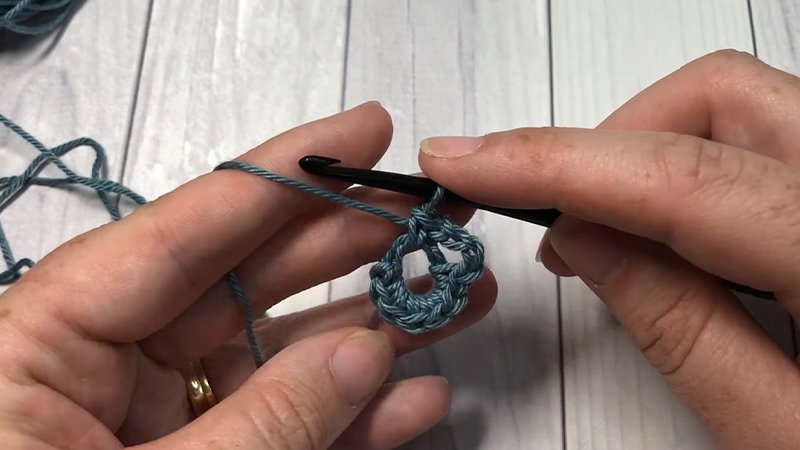
Step 3: Row 2 – Forming the Crescents
- Ch 4 (counts as 1 tr).
- Sk 1 st, (1 dc, 1 ch, 1 dc) in next st, sk next st, tr in next st.
- Rep from to across the row, ending with 1 tr in last st.
- Turn.
You’ll begin to see a slight wave forming – this is the base of your crescent pattern.
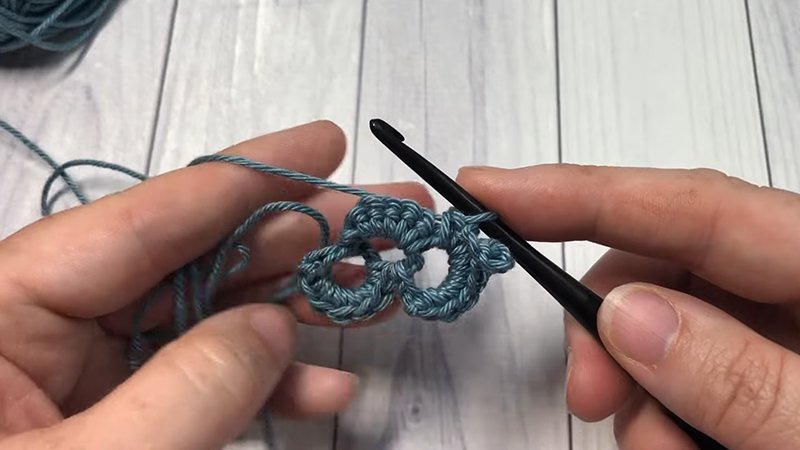
Step 4: Row 3 – Building the Lace Texture
- Ch 3 (counts as 1 dc).
- Work 1 dc in next ch-sp, ch 1, sk next dc, dc in tr of previous row.
- Rep from to to end of row.
- Turn.
Each repeat builds a delicate lace look while keeping the bookmark thin and flexible.
Step 5: Row 4 – Defining the Crescent Shape
- Ch 4, sk 1 st, tr in next st, ch 1, sk next st, (dc, ch 1, dc) in next ch-sp.
- Rep from to across the row, ending with tr in final dc.
- Turn.
After this row, your bookmark should begin to take on a gentle curve along one side – creating the signature “crescent” shape.
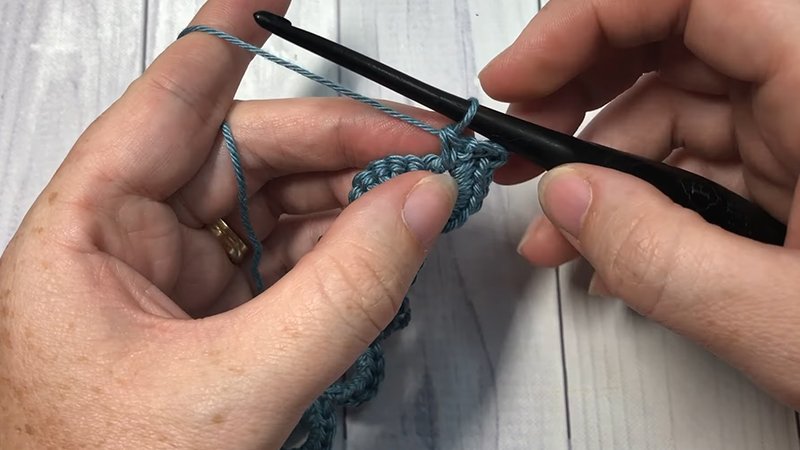
Step 6: Row 5 – Finishing Row

- Ch 1, work 1 sc in each st across the top edge.
- This provides a neat, even border and helps define the curve.
- Fasten off and weave in all ends using your yarn needle.
Optional: If you’d like both edges curved, repeat Rows 2-4 on the opposite side of the foundation chain before fastening off.
Optional Tassel
If desired, make and attach a tassel to one end of the bookmark.
To make a tassel:
- Wrap yarn around three fingers about 20 times.
- Cut the yarn from the skein and carefully slide the loops off your fingers.
- Tie a strand tightly near the top to secure it.
- Cut the bottom loops open and trim the ends evenly.
- Use your yarn needle to attach the tassel securely to the narrow end of the bookmark.
Finishing Touches
- Lightly block your bookmark by pinning it to a flat surface and steaming gently (if using cotton).
- Let it dry completely to maintain the crisp crescent shape.
- Optionally, you can stiffen the bookmark with a light spray of fabric starch.
Pattern Notes & Customization
- Adjust length: Add or subtract stitches in multiples of 8 in your foundation chain.
- Yarn choice: Experiment with linen or bamboo thread for a different texture.
- Color ideas: Soft pastels or variegated cottons look especially pretty for gift sets.
Your Crescent Bookmark is now ready.


