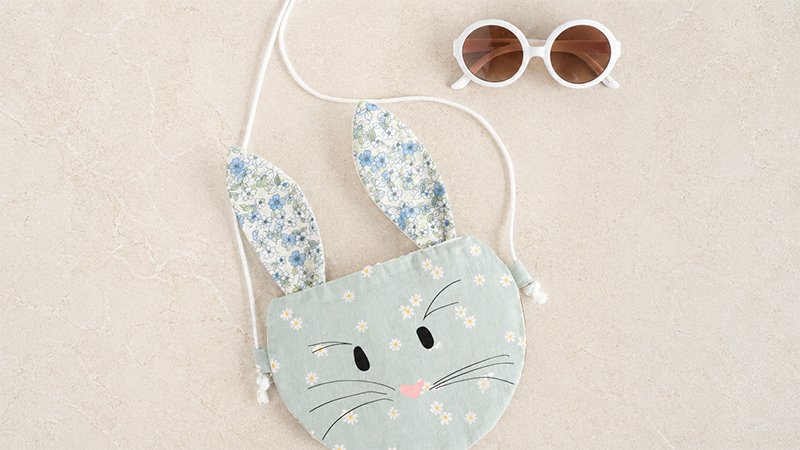
Easter is the perfect time to sew something fun, quick, and adorable—and this bunny purse is exactly that. It’s a beginner-friendly project that comes together fast, making it ideal for last-minute outfits or a cute everyday accessory for kids who love bunnies.
Materials & Supplies
Fabric
- 1/2 yard outer fabric (for bunny body)
- 1/2 yard lining fabric (also used for ears)
Alternative:- 2 fat quarters (outer body)
- 1 fat quarter (ears + lining)
Structure & Notions
- 1/2 yard Pellon Decor Bond interfacing
- 2 yards cotton rope, twine, or ribbon (strap + closure loop)
- 1 piece 1-inch button
- 2 pieces of floral wire (for poseable ears)
Face Details (choose one method)
- Option 1 (Cricut):
- Black iron-on vinyl
- Pink iron-on vinyl
- Option 2 (Hand embroidery):
- 2–3 skeins embroidery floss (black + pink)
Tools & Equipment
- Sewing machine
- Iron + ironing surface
- Fabric scissors or rotary cutter
- Pins or clips
- Turning tool (for ears)
- Hera tool (optional, for shaping seams)
Optional (Cricut users):
- Cricut Maker
- Fabric cutting mat (12″ × 24″ recommended)
- Standard grip mat (for vinyl)
- Weeding tools
- Cricut EasyPress + mat
Step 1: Cutting Your Pieces
Option A: Using Cricut
- Upload SVG files into Cricut Design Space.
- Separate layers:
- Hide face layers when cutting fabric
- Hide fabric layers when cutting vinyl
- Cut:
- 2 outer bag pieces
- 2 ear outer pieces
- 2 ear lining pieces
- 2 lining bag pieces
- 2 small rectangles (strap loops)
Important tips:
- Use “Attach” to keep shapes aligned
- Mirror vinyl before cutting
- Use a fabric mat for fabric and a standard mat for vinyl
Option B: Hand Cutting (No Cricut)
- Print the PDF pattern
- Trace onto fabric
- Cut:
- Outer bag (2)
- Lining bag (2)
- Ears (2 outer + 2 lining)
- Rectangles (2)
If embroidering the face, do it before assembling the bag
Step 2: Sewing the Ears
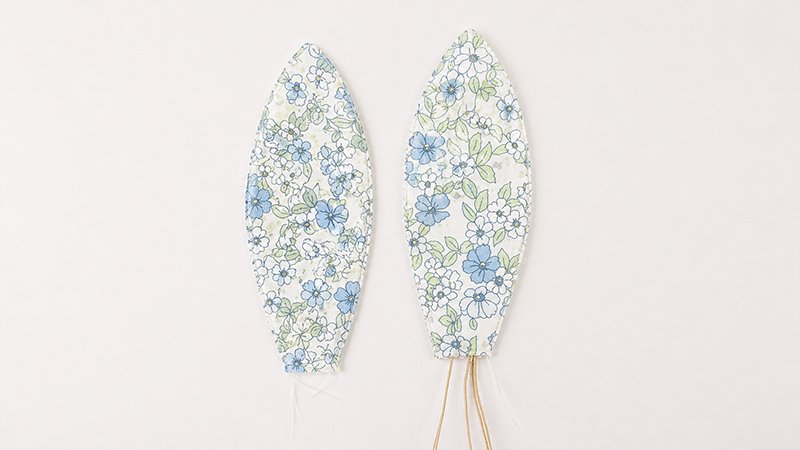
- Place outer ear + lining ear right sides together
- Sew around edges with 1/4″ seam allowance
- Leave bottom open
- Turn right side out
- Press neatly
- Insert floral wire:
- Fold wire for safety
- Push to ear tip
- Stitch bottom edge to secure wire
Repeat for the second ear.
Step 3: Preparing the Bag Exterior
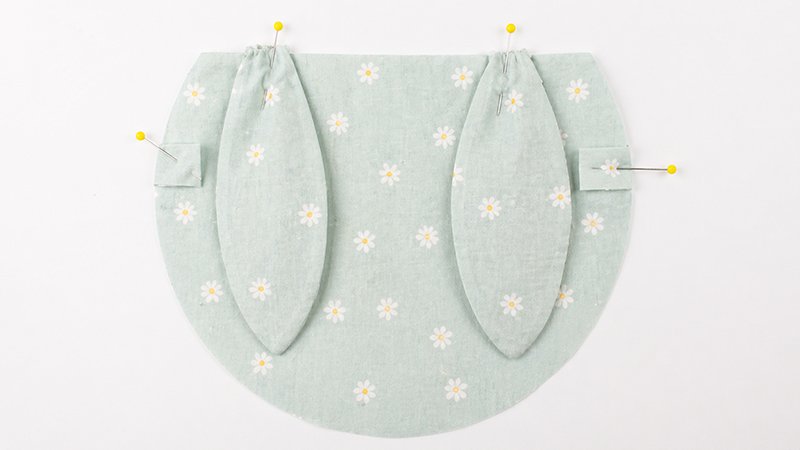
Add Interfacing
- Fuse interfacing to the wrong side of the outer fabric pieces
Make Strap Loops
- Fold the long edges of each rectangle inward
- Fold in half again
- Press and stitch
Attach Details to Front Piece
- Place strap loops:
- About 2 inches below top edge
- Pin ears:
- About 1 inch from each side
- Create closure loop:
- Cut 3-inch twine/ribbon
- Fold and pin at top center
- Stitch all in place
Step 4: Assemble Outer Bag
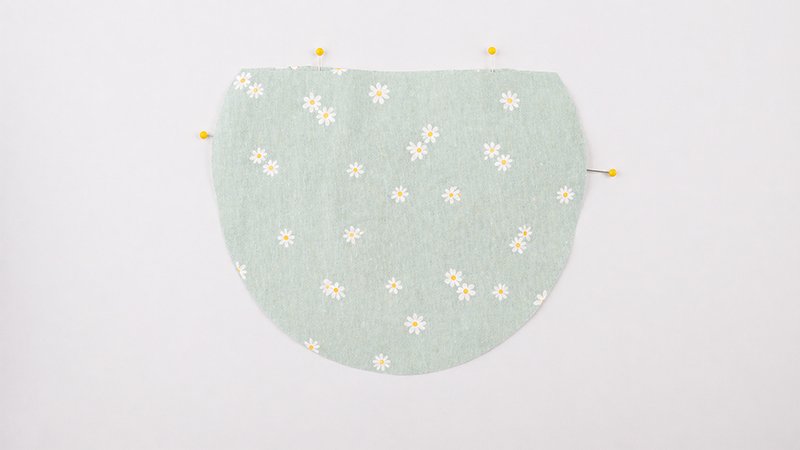
- Place front and back right sides together
- Sew around edges using 1/2″ seam allowance
- Clip curves carefully
- Turn right side out
- Press smooth
Step 5: Sew the Lining
- Place lining pieces right sides together
- Sew around edges (leave top open)
- Trim seam allowance to 1/8″
- Turn right side out
Step 6: Join Outer Bag & Lining
- Insert outer bag into lining (right sides facing)
- Align top edges and pin
- Sew around top edge
- Leave 3-inch gap for turning
- Turn bag right side out through gap
- Press top edge neatly
Step 7: Add Face Details
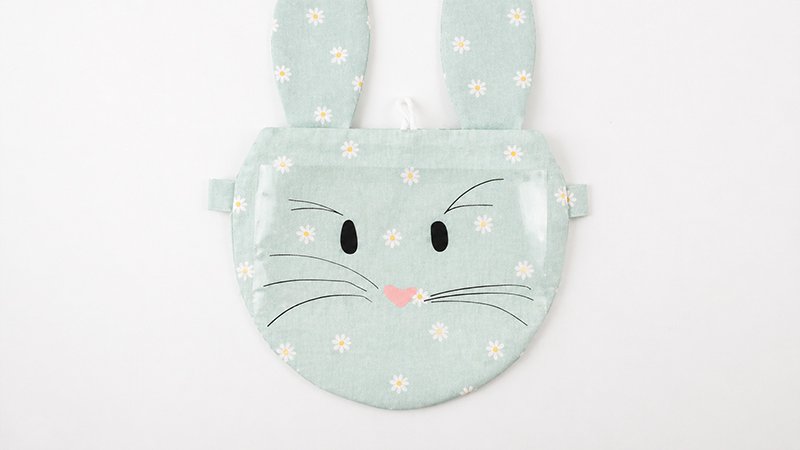
Cricut Vinyl Method
- Position:
- Pink nose centered
- Black eyes + whiskers above
- Cover with carrier sheet
- Press with EasyPress
Embroidery Method
- Use backstitch to sew:
- Eyes
- Nose
- Whiskers
Step 8: Finishing
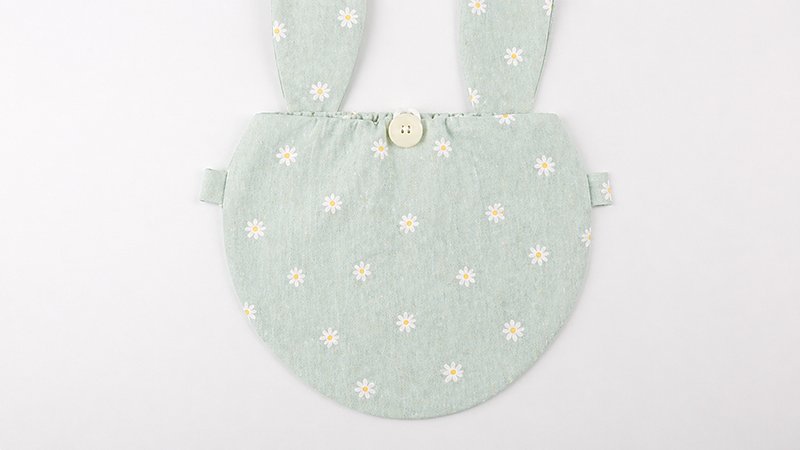
- Hand stitch the turning gap closed (slip stitch)
- Sew button onto back
- Attach strap:
- Thread rope through side loops
- Knot ends securely
Final Result
You now have a soft, structured bunny purse with poseable ears—perfect for Easter or everyday fun. It’s quick, customizable, and a great beginner-friendly sewing project.