
Pattern Description:
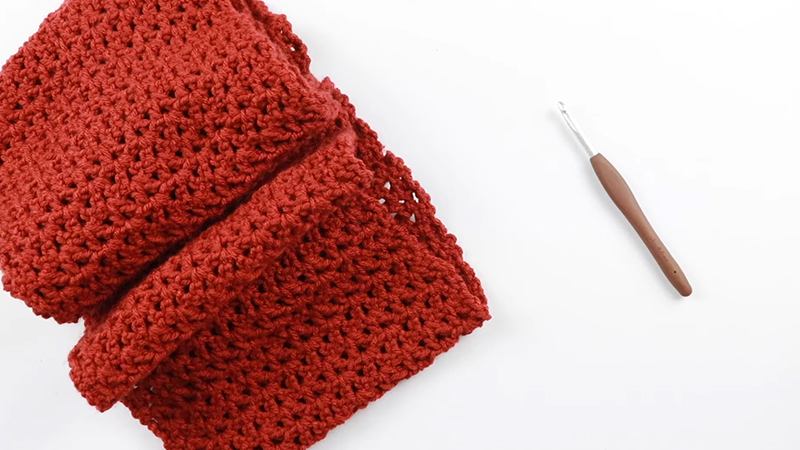
This Half Double Crochet V Stitch Scarf is a beginner-friendly and easy-to-crochet pattern, designed to be soft yet warm for cold days.
It features a beautiful and textured stitch (hdc v stitch) and is made with a simple one-row repeat, making it a super cozy item ideal for gift-giving.
Materials Needed & Measurements:
- Yarn: Ice Yarn Super Tweed Beige (2 skeins, 100g = 229yd/210m per skein). The pattern states you can use any weight of yarns.
- Yarn Weight: #4 Medium / Worsted weight / Acrylic yarn.
- Hook: US J-10 (6mm) crochet hook. The author used a larger hook than recommended for the yarn weight to create more drape.
- Notions: Tapestry needle for weaving ends. Scissors are also implied for trimming fringe.
- Measurements: The finished size is 7.75″ wide, 60.5″ long without fringe. This pattern can be adjusted to any size.
Stitches & Abbreviations Used:
- ch = chain
- st = stitch
- sk = skip
- sc = single crochet
- hdc = half double crochet
- ch-sp = chain space
- *** to ;** = repeat * to the instructions
- Special stitch: hdc V stitch = (hdc, ch 1, hdc) in indicated stitch
Instructions for Making the Double Crochet V Stitch Scarf Pattern:
Starting the Scarf
- Begin by crocheting a multiple of 2 chains. For the scarf in the example, you will ch 24. This forms the foundation for your scarf’s width.
The core of this pattern is a simple one-row repeat, making it accessible for beginners.
- Row 1:
- Make a (hdc, ch 1, hdc) into the fourth chain from the hook. The initial skipped chains count as a stitch, often as a hdc and ch-1 space for the first V-stitch.
- Next, skip the next chain, then make a (hdc, ch 1, hdc) into the following chain.
- Repeat these steps (from * to 😉 across the row until only the last two chains remain.
- Skip the next chain, and finally, make a hdc in the very last stitch.
- Turn your work.
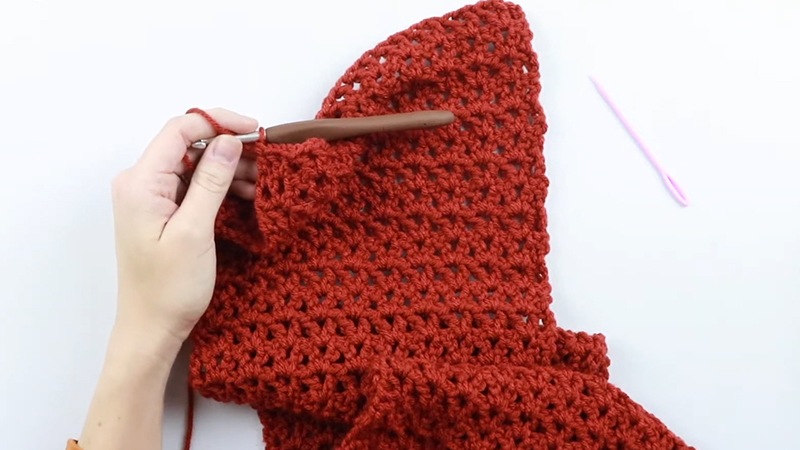
- Row 2:
- Chain 1. This chain typically does not count as a stitch but creates height for your first hdc.
- Make a hdc in the first stitch.
- Then, make a (hdc, ch 1, hdc) into the next ch-1 space between the two hdc stitches of the V-stitch from the previous row. This is where the new V-stitches are formed.
- Continue by making a (hdc, ch 1, hdc) into the next ch-1 space.
- Repeat these steps (from * to 😉 across the row until you reach the last ch-1 space.
- Make a hdc in the last stitch.
- Turn your work.
- Row 3 to 127 (or until desired length):
- For all subsequent rows, you will repeat Row 2. Continue repeating Row 2 until your scarf reaches the desired length. The example scarf has 127 rows.
- Once you’ve completed the final row, fasten off your yarn.
- Use your tapestry needle to weave in the loose end securely.
Adding Fringe
Adding fringe is an excellent way to finish your scarf and add an extra touch of style. You will need a tapestry needle for weaving ends and scissors for trimming.
- Cut Strands: Begin by cutting strands of yarn approximately 8 inches (20 cm) long. The pattern suggests using 2 strands together for each fringe. If you desire a fuller, thicker fringe, you have the option to add more strands per fringe bundle.
- Fold Yarn: Take the chosen number of yarn strands and fold them neatly in half. This creates a loop at one end and two tails at the other.
- Insert Hook: Locate the bottom edge of your scarf. Insert your crochet hook into a space along this bottom edge where you want to attach a fringe.
- Pull Loop Through: With your hook inserted, grab the folded loop of yarn and use your hook to pull it through the space on the edge of the scarf.
- Secure Fringe: Once the loop is pulled through, grab the yarn tails. Then, pull these tails back through the loop that is now on the scarf. Gently tug the tails to tighten the knot and secure the fringe to the scarf.
- Repeat and Trim: Repeat this process for as many fringe pieces as you wish to add along both ends of your scarf. Once all the fringe is attached, use your scissors to carefully trim the fringe. The goal is to achieve a straight edge and ensure all fringe pieces are of the same length.
Download Free PDF:


