Pattern Description:
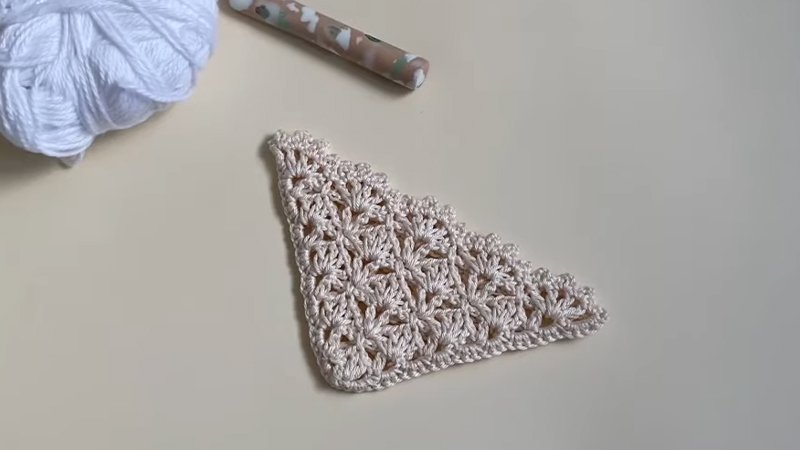
This pattern teaches how to create a gorgeous lace corner crochet bookmark. It is a simple pattern that is super easy to adapt if you wish to make it smaller or larger.
The creation involves making two triangles, one bigger (the back panel, 14 rows total) and one smaller (the front panel, 12 rows total). These two pieces are then joined along two of the edges to create a border.
Materials Needed & Measurements:
The materials required for this project include:
- Thin cotton yarn (the lighter in weight the better).
- 2.5mm crochet hook.
- Scissors.
- Darning Needle.
- Stitch marker (optional).
- A book (for measuring purposes).
Abbreviations Used:
- dc: double crochet
- tr: treble crochet
- sl st: slip stitch
Instructions for Making the Lace Corner Bookmark Pattern:
Panel Preparation
The pattern requires the creation of two separate triangular panels:
- Front Panel: This panel requires 12 rows in total.
- Back Panel: This panel requires 14 rows in total.
Crochet Method: Rounds 1-6
The following instructions detail the method for crocheting both panels, starting with Round 1.
- Round 1: Begin by creating a magic ring. Next, Chain 3 (ch 3). Into the ring, make 2 tr (treble crochet). Finally, pull your ring closed. Chain 3 (ch 3) and turn your work.
- Round 2: Make 2 tr (treble crochet) in the same stitch. Chain 3 (ch 3). Skip the next stitch, and then make 3 tr (treble crochet) in the last stitch. Chain 3 (ch 3) and turn your work.
- Round 3: Make 2 tr (treble crochet) in the same stitch. Chain 3 (ch 3). Make 1 dc (double crochet) in the chain 3 space from the previous row. Chain 3 (ch 3). Make 3 tr (treble crochet) in the last stitch. Chain 3 (ch 3) and turn your work.
- Round 4: Make 2 tr (treble crochet) in the same stitch. Chain 3 (ch 3). Make 1 dc (double crochet) in the chain 3 space. Make 3 tr (treble crochet) in the next stitch, which corresponds to the dc from the previous row.
Finally, make 1 dc (double crochet) in the next chain 3 space. Chain 3 (ch 3). Make 3 tr (treble crochet) in the last stitch. Chain 3 (ch 3) and turn your work.
- Round 5: Make 2 tr (treble crochet) in the same stitch. Chain 3 (ch 3). Make 1 dc (double crochet) in the chain 3 space. Chain 3 (ch 3). Skip over the first tr (treble crochet), and make 1 dc (double crochet) in the second tr stitch.
Chain 3 (ch 3). Make 1 dc (double crochet) in the chain 3 space. Chain 3 (ch 3) and make 3 tr (treble crochet) in the last stitch. Chain 3 (ch 3) and turn your work.
- Round 6: Make 2 tr (treble crochet) in the first stitch. Chain 3 (ch 3). Make 1 dc (double crochet) in the chain 3 space, followed by 3 tr (treble crochet) in the next stitch, and then 1 dc (double crochet) in the next chain 3 space. Chain 3 (ch 3).
Next, make 1 dc (double crochet) in the chain 3 space, 3 tr (treble crochet) in the next stitch, and 1 dc (double crochet) in the next chain 3 space. Chain 3 (ch 3), and make 3 tr (treble crochet) in the last stitch. Chain 3 (ch 3) and turn your work.
Continuing Rounds and Finishing Panels
- Rounds 7-12 (Completion of Front Panel): Continue crocheting in the same manner for 6 more rows.
This involves creating chain 3 spaces with 1 dc (double crochet) used to separate the sections, and tr (treble crochet) clusters with 1 dc (double crochet) placed on either side.
- For the front panel, crochet 12 rows in total.
- Rounds 13-14 (Completion of Back Panel): Continue the pattern described above for the back panel until you have reached 14 rows in total. Once the desired length is reached for each panel (12 rows for the front, 14 rows for the back), fasten off the yarn and cut it.
Assembling the Pieces
Once both the smaller triangle (front panel) and the larger triangle (back panel) are complete, you must join them along two edges.
- Lay your smaller triangle on top of the larger triangle, making sure to match the corners together. Secure the two pieces together using a stitch marker.
- Attach the yarn to the bottom corner of your back triangle.
- Chain 1 (ch 1).
- Make 1 dc (double crochet) in each stitch along the edge.
- When you reach the second triangle (the smaller piece), dc (double crochet) into both pieces simultaneously.
- Continue this single crochet border process until you reach the corner.
- At the corner, make 3 dc (double crochet) at the top.
- Continue to make 1 dc (double crochet) in each stitch down the second side.
- At the end of the second side, fasten off the yarn, cut it, and sew in all of the ends.
Now, have your own lace corner bookmark.