Pattern Description:
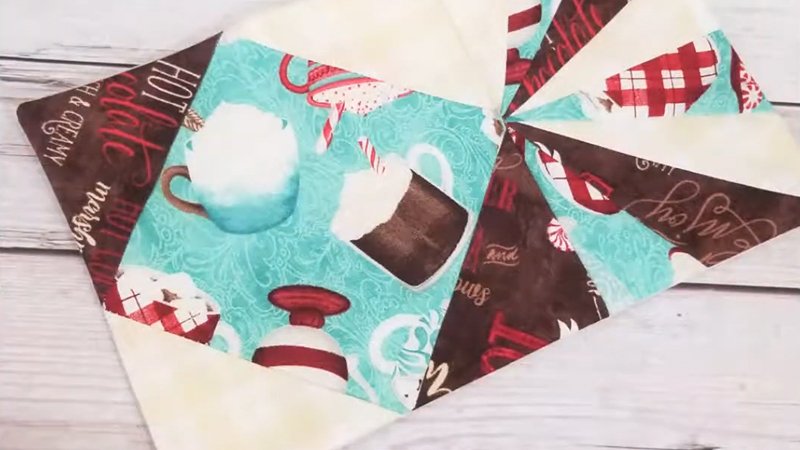
Create a charming mug rug with this free paper piecing pattern- perfect for using up fabric scraps! The “sew by number” method ensures precise piecing as you stitch two mushroom blocks together.
Add neat borders, backing, and batting to finish. Use a wooden iron for crisp seams and a standard iron for the final press, completing a polished, cozy mug rug.
Materials Needed & Measurements:
Materials
- Fabric and Foundation: Fabric scraps, backing fabric, and batting.
- Paper/Pattern: Downloaded and printed template.
- Sewing Equipment: Sewing machine.
- Pressing Tools: A wooden pressure/iron is crucial for creasing seams and ensuring folds are flat throughout the piecing process. A standard hot iron is used only for the final pressing step after turning the project right-side out.
- Other Tools: A flat pin is recommended for pinning the initial stem fabric, as it tends to shift.
Measurements
- Internal Seams: The lines printed on the template are the SEWING LINES. The pattern DOES NOT include the 1/4 inch seam allowance on these internal lines.
- Fabric Piece Size: Each fabric piece selected must be at least 1/4 larger than the template section it is intended to cover to ensure no holes appear.
- Initial Block Assembly: After sewing the two individual mushroom blocks together, trim the resulting piece to: 8 1/2 X 7 1/2.
- Border Strips: Four strips are required for the border:
- Two strips cut at: 2 X 7 1/2
- Two strips cut at: 2 X 11 1/2
- Final Project Size: After attaching the borders and trimming, the finished mug rug size is: 10 1/2 X 11 1/2.
- Backing and Batting: Both the backing fabric and batting should be cut to match the final trimmed size: 10 1/2 X 11 1/2.
- Turning Opening: When sewing the final layers together, a 3 inch opening must be left for turning the project right sides out.
Instructions for Making the Paper Piecing Mug Rug Pattern:
Initial Fabric Placement and Creasing
The first step involves placing the fabric intended for the mushroom stem. Lay this chosen fabric on the bottom of the pattern, ensuring the right side is facing away from the paper.
Because this piece tends to shift when you turn it to sew, it should be secured using a pin; a flat pin will work the best.
Next, prepare to add the first connecting piece. With the paper on the bottom and the fabric on the top, fold back one edge of the paper and fabric until the fold lines up with the black line.
To get a strong, crisp fold, use your wooden pressure/iron to achieve a good crease. Open the paper and fabric up; if the crease in the fabric is not visible, refold and repress it using the wooden pressure.
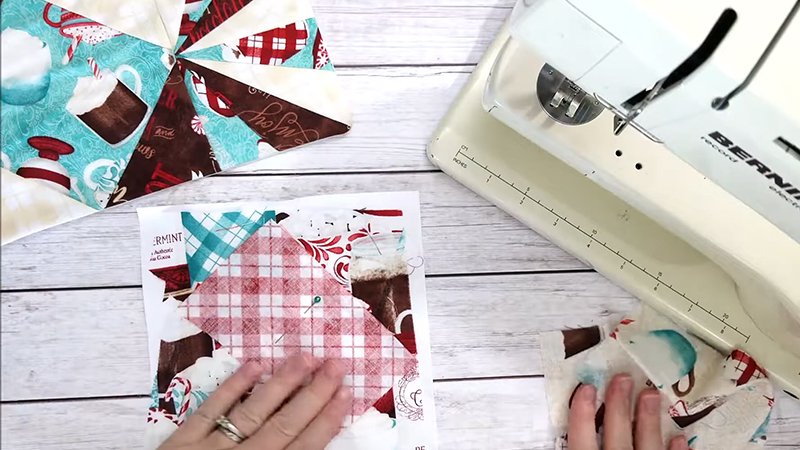
Sewing the Pieces
Place your next fabric piece, the one that will be sewn onto the creased edge, right side down on top of the previous piece. This new piece should extend 1/4 past the crease to account for the necessary seam allowance.
Pinch the layers together with your fingers or pin them in place. Then, turn the block over so that the paper is on top, clearly showing the sewing lines.
Using your sewing machine, sew directly on the marked lines. It is essential to backstitch at both ends of the seam; this helps the seam remain secure when the paper is removed later.
After sewing the seam, open up the fabric you have just attached and immediately give it a good press using your wooden iron.
Next, fold back both the fabric and the paper- you must be careful not to cut the paper. Trim any extra fabric that extends past the seam.
This trimming step is important because leaving excess fabric will make the block bulky, and a darker seam might show through if lighter colored fabric is placed on top.
Assembling the Mushroom Blocks
Continue the process, repeating the placement, sewing, pressing, and trimming steps for the other side and the top of the mushroom.
The technique is likened to “sewing by number”. Remember to utilize the wooden iron after each step to keep your seams neat and prevent puckers in the folds.
Once the first mushroom block is complete, place the block right sides facing down, with the paper still on top.
Trim the entire block using the paper outline as a guide. When trimming the outside edge, cut 1/4 past the edge; this section represents the final seam allowance for the block. Sew the top of the mushroom to the bottom to create one finished mushroom block.
Repeat this entire process to construct the second mushroom block.
Final Assembly and Finishing
After both mushroom blocks are complete, sew them together, side by side. Trim the resulting combined block to 8 1/2 X 7 1/2.
Next, cut four strips for the border:
- Two strips should be cut at 2 X 7 1/2.
- Two strips should be cut at 2 X 11 1/2.
Sew these border strips to the sides, top, and bottom of the joined block. Trim the entire piece once more to its final finished dimensions: 10 1/2 X 11 1/2.
Cut the backing fabric and the batting to match this final size of 10 1/2 X 11 1/2. Layer the backing, batting, and pieced top, and sew all the way around the perimeter.
Make sure to leave a 3 inch opening for turning the project. Trim the corners and turn the mug rug right sides out. Use a real hot iron (a standard iron) to press the project flat.
To complete the mug rug, sew 1/8 inch all the way around the outside edge to close the opening used for turning.
Finally, sew again just inside the border. The project is now ready to be loaded and used for snacks.
Download Free PDF: