Pattern Description:
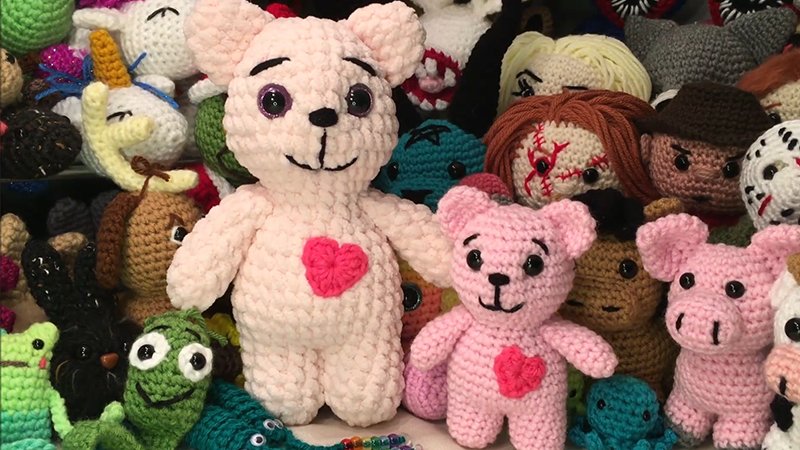
The Small Love Heart Bear is a charming handmade plush, standing just over 8″ tall and 7″ wide.
Crafted from soft fleece with an embroidered face and a sewn heart detail, it’s beginner-friendly and fun to make.
The free pattern comes in printable PDF format, suitable for hand-cutting or Cricut Maker projects.
Materials Needed & Measurements:
- Fleece, felt, or leather fabric for the nose.
- Embroidery thread for the eyes and mouth.
- Coordinating thread.
- Poly-fil for stuffing.
- Basic sewing tools and supplies.
- Approximately 11″ X 17″ fleece fabric for the bear’s body. For cutting on a Cricut Maker, you’ll need two pieces of fleece fabric, each approximately 8.5″ X 11″ for each body piece.
- 3″ X 3″ fleece, felt, leather, or other fabric for the heart.
- The final size of the small Love Bear is just over 8″ tall by 7″ wide.
Instructions for Making the Small Love Heart Bear Pattern:
Pattern Acquisition & Cutting
First, obtain the free teddy bear pattern, which is for the small size Love Bear only. It includes printable PDF pattern pieces and cut files for use with Cricut Maker or other cutting machine software.
- Cutting by Hand: Print the PDF pattern at 100% and cut out the body, heart, and nose pattern pieces.
- You have two options for cutting fabric:
- Place or pin the paper pattern pieces onto the wrong side of the fabric and trace around them with a fabric marking pen or regular pen.
- Pin the paper pattern pcs directly onto the fabric and cut around the paper.
- Cutting on a Cricut Maker: Upload the teddy bear pattern file into Cricut Design Space and place it onto the canvas. Click the “Make It” button. Prepare your Cricut FabricGrip Mat with your fabric pcs. For the teddy bear body pcs, you’ll need two pcs of fleece fabric approx. 8.5″ X 11″ for each body pc. Once mats are prepped, select materials, load the correct blade, and send it to the Cricut Maker to cut.
Assembling Face & Heart
We’ll start by adding the heart and face onto the front body pc.
- Placing the Heart: Fold the front body piece in half lengthwise with the wrong sides together and place a few pins along that fold. Unfold the body piece to reveal a pin line down the center. Measure up 2″ from the crotch of the bear and place the bottom of the heart there. Pin the heart in place. Sew around the perimeter of the heart with a 1/8″ to 1/4″ seam allowance. and backstitch to secure the threads. If using leather for the heart, it’s recommended to add some glue to the back for a temporary hold while sewing, then pull the top threads to the back and knot without backstitching.
- Adding the Nose: Add a little glue to the back of the nose pc for temp hold. Place the nose piece 2 1/8″ down from the top of the head and center horizontally. Sew the nose piece in place. If using a leather nose, pull the top threads to the back and knot; otherwise, backstitch to secure threads.
- Creating Eyes and Mouth: Use the included placement guide on the pattern pc. Place the paper pattern on top of the front body piece and clip or pin to hold. Use a pin to poke several holes along the eyes and mouth lines to create a dotted line. Connect those dots to create openings in the paper pattern. Then, use a fabric marking pen (or standard pen) to trace through the paper slits onto the fabric. Remove the paper pattern and ensure the eyes and mouth lines are visible. Add the eyes and mouth using basic embroidery stitches; a stem stitch is suggested for the eyes and a split stitch for the mouth.
Body Assembly & Finishing
- Sewing the Body: Place the front body and back body pieces with right sides facing. Pin or clip the pcs together to hold. Along the inside edge of one leg, place pins to indicate where to leave an opening for stuffing. Sew around the perimeter of the bear with a 1/4″ seam allowance. Make sure to backstitch at the beginning and end of the opening to prevent stitches from coming undone when turning. Carefully clip the seam allowance. at the corners, being careful not to cut the stitches, to help the corners lie flat after turning. Snip the seam allowance. at curves, optionally, though it’s not typically necessary for fleece fabric.
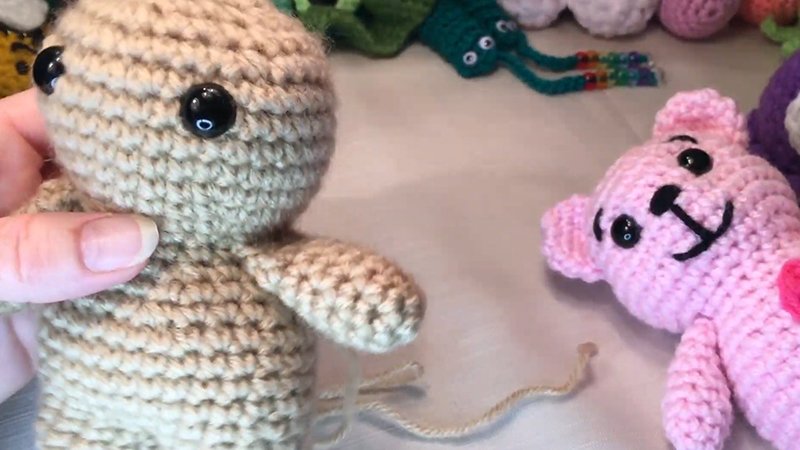
- Turning & Stuffing: Carefully turn the teddy bear right side out through the opening. Use a chopstick or similar tool to push out the ears, arms, and legs. Stuff the teddy bear with Poly-fil until it is plush but not overstuffed.
- Closing the Opening: For the last step, fold the seam allowance inside the bear and pin to hold. Sew the hole closed using a ladder stitch.
Download Free PDF: