Pattern Description:
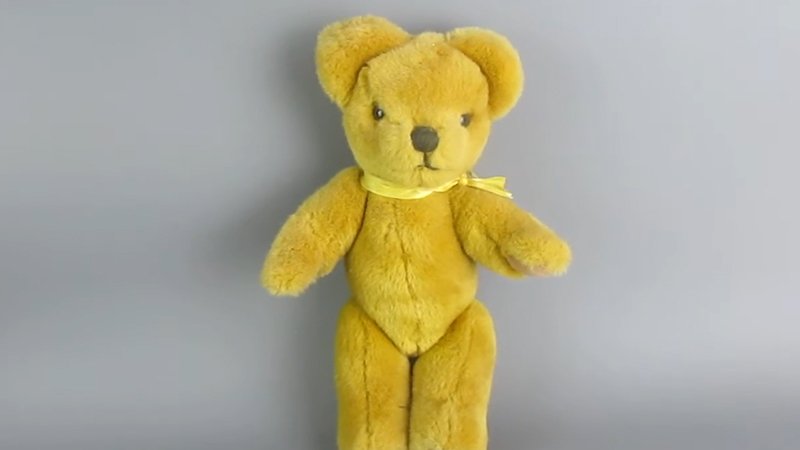
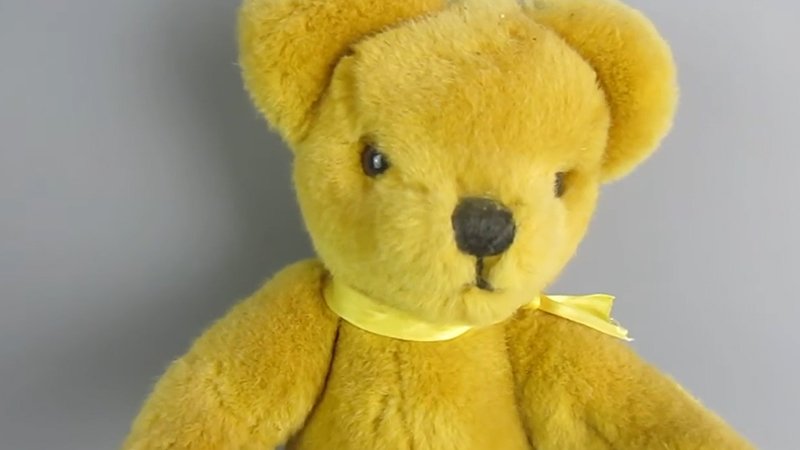
This vintage teddy bear pattern creates a charming, handmade bear standing about 12 inches tall. The design features classic proportions with a rounded head, softly stuffed limbs, and stitched details for a timeless look.
Ideal for beginner and intermediate sewists, the pattern includes head, body, arms, legs, and foot pieces to assemble a cuddly, old-fashioned toy.
Materials You Will Need:
- Fabric: A soft textile (like mohair, felt, or cotton) large enough to cut all bear parts.
- Thread: Sewing thread in a color that blends with your fabric.
- Stuffing: Polyester fiberfill (or another soft toy stuffing).
- Tools:
- Scissors or rotary cutter
- Pins or clips
- Sewing machine (or needle for hand sewing)
- Pencil/fabric marker for tracing
- Optional: Embroidery thread for the nose and mouth, safety eyes or buttons (if not stitching eyes).
Measurements:
- Finished Size: approx. 12 inches (30 cm) tall when fully stuffed.
- Pattern Printing: Print the PDF at 100% scale on A4 paper (do not resize).
- Pieces to Cut:
- Head: 2 (front & back)
- Ears: 2 (cut in pairs)
- Body: 2 (front & back)
- Arms: 4 (cut in pairs)
- Legs: 4 (cut in pairs)
- Foot soles: 2
Instructions for Making the Vintage Style Teddy Bear Pattern:
Cut Out the Pattern Pieces
Lay the paper templates on your fabric and trace carefully with a fabric marker. Be sure to mark all notches and seam allowances as indicated. From the pattern, you will cut:
- Two pieces for the head front and back.
- Two ear pieces.
- Two pieces for the body (front and back).
- Four arms and four legs.
- Two foot soles.
Remember that some pieces need to be cut in pairs to create symmetrical shapes. Once cut, pin the fabric sections in place to prevent shifting as you sew.
Assemble the Head and Face
Start with the bear’s face. Place the head pieces together, right sides facing, and stitch along the center seam. This creates the nose and mouth area. Lightly stuff the muzzle to give the face definition before closing.
Next, prepare the ears. Sew two ear pieces together, turn them right side out, and add a small amount of stuffing for volume. Attach the ears to the top of the head, positioning them symmetrically. At this stage, you can also embroider the nose and mouth or attach safety eyes for expression.
Construct the Body
Sew the front and back body pieces together, leaving openings for the arms and legs. Pay attention to alignment so the seams meet neatly at the top where the head will eventually be attached.
Once the main body shell is sewn, leave a small gap at the back seam. This opening will later allow you to insert stuffing and attach the head securely.
Sew and Attach the Arms
For each arm, stitch two pieces together, leaving the top open. After turning them right side out, stuff them with polyester fiberfill. Avoid overstuffing, as softer arms give the bear a cuddlier look.
Pin the open edges of the arms into the body openings and sew securely. Reinforce the stitching since the arms will be handled frequently when the bear is hugged or posed.
Make the Legs and Feet
As with the arms, sew two leg pieces together for each leg, leaving the top open. Before closing, attach the rounded foot soles at the bottom. This step requires careful stitching to ensure the curves align smoothly.
Turn the legs right side out, stuff them firmly, and then sew them into the lower openings of the body. The stuffed soles will help the bear sit upright once completed.
Join the Head and Body
With the body and limbs prepared, it’s time to add the head. Position the stuffed head at the top of the body opening and pin in place.
Use a ladder stitch (or a small machine stitch if preferred) to attach the two sections. The hand-sewn ladder stitch is recommended here for a seamless finish.
After the head is secured, fill the body cavity with stuffing. Work in small handfuls, pushing the fiber evenly into corners and limbs. Avoid packing the stuffing too tightly, as a slightly soft bear has more charm.
Finish and Close the Bear
Once you’re satisfied with the shape and firmness, close the opening in the back seam using an invisible hand stitch. Smooth the seams and adjust the stuffing as needed.
Add final touches such as a ribbon around the neck, small buttons, or even a stitched heart on the chest. These details enhance the vintage appeal and make your teddy bear unique.
Download Free PDF: