Pattern Description:
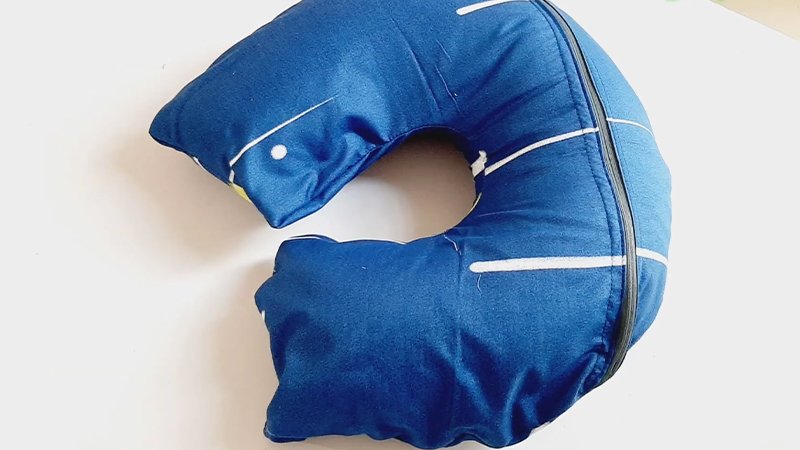
This free sewing pattern guides you through making a soft, removable neck pillowcase that provides both comfort and convenience.
Designed to fit a standard U-shaped neck pillow, this pillowcase is slightly loose to allow flexibility and a natural contour around the neck.
It’s made from quilting cotton, a breathable and durable fabric that holds its shape well while being easy to clean.
The pillowcase features a zippered back created from two rectangular fabric panels, allowing quick removal for laundering.
Materials Needed & Measurements:
- Fabric: 2 fat quarters or ½ yard (0.5 m) of quilting cotton
- Notions:
- 10-inch (25 cm) zipper
- 5 inches (12.5 cm) of ribbon
- Matching thread
- Tools:
- Sewing machine with zipper foot
- Fabric scissors or rotary cutter
- Pins or clips
- Fabric marker or chalk
- Iron and ironing board
Instructions for Making the Neck Pillowcase Pattern:

Cutting Instructions
Cut your quilting cotton into the following three rectangular pieces:
- Front piece: 16½ x 13 inches
- Back (larger piece): 16½ x 9 inches
- Back (smaller piece): 16½ x 5¼ inches
Step 1: Installing the Zipper
- Attach the zipper to the larger back piece: Place the zipper face down along the top edge of the larger back piece (16½ x 9 inches). Pin carefully, ensuring the wrong side of the zipper is facing up. Stitch in place using a zipper foot.
- Attach the smaller back piece: Align the smaller back piece (16½ x 5¼ inches) with the opposite side of the zipper, right sides together. Pin and stitch using the zipper foot.
- Create the zipper overlap: Once both sides are attached, open the fabric so the right side faces up. Fold the fabric above the zipper downward to overlap it by about 1 inch. Press neatly with an iron.
- Topstitch for a clean finish: Stitch close to the folded edge along the length of the zipper and at both ends to secure the overlap. This gives your neck pillowcase a professional finish and hides the zipper neatly.
Step 2: Shaping and Assembling the Pillowcase
- Pin and align the fabric pieces: Lay the front piece right side up and place the completed back panel right side down on top of it. Align all edges and open the zipper halfway to allow turning the cover later.
- Trace the pillow shape: Place your neck pillow on top of the pinned fabric. Flatten it slightly and trace around it with fabric chalk, leaving about ½ to 1 inch of space around the outline. This extra allowance ensures a relaxed, comfortable fit.
- Add a ribbon loop: Fold your 5-inch ribbon in half to form a small loop. Insert it between the two layers at the top of the pillow outline, with the raw ends aligned to the edge. Pin in place securely.
- Sew around the outline: Stitch along the traced outline using a straight stitch. Once complete, test the fit by slipping the pillow inside. If it fits well, reinforce the seam by stitching around the shape a second time.
- Trim and finish the edges: Trim any excess fabric, leaving a ¼ inch seam allowance, and clip the curves carefully so the seams will turn smoothly.
- Turn and press: Turn the pillowcase right side out through the zipper opening. Press all seams flat for a crisp, polished finish. Insert your neck pillow through the zipper, close it, and enjoy your new pillowcase!
Finishing Touches
To enhance durability, you can double-stitch the seams or finish them with a zigzag or serger stitch. You might also personalize your pillowcase with patterned cotton, contrast piping, or embroidered initials.
This Neck Pillowcase pattern creates a cozy, washable cover that combines practicality and comfort.
Whether for home use, long flights, or road trips, it adds a touch of handmade charm to your relaxation essentials.
Download Free PDF: