Pattern Description:
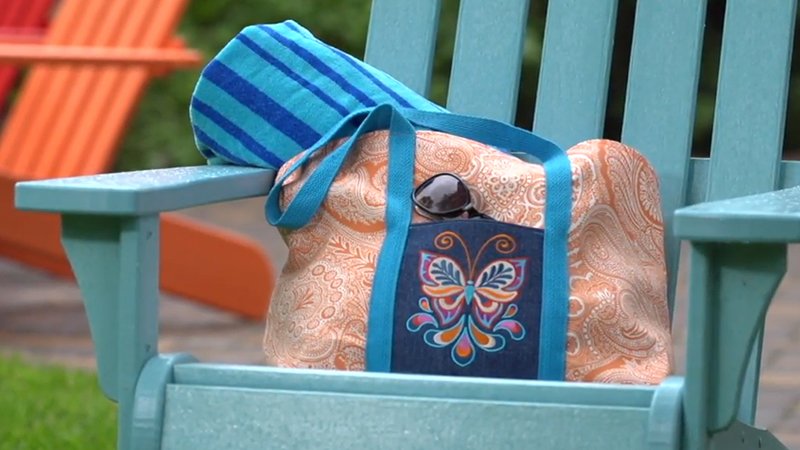
The “Strappy Bag with Pockets” is a free, easy DIY tote bag pattern. This boxy tote features pockets on both the outside and the inside, allowing customization.
It stands up on its own, stabilized by flexible foam interfacing. The pattern uses leather strips or fabric straps for handles and is designed to be sewn quickly, potentially in an afternoon. (57 words)
Materials Needed & Measurements:
Materials Needed:
- \frac{1}{2} yd exterior fabric
- \frac{1}{2} yd lining fabric
- \frac{1}{2} yd exterior pocket fabric
- \frac{1}{2} yd interior pocket fabric
- \frac{1}{2} yd flexible foam stabilizer (such as ByAnnie’s soft and stable) – 58” wide
- \frac{1}{2} yd medium weight fusible interfacing (such as Pellon SF101)
- magnetic snap
- leather pieces or strips to make 2 straps \frac{3}{4}” x 21” (fabric straps or thrifted handles are alternative options)
- a fabric marking pen
- a leather needle for your sewing machine
Finished Dimensions: 10 \frac{1}{2}” tall x 13 \frac{1}{2}” wide x 4 \frac{1}{2}” deep
Cutting Dimensions:
| Fabric/Stabilizer | Piece Description | Quantity | Dimensions |
| Exterior Fabric | Bag front and back | 2 rectangles | 11 \frac{1}{2}” x 14 \frac{1}{2}” |
| Bag sides | 2 rectangles | 11 \frac{1}{2}” x 5 \frac{1}{2}” | |
| Bag bottom | 1 rectangle | 5 \frac{1}{2}” x 14 \frac{1}{2}” (Note: Pocket fabric was used for the bag bottom in the example) | |
| Pocket Fabric | Exterior pockets (front and back) | 2 rectangles | 14” x 14 \frac{1}{2}” |
| Interior pockets | 2 rectangles | 14” x 14 \frac{1}{2}” | |
| Lining Fabric | Lining front and back | 2 rectangles | 11 \frac{1}{2}” x 14 \frac{1}{2}” |
| Lining sides | 2 rectangles | 11 \frac{1}{2}” x 5 \frac{1}{2}” | |
| Lining bottom | 1 rectangle | 5 \frac{1}{2}” x 14 \frac{1}{2}” | |
| Flexible Foam Interfacing | Bag front and back | 2 rectangles | 11 \frac{1}{2}” x 14 \frac{1}{2}” |
| Bag sides | 2 rectangles | 11 \frac{1}{2}” x 5 \frac{1}{2}” | |
| Bag bottom | 1 rectangle | 5 \frac{1}{2}” x 14 \frac{1}{2}” | |
| Medium Weight Interfacing | Exterior pockets | 2 rectangles | 7” x 14 \frac{1}{2}” (Cut 2 more if stabilizer is wanted on interior pockets) |
| Leather | Straps | 2 strips | \frac{3}{4}” x 21” |
Instructions for Making the Strappy Tote Bag With Pockets Pattern:
Make the Pockets
Begin by preparing the four pocket pieces.
For the exterior pockets, fuse a 7” x 14 \frac{1}{2}” piece of medium weight interfacing (such as Pellon SF101) to the lower half of one 14” x 14 \frac{1}{2}” pocket piece on the wrong side.
Fold the pocket piece in half, aligning the wrong sides together, so that the interfacing is sandwiched inside, and then press.
This creates a 7” x 14 \frac{1}{2}” pocket. Topstitch along the fold to finish the pocket’s top edge.
The interior pockets do not include interfacing, though you may add light or medium weight fusible interfacing if desired.
Fold and press the two 14” x 14 \frac{1}{2}” interior pocket pieces in half with wrong sides together to form two 7” x 14 \frac{1}{2}” pieces. Topstitch along the fold to create the finished top edge of the interior pockets.
Once all four pockets (two exterior and two interior) are prepared, a helpful tip is to fold each piece in half and press a vertical line down the middle; this center line will be used later for dividing the pockets.
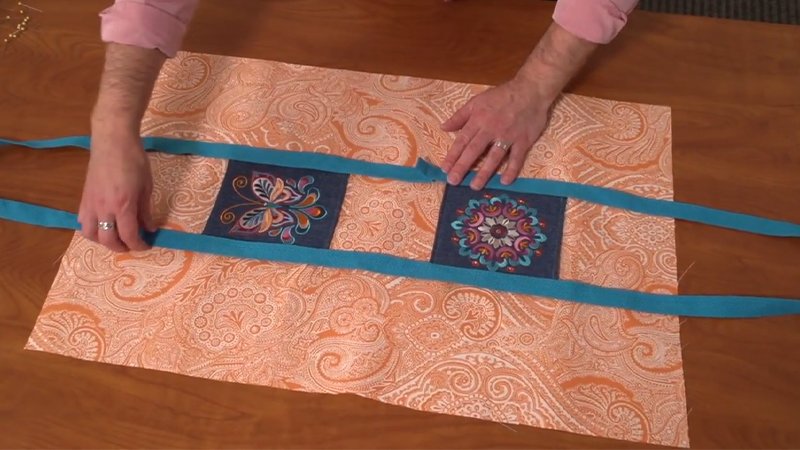
Attach the Exterior Pockets
First, stabilize the bag’s main body pieces. Baste the exterior fabric pieces (front, back, sides, and bottom) to the corresponding flexible foam interfacing pieces. Sew all the way around the edges, 1/8” to 1/4” from the edge, using a long stitch.
Next, pin the prepared exterior pockets to the bag front and back pieces. Baste the edges of the pockets to the front and back pieces, sewing 1/4” from the edge.
To divide the pockets, mark a vertical line down the center of the pocket (you can use the vertical line pressed earlier).
Sew along this center line to divide the pocket into two compartments. Repeat this process to attach and divide both exterior pockets.
Assemble the Bag Exterior
Use a 1/2” seam allowance for assembling the bag exterior.
- On the wrong side of the bag bottom piece, mark four dots in the corners, 1/2” away from the edges.
- Pin the bag bottom to the bottom edge of either the front or back piece, ensuring right sides are together. Stitch this seam, sewing from dot to dot only, do not stitch all the way across the piece.
Repeat this step to sew the other side of the bag bottom to the remaining front or back piece. Press both of these seams open.
- Mark dots 1/2” away from the lower corners only of the two side pieces.
- Sew the side pieces to the bag front, starting at the top edge and sewing down to the dot. Press these seams open.
- Fold the bag over and pin the sides to the back of the bag. Sew from the top edge down to the dot. Repeat this process on the remaining side and press the seams open.
- To finish the bottom side edges, fold the bag flat, aligning the bottom piece against one of the sides with the edges matched up. Sew the 4 \frac{1}{2}” seam from dot to dot. Repeat this step on the other side.
- Trim away the excess fabric and stabilizer at the corners to reduce bulk. Turn the completed bag right side out and gently press it.
Make the Bag Lining
Use a 1/2” seam allowance for the lining.
- Attach the interior pockets to the interior front and back lining pieces in the same manner used for the exterior pockets.
- Attach the magnetic snap pieces to the top of the front and back lining pieces. The snap should be centered and located 1 \frac{1}{2}” below the top edge.
- Mark dots 1/2” away from the corner edges on the lining bottom piece, mirroring the steps for the exterior bottom.
- Sew the lining bottom piece to a front or back lining piece in the same manner as the exterior. Crucially, leave a 6” opening in this seam for turning the bag right side out later.
- Finish sewing the rest of the lining together using the same technique as the bag exterior.
- Press the lining seams, but do not turn the lining right side out.
Sew the Lining to the Exterior
- Place the bag exterior (which is already right side out) inside the lining, matching the right sides together. Pin all the way around the top edge.
- Sew completely around the pinned top edge using a 1/2” seam allowance.
- Turn the entire bag right side out by pulling it through the 6” opening left in the lining.
- Press the raw edges at the opening inward and then close the opening, either by hand or machine-stitching.
- Press the top edge of the bag flat and then topstitch 1/4” from the edge all the way around.
Attach the Bag Handles
If using 3/4” x 21” leather strips for the handles, exercise care and avoid pinning the leather, as this creates extra holes.
- Use a fabric pen to mark the location for the strap on the bag front. The side edge of the strap should be 3 \frac{1}{2}” away from the side seam. The bottom edge of the strap should be 1 \frac{1}{2}” below the top edge of the bag.
- Install a leather needle on your sewing machine. Carefully hold the leather strap in the marked location and use matching thread to sew a square shape to secure it. Sewing around the square twice is recommended for enhanced security.
- Attach the other end of the handle strap in the same way, and then repeat this process to sew the second handle onto the back of the bag.