Cozy, Classic, and Beginner-Friendly Crochet Vest
Sweater vests are timeless — effortlessly layering over tees and button-downs for fall, winter, or even cool spring nights.
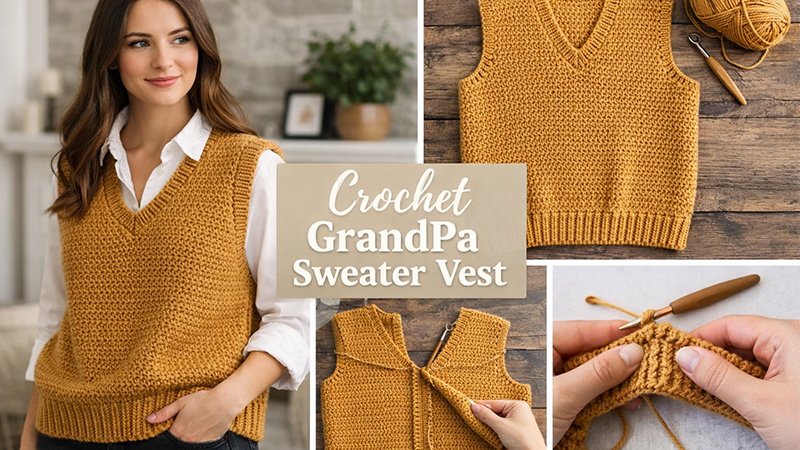
The GrandPa Sweater Vest by Carrie from Crochet with Carrie has become a favorite among crochet lovers because it’s easy to make, uses basic stitches, and works up quickly. Best of all, even a confident beginner can tackle it in just a couple days!
This pattern includes detailed written instructions, helpful tips, and sizing guidance so you can create your own classic unisex vest. We’ll walk through materials, gauge, construction, and finishing.
Materials + Tools
To start your vest, gather the following:
- Yarn: Medium-weight / worsted / aran weight yarn. Lion Brand Vanna’s Choice in Honey was used in the original sample, but any worsted weight yarn in your favorite color will work beautifully. (Crochet with Carrie)
- Hook: 5.0 mm (H/8) crochet hook — adjust if your gauge differs.
- Notions:
- Yarn needle for weaving in ends
- Stitch markers to mark shaping edges
- Measuring tape to check length and gauge
Gauge
Before beginning, check your gauge:
13 stitches × 11 rows = 4 inches in half-double crochet (hdc).
Getting this gauge means your vest will turn out true to size. If your stitches are too loose, try a smaller hook; too tight, switch to a larger hook.
Sizing
This free pattern includes sizes from Small to 2XL based on bust measurements:
| Size | Bust Fit | Back Width | Length |
|---|---|---|---|
| S | 32–34″ | 18″ | 23″ |
| M | 36–38″ | 19.5″ | 23″ |
| L | 40–42″ | 21.5″ | 24″ |
| XL | 44–46″ | 24″ | 24″ |
| 2XL | 48–54″ | 27″ | 25″ |
Stitch Glossary (US Terms)
- ch – chain
- sc – single crochet
- hdc – half double crochet
- sl st – slip stitch
- st(s) – stitch(es)
- hdc2tog – half double crochet 2 together decrease
- BLO – back loop only
Construction Overview
The vest is worked in three main stages:
- Ribbed Hem
- Body Panels (Back & Front)
- Assembly + Neck & Armhole Ribbing
The ribbing gives the vest a cozy, structured look, and the half-double crochet stitch keeps the fabric soft and drapey — perfect for layering over anything from tees to flannels.
1. Ribbed Hem
The pattern begins with a ribbed base that anchors the vest and adds visual texture.
Row 1:
- Ch 10, sc in 2nd chain from hook, sc across. Turn.
This forms the foundation for the ribbed hem.
Row 2:
- Ch 1, sc in BLO in every stitch across. Turn.
Repeat Row 2 until you have a total of: - 61 (63, 69, 77, 87) rows (depending on size). This gives you a tall, stretchy hem that sits comfortably at the hips.
2. Back Panel (Body)
Once the hem is tall enough, you’ll begin building the main back piece directly from the ribbing:
First Body Row:
- Ch 1, hdc in each stitch across along the long edge of the ribbing. Turn.
Continue:
- Ch 1, hdc in each stitch across.
- Repeat until the back measures approx 15–16″ from the hem (length changes slightly by size). Don’t fasten off yet!
Armhole Shaping (Back)
To create the arm openings:
- Next Row:
- Sl st in the next 5 (5, 7, 7, 9) sts, ch 1, hdc in same st, hdc across until you leave the last 4 (4, 6, 6, 8) sts unworked. Turn.
- Repeat:
- Ch 1, hdc across to the end. Turn.
- Continue until the armhole measures approx 8–9.5″ (size dependent). Fasten off.
3. Front Panel
The front panel begins exactly like the back:
Ribbing:
- Ch 10, sc in 2nd ch from hook, sc to end. Turn.
- Ch 1, sc in BLO across, turn — repeat until you have as many rows as you did for the back.
Body:
- Ch 1, hdc across along the long rib edge — repeat rows until the front body piece measures the same length as the back.
Front Armhole + V-Neck Shaping
This vest has a gentle V shaping in the front:
- Armhole: Sl st next 5 (5, 7, 7, 9) sts, ch 1, hdc in same st, hdc to last 4 (4, 6, 6, 8) sts.
- Neck Marker: On the next row, place a stitch marker at the middle stitch (different depending on size). This marks the center V point.
- Shaping Decreases:
- Work hdc across until 2 sts before marker, then hdc2tog. Turn.
- Next row: hdc2tog, then hdc across — continue alternating decrease rows to sculpt the V-neck until you reach the desired width.
- Length: Continue even rows (hdc across) until the shoulder height matches the back armhole. Fasten off leaving a long tail for seaming.
4. Assembly
- Place the front and back panels with right sides together.
- Use mattress stitch or whip stitch to sew the shoulders first, then the sides, leaving armholes open. Seam neatly so stitches don’t show on the outside.
5. Ribbing Finishing
Neckline
- Attach yarn at the center V.
- Ch 1, sc around the neckline — slip stitch to join.
- Repeat foundation sc + BLO ribbing rounds to create a textured rib look that frames the V.
Armhole Ribbing
- Attach yarn to the bottom of the armhole.
- Sc around, then work ribbing rounds like the neckline to match.
- Seam closed with mattress stitch for a polished finish.
Final Touches
Weave in all ends and give your vest a gentle blocking to relax stitches and even the shape. Try it on with layers — a simple long sleeve tee, button-down shirt or even a cozy turtleneck look stunning under the vest for fall and winter.