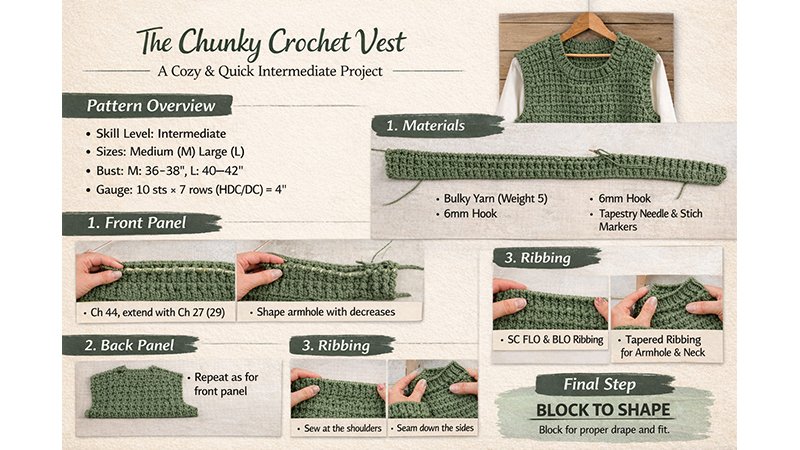
A Cozy & Quick Intermediate Project
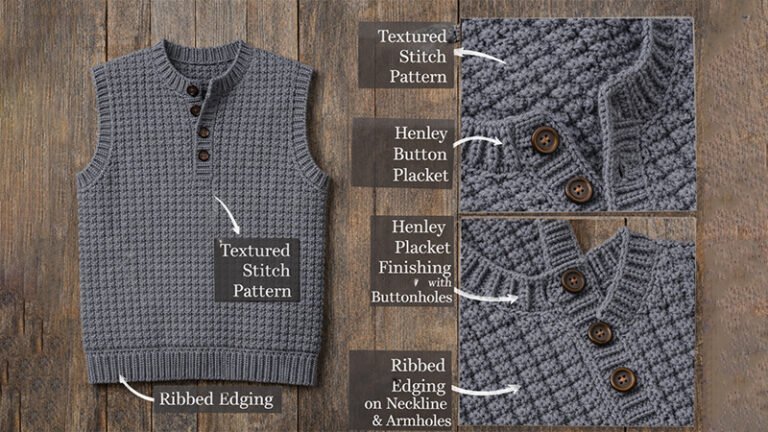
The Lorilane Chunky Crochet Sweater Vest is a stylish, quick-to-make layering piece designed for crocheters who love the softness and fast progress of chunky yarn. Named after a friend who gifted the yarn to the designer, this vest makes the perfect “gift to yourself” and pairs beautifully with both casual and dressed-up looks.
Pattern Overview
- Skill Level: Intermediate
- Sizes: Medium (M) and Large (L)
- Large instructions are written in parentheses.
- Bust Measurements:
- M: 36–38″
- L: 40–42″
- Gauge: 10 stitches × 7 rows (HDC/DC) = 4″ square
Materials
- Yarn: Bulky weight (Category 5) chunky yarn
- Sample used: Hobby Lobby I Love This Chunky in “Herb Garden”
- Approx. 5+ skeins for smaller sizes
- Hook: 6 mm
- Notions: Tapestry needle, stitch markers
Important Notes
- Written in U.S. crochet terms.
- Beginning Ch 1 and Ch 2 do NOT count as stitches unless stated otherwise.
- The front panel is identified by the HDC ribbing section.
- Blocking is essential. Chunky fabric benefits greatly from blocking to improve drape and allow ribbing to relax and stretch properly.
1. Front Panel
Base & Armhole Extension
Row 1: Ch 44. DC in 2nd ch from hook and in each ch across. Ch 2, turn.
Row 2: DC in each stitch across. Ch 2, turn.
Row 3: DC in each stitch across.
To extend armhole: Ch 27 (29), turn.
Row 4: Skip first chain, HDC in 2nd ch and each ch across. Continue HDC across remaining stitches. Ch 2, turn.
Body Texture
Rows 5–10 (12):
- Row 5: DC in Back Loops Only (BLO) across. Ch 2, turn.
- Row 6: HDC across. Ch 2, turn.
Repeat these two rows to complete Rows 5–10 (12).
Armhole Shaping
Row 11 (13):
Mark the halfway point of the armhole at stitch 13 (14).
DC across to stitch before marker.
DC2tog over next 2 stitches. Ch 1, turn.
Row 12 (14):
Skip first stitch, HDC across. Ch 2, turn.
Row 13 (15):
DC across to last 2 stitches, DC2tog over last 2 stitches. Ch 1, turn.
Rows 14 (16)–25 (27):
Alternate HDC and DC rows evenly across. Maintain stitch count. Ch 2, turn.
Shaping Opposite Armhole
Row 26 (28):
2 HDC in first stitch, HDC across. Ch 2, turn.
Row 27 (29):
DC across to last stitch, 2 DC in last stitch.
To extend second armhole: Ch 12 (13), turn.
Row 28 (30):
Skip first chain, HDC in each chain and across row. Ch 2, turn.
Rows 29 (31)–34 (38):
Alternate DC and HDC rows evenly across. Ch 2, turn.
Rows 35 (39)–37 (41):
Work 3 rows of standard DC (not BLO) across, maintaining 41 stitches.
Fasten off, leaving a long tail for seaming.
2. Back Panel
Work the back panel to mirror the front.
- Rows 1–10 (12): Repeat as for front panel.
- Rows 11 (13)–13 (15): Repeat decrease rows to match shaping.
- Rows 14 (16)–37 (41): Continue alternating HDC and DC rows, including increases at Rows 26 (28) and 27 (29), ensuring final dimensions match the front panel.
Fasten off, leaving a long tail.
3. Ribbing
Maintain even tension throughout all ribbing sections.
Bottom Ribbing
Ch 10.
Row 1: SC in 2nd ch from hook and across (9 sts). Ch 1, turn.
Row 2: SC in FLO across. Ch 1, turn.
Row 3: SC in BLO across. Ch 1, turn.
Repeat Rows 2–3 until you reach:
- 58 rows (M)
- 64 rows (L)
Do not fasten off unless instructed during assembly.
Armhole & Neckline Ribbing
Ch 6.
Row 1: SC in 2nd ch from hook and in next 3 stitches, SL ST into edge of vest to join. Turn.
Row 2: Skip SL ST, SC in BLO across. Ch 1, turn.
Row 3: SC across, SL ST into next stitch along edge of vest. Turn.
Repeat until you reach:
- Armholes: 64 (68) rows
- Neckline: 74 (76) rows
Fasten off.
4. Assembly & Joining
Bottom Ribbing
With wrong side facing up:
- Match 1 DC row to 2 SC ribbing rows
- Match 1 HDC row to 1 SC ribbing row
Sew evenly along edge.
Shoulders
Align panels with right sides together and seam shoulders securely.
Neckline
Attach ribbing with the wider SC edge joined to the vest body. The slip stitch edge should face outward.
Sides & Armholes
Seam side edges.
Optional: Leave bottom ribbing side slightly open for improved comfort and movement.
Final Step
Block your garment thoroughly.
Blocking will help the chunky fabric relax, improve drape, and ensure ribbing lays flat and closes properly at the hem.