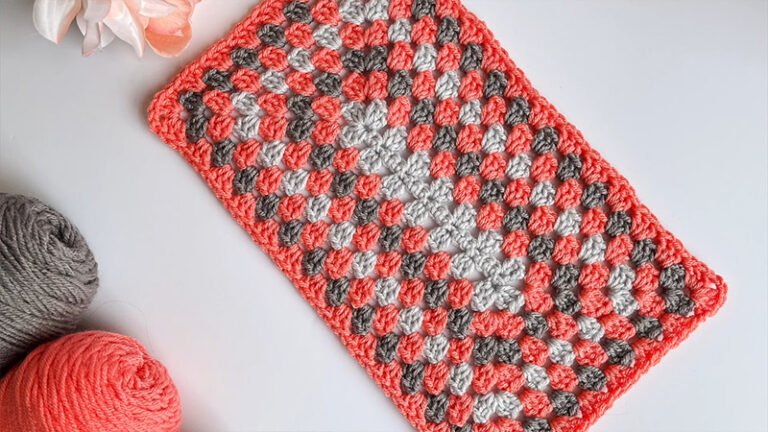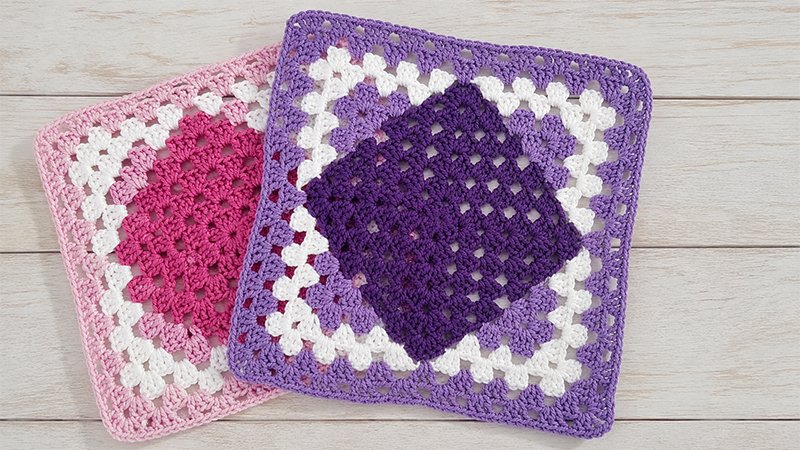
This creative pattern puts a clever twist on the classic crochet motif by rotating the central design into a striking, tilted diamond.
By extending the edges of a traditional square using targeted row extensions, you can choose between two distinct styles to square off your project: Granny Squaring (for a seamless, block-by-block extension) or Corner-to-Corner (C2C) Squaring (for a textured, modular approach).
Project Overview & Materials
-
Crochet Hook: 5.5-mm (Size I/9 US, 5 UK)
-
Yarn: Aran-weight (#4 Medium) acrylic or cotton yarn. Paintbox Yarns Simply Aran works beautifully. Pick at least three contrasting shades (Color A, Color B, and Color C) to highlight the shifting diamond design, plus a neutral border shade if desired.
-
Notions: Tapestry needle for weaving in tails, scissors, and a few stitch markers.
Key Abbreviations (US Terminology)
-
Ch: Chain
-
Dc: Double Crochet
-
MC: Magic Circle
-
Sl St: Slip Stitch
-
Sp(s): Space(s)
-
St(s): Stitch(es)
-
SK: Skip
-
YO: Yarn Over
-
RS / WS: Right Side / Wrong Side
Essential Pattern Mechanics
-
Standard Spacing: When the pattern directs you to “dc 3”, place exactly one double crochet into each of the next three consecutive stitches.
-
Grouping
[...]: Complete all commands enclosed inside square brackets into the single specified stitch or open space. -
Repetitions
(...): Repeat the sequence within the parentheses the exact number of times requested.
Part 1: The Base & The Diamond Points
The Central Base
Using Color A, construct a traditional 6-round granny square. This acts as the anchor for your tilted diamond. Secure the yarn, cut, and neatly weave in your tails.
Shaping the Tilted Points
You will now build asymmetrical extensions onto each of the four flat edges of your base square to turn it into a diamond.
Row 1 (RS)
-
Turn your base square right-side up.
-
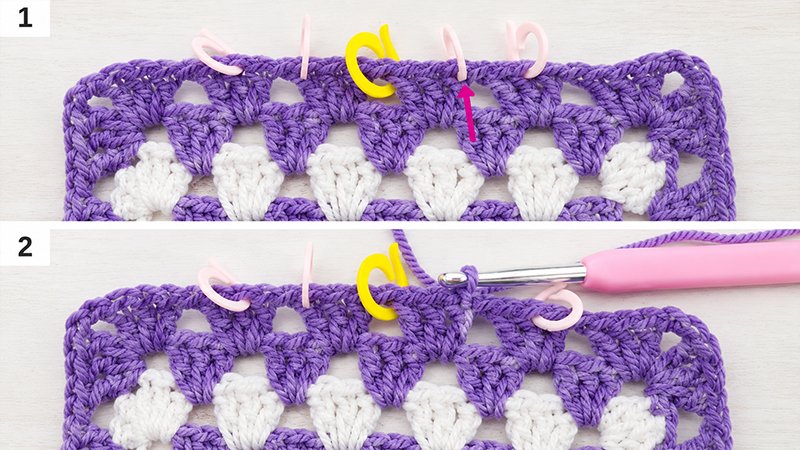
Count the 3-dc clusters along any flat edge. Attach Color B with a slip stitch into the very first double crochet of the third cluster on that side.
-
Jump over the next 3 double crochet stitches entirely.
-
Work
[dc 3, ch 2, dc 3]directly into the center-most chain-1 space of that side (mark this space if needed to stay oriented). -
Skip the next 2 stitches, then anchor the work by slip stitching into the following double crochet. (Stitch Count: 6 dc, 1 ch-2 corner space, 2 slip stitches)
Row 2 (WS)
-
To step up the height, ch 2, pass over the next chain-1 space and the next double crochet, then slip stitch into the next stitch.
-
Turn your work to the wrong side and chain 1.
-
Work
[dc 3]into the structural gap located right between the previous slip stitch and the final double crochet made in Row 1. -
Ch 1, skip 3 stitches, and work your peak corner:
[dc 3, ch 2, dc 3]into the central ch-2 space. -
Ch 1, skip 3 stitches, and place
[dc 3]into the gap between the first double crochet of Row 1 and your original yarn attachment point. -
Secure the row and fasten off. (Stitch Count: 12 dc, 2 ch-1 spaces, 1 ch-2 corner space)
Row 3 (RS)
-
Turn to the right side. Skip the next double crochet and chain-1 space from your Row 2 finish line. Join Color C into the next stitch.
-
Work
[dc 3]into the gap between the slip stitch and the first double crochet from Row 2. -
Ch 1, skip 3 stitches, and work
[dc 3]in the next chain-1 space. -
Ch 1, skip 3 stitches, then work your peak corner:
[dc 3, ch 2, dc 3]into the central ch-2 point. -
Ch 1, skip 3 stitches, and work
[dc 3]in the next chain-1 space. -
Ch 1, skip 3 stitches, and place
[dc 3]into the gap between the initial double crochet and the first slip stitch of Row 2. -
Skip the next double crochet and chain-1 space on your original 6-round base square, then anchor with a slip stitch into the next stitch. (Stitch Count: 18 dc, 4 ch-1 spaces, 1 ch-2 corner space)
Row 4 (WS)
-
Ch 2, skip the next 2 double crochets, and slip stitch into the next ch-2 space to step up.
-
Turn your work to the wrong side and chain 1.
-
Place
[dc 3]into the gap between the slip stitch and the last double crochet from Row 3. -
(Ch 1, skip 3, [dc 3] in the next ch-1 space)repeat this sequence a total of 3 times. -
Create your peak point:
[dc 3, ch 2, dc 3]in the central ch-2 space. -
(Ch 1, skip 3, [dc 3] in the next ch-1 space)repeat this sequence a total of 3 times. -
Finish the row by working
[dc 3]into the final gap between the first double crochet of Row 3 and the initial connection point of Color C. -
Fasten off. (Stitch Count: 32 dc, 6 ch-1 spaces, 1 ch-2 corner space)
Note: Repeat Rows 1 through 4 on all four flat edges of your original base square, then thoroughly weave in all yarn ends.
Part 2: Squaring Off Your Project
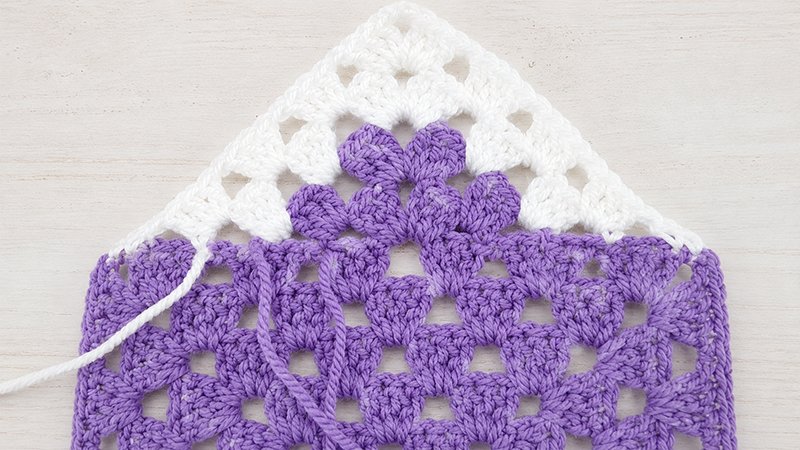
Choose Option A for a standard, uniform look or Option B for an angular, geometric texture.
Option A: The Granny Stitch Extension
Round 5 (RS)
Join Color B into any outer ch-2 corner peak.
-
Start: Ch 4 (acts as 1 dc + ch 2), then work
[dc 3]back into that same corner space. -
The Sides:
*(Ch 1, skip 3, [dc 3] in the next ch-1 space)*repeat 3 times. Ch 1, skip 3, and work[dc 3]directly into the valley where the extensions meet the initial base square.*(Ch 1, skip 3, [dc 3] in the next ch-1 space)*repeat 3 times. -
The Corners: Ch 1, skip 3, then work
[dc 3, ch 2, dc 3]into the next corner peak. -
To Finish: Repeat this pattern around. On the final side, work your final repeats, then place
[dc 2]into your very first starting corner space. Sl st into the 3rd chain of your starting chain-4 to close. (27 dc and 8 ch-1 spaces per flat side)
Round 6 (RS)
-
Sl st forward into the corner space. Ch 4 (acts as 1 dc + ch 2), and place
[dc 3]in the same space. -
*(Ch 1, skip 3, [dc 3] in the next ch-1 space)*repeat 8 times down the side. -
Work
[dc 3, ch 2, dc 3]into the next corner. -
Complete the cycle around the square. At the final corner, work
[dc 2], then sl st into the 3rd chain of your starting chain-4 to close. Fasten off. (30 dc and 9 ch-1 spaces per side)
Option B: The Corner-to-Corner (C2C) Fill-In
For this method, you will fill in the triangular gaps on each side individually using decreasing rows. Turn your piece right-side up and attach your yarn to any outer ch-2 corner peak.
-
Row 1 (RS): Ch 3 (this counts as your first dc throughout this section).
*(Skip 3, [dc 3] in the next ch-1 space, ch 1)*repeat 5 times total. Skip the next 3 stitches, work[dc 3]in the last ch-1 space, and finish with a singledc 1right into the next corner ch-2 space. Turn. (20 dc, 5 ch-1 spaces) -
Row 2 (WS): Ch 3, turn.
*(Skip 3, [dc 3] in the next ch-1 space, ch 1)*repeat 4 times total. Skip 3, work[dc 3]in the final ch-1 space, then place a singledc 1in the gap between the last two double crochets of the row below. Turn. (17 dc, 4 ch-1 spaces) -
Row 3: Ch 3, turn.
*(Skip 3, [dc 3] in the next ch-1 space, ch 1)*repeat 3 times total. Skip 3, work[dc 3]in the last ch-1 space, thendc 1between the final two stitches. Turn. (14 dc, 3 ch-1 spaces) -
Row 4: Ch 3, turn.
*(Skip 3, [dc 3] in the next ch-1 space, ch 1)*repeat twice. Skip 3, work[dc 3]in the last ch-1 space, thendc 1between the final two stitches. Turn. (11 dc, 2 ch-1 spaces) -
Row 5: Ch 3, turn. Skip 3,
[dc 3]in the next ch-1 space, ch 1, skip 3,[dc 3]in the next ch-1 space, thendc 1between the final two stitches. Turn. (8 dc, 1 ch-1 space) -
Row 6: Ch 3, turn. Skip 3,
[dc 3]in the final open ch-1 space, thendc 1between the final two stitches. Turn. (5 dc) -
Row 7: Ch 3, turn. Secure the point with 1 sl st between the last two double crochets. Fasten off. (3 chains total)
Note: Repeat Rows 1–7 inside all four open side sections to completely square off your motif.
Part 3: The Final Framing Border
If you chose the C2C squaring option, adding this final frame gives your squares a clean edge that makes joining them into a blanket incredibly simple.
Round 8 (RS)
Join your framing or joining yarn (such as a solid cream or neutral shade) into any ch-3 corner space created during the squaring process.
-
The Corner Start: Ch 4 (counts as 1 dc + corner space), then work
[dc 3]back into that same corner space. -
The Sides: Along the flat edge, work
([dc 3], ch 1)exactly 9 times evenly across into the side spaces. -
The Remaining Corners: When you reach the next corner ch-3 space, work
[dc 3, ch 2, dc 3]. -
Closing: Repeat this sequence around your remaining sides. When you return to your starting corner, work
[dc 2]into the space, then slip stitch into the 3rd chain of your initial chain-4 to close the square.
Fasten off your yarn, weave in any remaining loose ends, and lightly block your finished square to set the crisp, diamond-in-a-square geometry!