Pattern Description:
The Rectangle Granny is a beautiful twist on the classic Granny Square, perfect for beginners who want to make rectangular projects such as blankets, table runners, mug rugs, or bookmarks.
It’s created using treble crochet clusters with increases at the corners to keep the shape neat and even.
The best part is that you can easily adjust the size by changing the length of your starting chain, as long as it follows a multiple of 3 plus 2.
Materials Needed & Measurements:
- Yarn: Stylecraft Special DK or any DK weight yarn of your choice
- Hook: 4 mm crochet hook
- Sample Colours: Palma Violet, Blush, Plum
- Alternative Yarn: Paintbox Simply DK works beautifully for blankets
- Tapestry Needle: For weaving in ends
- Scissors
Abbreviations
- ch – chain
- dc – double crochet
- tr – treble crochet
- ss – slip stitch
- sp – space
(Note: 3 tr worked together in the same space counts as one cluster.)
Instructions for Making the Rectangle Granny Pattern:
Foundation Chain
The foundation chain determines the length of your rectangle. Make a starting chain that is a multiple of 3 + 2.
No. of Treble Clusters (long side)Starting Chain49 + 2512 + 2615 + 2718 + 2821 + 2924 + 2
For example, to make a rectangle with 7 clusters along each long side, chain 20 (18 + 2).
Setup Row
- Begin by working 1 dc into the second ch from hook.
- Work 1 dc into each remaining chain across.
- Turn your work. You should now have 18 dc stitches plus your turning chain if following the 7-cluster sample.
This forms a firm foundation for your first granny round.
Round 1: Establish the Rectangle Shape
- Ch 3 (counts as 1 tr).
- Work 2 tr into the same stitch – this forms your first cluster.
- Skip 2 dc, then 3 tr into the next dc – repeat this pattern (skip 2, 3 tr in next) across the row until 1 dc remains.
- In the last dc, work 3 tr, ch 2, 3 tr – this creates your first corner.
- Rotate your work so you can crochet along the other side of the foundation chain.
- Skip 2 dc, 3 tr in next dc across to the start of the chain.
- In the first stitch, work 3 tr, ch 2, 3 tr – this forms the second corner.
- Ch 2 at each corner and join with ss to top of beginning ch-3.
You now have 7 clusters on each long side and 1 cluster on each short side.
Round 2: Building the Next Layer
- Ss across to the next corner ch-2 sp.
- Ch 3, work 2 tr in same sp, ch 2, 3 tr again – this forms your corner cluster.
- Ch 1, 3 tr in next space between clusters, ch 1 – repeat along the long side.
- At each corner, work (3 tr, ch 2, 3 tr).
- Continue this pattern around.
- Join with ss to the top of beginning ch-3.
You now have 8 clusters along each long side and 2 clusters along each short side.
Round 3 and Beyond
Each new round follows the same rhythm:
- Work a corner cluster (3 tr, ch 2, 3 tr) into each corner ch-2 space.
- Along the sides, work (3 tr, ch 1) in each ch-1 space between clusters from the previous round.
- Always end with a ss to join the round.
This continual increase at each corner allows the rectangle to grow evenly without distorting shape.
Changing Colours
To add stripes or colour transitions:
- Fasten off your yarn at the end of a round.
- Join your new colour in any corner ch-2 space.
- Continue as before, maintaining the same stitch pattern.
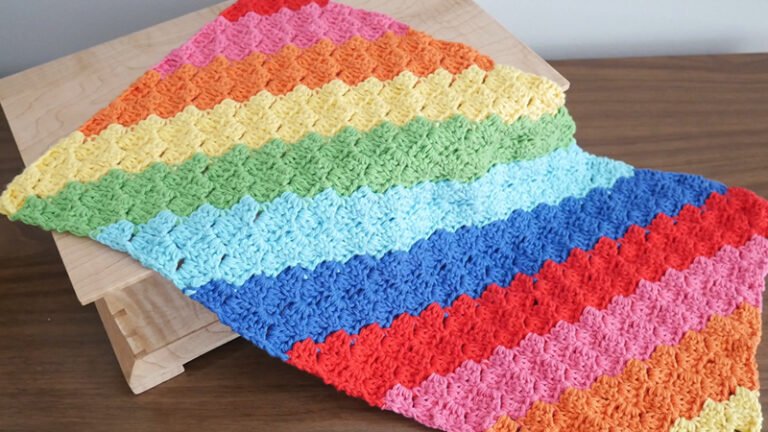
Alternate between two or three shades for a coordinated look, or use scraps for a vibrant, multicoloured blanket.
Finishing Touches
When your rectangle reaches the desired size:
- Work one final round of dc stitches evenly around the edge to create a neat border.
- Fasten off and weave in all ends using a tapestry needle.
- Gently block your piece to straighten the edges and enhance stitch definition.
Customisation Ideas
- Blanket: Continue adding rounds until the rectangle reaches blanket size.
- Bookmark: Stop after 3-4 rounds for a slim, delicate design.
- Cushion Cover: Make two rectangles of equal size and join them.
- Table Runner: Work a long foundation chain and fewer rounds for a perfect decorative piece.
Final Notes
The Rectangle Granny pattern is a relaxing and repetitive project that builds rhythm with every round.
Once you’ve mastered the increases at the corners, you can experiment with colours, textures, and yarn weights to make it truly your own.
Whether you’re crafting a cosy throw or a quick handmade gift, this timeless motif will become a staple in your crochet collection.