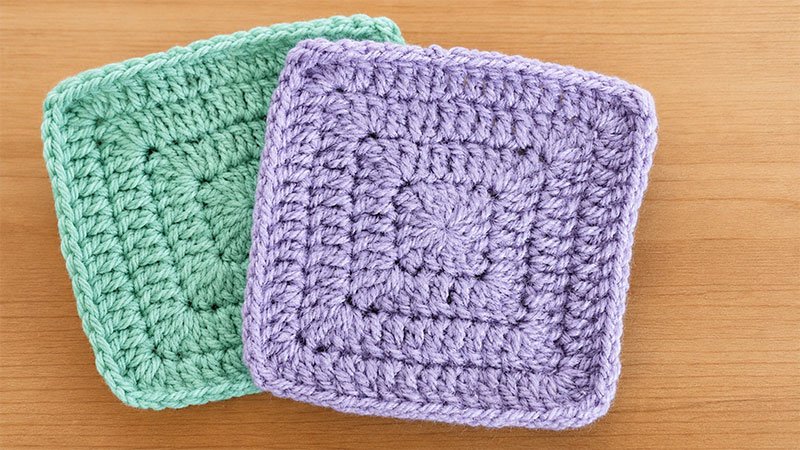
If you love the plush, soft texture of double crochet but hate the little holes that traditional granny squares leave behind—especially in the corners—this seamless, gap-free solid square is your perfect solution.
By replacing the usual corner chain spaces with a clever combination of stitches, this pattern creates a dense, solid fabric that is ideal for warm blankets, sturdy tote bags, and cozy garments.
Materials & Essentials
-
Yarn: Any weight works, but an Aran-weight (Weight 4) yarn gives it a beautiful, sturdy structure.
-
Hook: A 5.5 mm (US I/9) crochet hook (or the size recommended for your chosen yarn).
-
Tools: A tapestry needle for weaving in ends and a pair of scissors.
Stitch Key (US Terminology)
-
MC: Magic Circle (or Magic Ring)
-
Ch: Chain
-
Sl St: Slip Stitch
-
Dc: Double Crochet
-
Tr: Treble (Triple) Crochet
Helpful Pattern Notes
-
The Invisible Chain-2: The at the start of each round is used purely to bring your yarn up to the correct height. It never counts as an actual stitch, so do not skip it or stitch into it on your way back around.
-
Corner Formula: The magic to keeping this square gap-free is working
[2 dc, 1 tr, 2 dc]all into the exact same stitch at every corner. The treble crochet acts as the anchor point for the next round’s corner. -
Stitch Multipliers:
-
Dc 3means work one double crochet into each of the next three stitches. -
Brackets
[...]mean all of those stitches are crammed into a single stitch.
-
Detailed Step-by-Step Tutorial
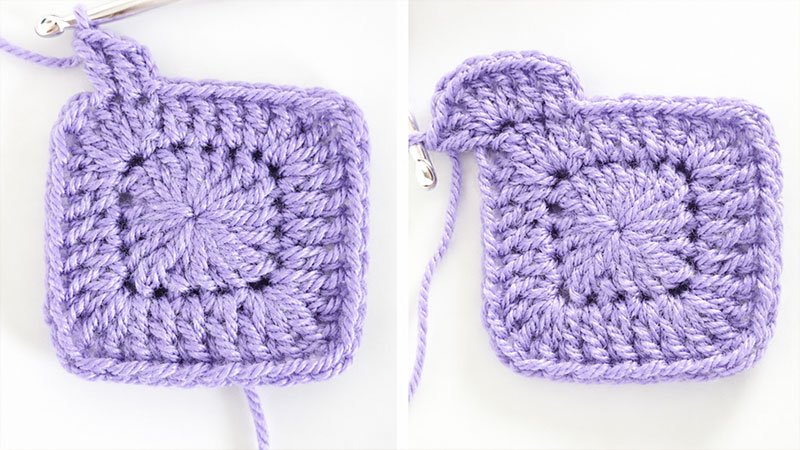
Round 1: Setting the Foundation
To begin, we will establish the four distinct corners and sides inside a adjustable loop.
-
Form a Magic Circle and secure it with a ch 2 (remember, this doesn’t count as a stitch).
-
Inside the circle, work 1 treble crochet, followed by 3 double crochets. This creates your first corner and your first side.
-
Repeat that exact sequence—(1 tr, 3 dc)—three more times around the circle. You will have a total of 4 trebles and 12 double crochets.
-
Pull the tail of your magic circle firmly to close the center hole completely.
-
Slip stitch into the very first treble crochet of the round to close.
-
Stitch Count: 3 dc per side, with 1 tr at each of the 4 corners.
Round 2: Expanding the Corners
In this round, we expand the sides from 3 stitches to 7 stitches by multiplying the corner work.
-
Ch 2.
-
Look at the very first stitch (the treble from the previous row). In that single stitch, work your first gap-free corner: 2 dc, 1 tr, and 2 dc all together.
-
Work 1 dc into each of the next 3 stitches along the side.
-
Repeat this entire sequence [Corner group in the tr, 1 dc in each of the 3 side stitches] around the remaining three sides of your square.
-
Join with a slip stitch into the top of the first stitch of the round.
-
Stitch Count: 7 dc per side, with 1 tr at each of the 4 corners.
Round 3: Growing the Sides
Now that the square is larger, you will start the round a couple of stitches before reaching the first corner.
-
Ch 2, then work 1 dc into each of the first 2 stitches.
-
You have reached the corner treble. Inside it, work your corner group: [2 dc, 1 tr, 2 dc].
-
Work 1 dc into each of the next 7 stitches along the side to reach the next corner.
-
Repeat the [Corner group in the tr, 7 dc along the side] process 3 times.
-
For the final side, work your last corner group into the final treble, then work 1 dc into the remaining 5 stitches. (Combined with the 2 dc you started with, this completes your final 7-stitch side).
-
Join with a slip stitch to close the round.
-
Stitch Count: 11 dc per side, with 1 tr at each of the 4 corners.
How to Continue Growing Your Square
You can make this square as massive as you’d like! Notice that each round adds exactly 4 double crochets to every side of the square (going from 3 to 7, then 7 to 11, then 11 to 15, and so on).
To keep expanding, simply:
-
Start the round with a ch 2.
-
Work 1 dc into every double crochet from the row below until you hit a corner treble.
-
Work
[2 dc, 1 tr, 2 dc]directly into the top of that corner treble. -
Repeat this method all the way around, fastening off with a slip stitch when your square reaches your desired size!