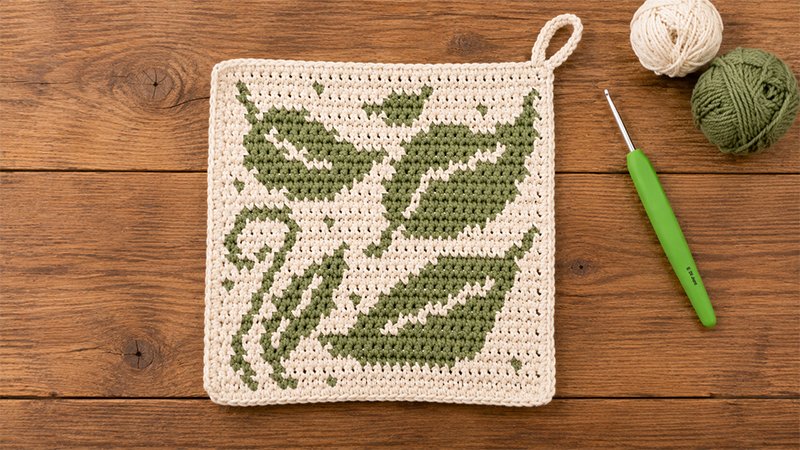
This intermediate tapestry crochet pattern creates a thick, functional potholder featuring a modern swirling leaves design. Worked flat using medium-weight cotton yarn and standard single crochet stitches, the color changes create a striking graphic effect. A simple integrated border and practical hanging loop complete this durable, heat-resistant kitchen accessory.
Pattern Overview
-
Skill Level: Intermediate (due to frequent color carries and changes).
-
Finished Size: Approximately 6.25 inches square.
-
Gauge: About 22.5 single crochets across and 21 rows up for a 4-inch square. Keeping a consistent tension ensures your potholder stays flat and square.
Materials & Tools
-
Hook: 3.5 mm (Size E)
-
Yarn: Medium-weight (Aran/Group 4) 100% cotton yarn. Cotton is essential because synthetic fibers like acrylic can melt under high heat. You will need about 30 yards of Color A (Natural/Base) and 32 yards of Color B (Green/Pattern).
-
Notions: A blunt tapestry needle for sewing in the yarn tails, and a pair of scissors.
Core Techniques
-
Tapestry Color Changes: Change your yarn color on the final pull-through of the stitch before the change. For example, to switch from Natural to Green: insert hook, pull up a loop of Natural, then yarn over with Green and pull through both loops to complete the stitch.
-
Carrying Yarn: Lay the color you aren’t using across the top of the previous row. Work your single crochets over this strand to trap it inside your stitches until you need it again.
-
Turning: At the end of every row, make 1 chain space and turn your work. This turning chain does not count as a stitch; start your next row in the very first stitch available.
Step-by-Step Instructions
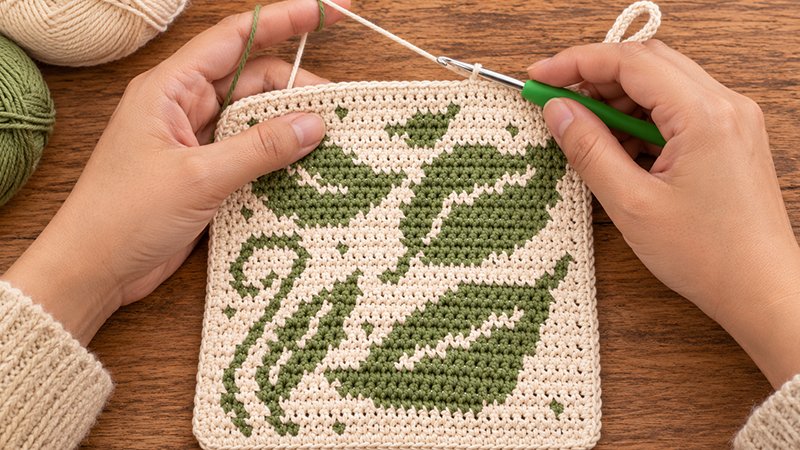
Section 1: The Potholder Body
All rows maintain a constant count of 34 stitches. Odd rows represent the front side (Right Side); even rows represent the back side (Wrong Side).
Using Color A, start by chaining 35.
-
Row 1 (RS): Begin in the second chain from the hook. Work 21 single crochets with A. Switch to B for 1 stitch. Switch back to A for 3 stitches. Work 2 stitches in B, 2 stitches in A, 1 stitch in B, and finish the row with 4 stitches in A.
-
Row 2 (WS): Work 3 stitches in A, 1 in B, 2 in A, 1 in B, and finish with 27 stitches in A.
-
Row 3 (RS): Work 2 in A, 1 in B, 6 in A, 10 in B, 8 in A, 1 in B, 2 in A, 2 in B, and 2 in A.
-
Row 4 (WS): Work 2 in A, 1 in B, 2 in A, 3 in B, 4 in A, 15 in B, and 7 in A.
-
Row 5 (RS): Work 6 in A, 17 in B, 2 in A, 2 in B, 1 in A, 1 in B, 2 in A, 1 in B, and 2 in A.
-
Row 6 (WS): Repeat the sequence of (2 in A, 1 in B) twice. Then work 1 in A, 3 in B, 4 in A, 3 in B, 2 in A, 9 in B, and 6 in A.
-
Row 7 (RS): Work 5 in A, 7 in B, 3 in A, 4 in B, 4 in A, 3 in B, 1 in A, 2 in B, 1 in A, 1 in B, and 3 in A.
-
Row 8 (WS): Work 3 in A, 1 in B, 2 in A, 2 in B, 1 in A, 3 in B, 4 in A, 5 in B, 3 in A, 5 in B, and 5 in A.
-
Row 9 (RS): Work 4 in A, 4 in B, 2 in A, 7 in B, 2 in A, 1 in B, 2 in A, 2 in B, 1 in A, 3 in B, 1 in A, 1 in B, and 4 in A.
-
Row 10 (WS): Work 4 in A, 1 in B, 2 in A, 2 in B, 1 in A, 2 in B, 6 in A, 7 in B, 3 in A, 2 in B, and 4 in A.
-
Row 11 (RS): Work 3 in A, 2 in B, 1 in A, 8 in B, 7 in A, 2 in B, 1 in A, 2 in B, 2 in A, 1 in B, 3 in A, 1 in B, and 1 in A.
-
Row 12 (WS): Work 5 in A, 1 in B, 3 in A, 4 in B, 8 in A, 10 in B, and 3 in A.
-
Row 13 (RS): Work 3 in A, 8 in B, 10 in A, 2 in B, 4 in A, 1 in B, 2 in A, 2 in B, and 2 in A.
-
Row 14 (WS): Work 1 in A, 1 in B, 2 in A, 1 in B, 1 in A, 1 in B, 5 in A, 1 in B, 2 in A, 2 in B, 13 in A, 2 in B, and 2 in A.
-
Row 15 (RS): Work 1 in A, 1 in B, 14 in A, 1 in B, 9 in A, 1 in B, 5 in A, 1 in B, and 1 in A.
-
Row 16 (WS): Work 1 in A, 1 in B, 5 in A, 1 in B, 9 in A, 1 in B, 1 in A, 6 in B, 7 in A, 1 in B, and 1 in A.
-
Row 17 (RS): Work 6 in A, 10 in B, 6 in A, 1 in B, 3 in A, 1 in B, 4 in A, 1 in B, and 2 in A.
-
Row 18 (WS): Work 2 in A, 5 in B, 10 in A, 2 in B, 1 in A, 9 in B, and 5 in A.
-
Row 19 (RS): Work 4 in A, 9 in B, 1 in A, 3 in B, and 17 in A.
-
Row 20 (WS): Work 7 in A, 5 in B, 5 in A, 3 in B, 1 in A, 10 in B, and 3 in A.
-
Row 21 (RS): Work 3 in A, 9 in B, 1 in A, 4 in B, 3 in A, 9 in B, 2 in A, 1 in B, and 2 in A.
-
Row 22 (WS): Work 4 in A, 11 in B, 3 in A, 3 in B, 3 in A, 8 in B, and 2 in A.
-
Row 23 (RS): Work 2 in A, 5 in B, 3 in A, 6 in B, 2 in A, 4 in B, 3 in A, 6 in B, and 3 in A.
-
Row 24 (WS): Work 3 in A, 4 in B, 2 in A, 8 in B, 2 in A, 7 in B, 3 in A, 3 in B, and 2 in A.
-
Row 25 (RS): Work 1 in A, 3 in B, 1 in A, 10 in B, 5 in A, 6 in B, 2 in A, 3 in B, and 3 in A.
-
Row 26 (WS): Work 3 in A, 2 in B, 1 in A, 6 in B, 8 in A, 13 in B, and 1 in A.
-
Row 27 (RS): Work 1 in A, 4 in B, 3 in A, 4 in B, 11 in A, 7 in B, and 4 in A.
-
Row 28 (WS): Work 3 in A, 1 in B, 1 in A, 4 in B, 8 in A, 3 in B, 11 in A, 2 in B, and 1 in A.
-
Row 29 (RS): Work 1 in A, 1 in B, 4 in A, 1 in B, 6 in A, 6 in B, 11 in A, 1 in B, and 3 in A.
-
Row 30 (WS): Work 2 in A, 1 in B, 14 in A, 4 in B, 11 in A, 1 in B, and 1 in A.
-
Row 31 (RS): Work 12 in A, 1 in B, 10 in A, 1 in B, 7 in A, 1 in B, and 2 in A.
-
Row 32 (WS): Work all 34 stitches using only Color A.
Section 2: Border & Finishing Touch
Cut Color B and pull it through tightly to fasten off; you will only use Color A for the rest of the project. Chain 1 and turn your work to face the Right Side.
-
Border Round 1 (RS): Single crochet in each of the 34 stitches across the top edge. At the corner stitch, chain 1 to turn the corner. Continue down the side edge, placing 32 single crochets evenly spaced along the row-ends. Chain 1 at the next corner. Work 34 single crochets along the bottom foundation chain. Chain 1 at the third corner. Work 32 single crochets up the remaining side edge. Finish with a final chain 1, then secure the round by making a slip stitch into the very first single crochet you made.
-
Hanging Loop: Chain 1 and turn back to the Wrong Side. Chain 14 more stitches (creating a total chain of 15). Anchor this chain by slip-stitching it into the adjacent border stitch to create a loop opening. Chain 1 and turn back to the Right Side. Fill the loop securely by working 18 single crochets directly into the chain ring.
Fasten off your yarn, weave all loose strands securely into the stitches on the back side with your tapestry needle, and trim away any excess. Your hot pad is ready for use.