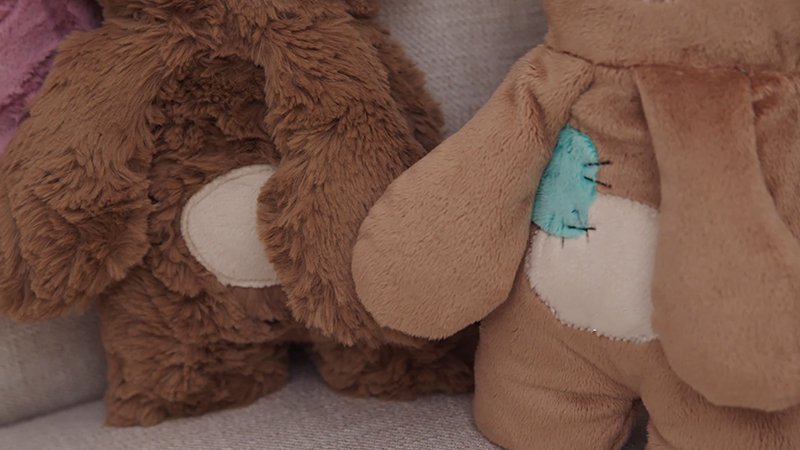
The Kimberbear pattern creates a soft, huggable teddy made from plush Minky fabric. Featuring a stitched muzzle, embroidered details, and an optional heart accent, it’s designed to comfort children and inspire generosity.
The pattern is beginner-friendly, requiring basic sewing skills, and produces a cuddly toy perfect for gifts, donations, or personal keepsakes.
Materials Needed & Measurements:
Materials Needed:
- Body fabric: A soft Luxe Cuddle® Heather fabric (such as Frappe or Quartz) for the main bear and muzzle.
- Heart fabric: Small piece of Cuddle® 3 (in Shell, Coral, or similar shade) for the chest heart.
- Nose fabric: A dark scrap of Cuddle® 3 (like Chocolate) to create the nose.
- Stuffing: Fairfield Poly-Fil® fiberfill to give the bear its shape and softness.
- Basic sewing tools: Clips, needles, scissors, or other Clover® sewing notions recommended in the pattern.
Measurements:
- Main fabric use: About 1 yard of Luxe Cuddle® minky makes up to four complete bears.
- Accent fabrics (heart and nose): Only small leftover pieces are required.
- Finished size: Each Kimberbear turns into a small plush companion sized just right for children to hold and cuddle.
Abbreviations Used:
- RS – Right Side (the front/outer side of the fabric)
- WS – Wrong Side (the back/inner side of the fabric)
- SA – Seam Allowance
- B/S – Backstitch
- Cl – Clip
Instructions for Making the Minky Fabric Teddy Bear Pattern:
Cutting the Fabric Pieces
Follow the pattern provided to cut out all the bear parts:
- 2 body pieces (front & back)
- 4 arms (2 pairs, mirrored)
- 4 legs (2 pairs, mirrored)
- 2 ear pieces
- 1 muzzle piece
- 1 heart piece
- 1 small nose piece
- Remember: Always cut with the nap (fabric direction) consistent so the bear feels smooth. Use fabric clips instead of pins to avoid leaving holes in Minky.
Sewing the Arms and Legs
- Place each pair of arm pieces RS together.
- Stitch around the edges, leaving the top open (SA about ¼”).
- Repeat with the leg pieces.
- Turn each piece RS out, gently pushing out the curves with a blunt tool.
- Lightly stuff with Poly-Fil® (don’t overfill yet).
Creating the Ears and Muzzle
- Place the ear pieces RS together, sew around the curve, and turn RS out.
- Press gently with your fingers (avoid heat pressing Minky).
- For the muzzle, sew around the edge and attach it to the front body piece, topstitching in place.
- Sew the small fabric nose onto the muzzle using a zigzag stitch or satin stitch.
Attaching the Heart Detail
- Position the heart on the bear’s chest (front body piece).
- Topstitch carefully around the heart edges with a short, tight stitch.
- Use B/S at the beginning and end to secure stitches.
Assembling the Body
- Place the two body pieces RS together.
- Insert the ears at the top, pointing inward between the layers.
- Place arms and legs at the sides, also tucked inward, with raw edges aligned.
- Clip everything securely.
- Stitch around the bear, leaving a small opening at the side or back for turning.
Turning and Stuffing
- Turn the bear RS out through the opening.
- Use a blunt tool to push out corners, ears, and curves.
- Gradually stuff the body with Poly-Fil®, starting with the limbs, then moving to the torso and head.
- Keep stuffing until the bear is plump but still huggable.
Closing the Opening
- Fold the raw edges of the opening inward (WS hidden).
- Use a ladder stitch (invisible hand stitch) to close neatly.
- Knot securely and hide the thread tail inside the stuffing.
Finishing Touches
- Fluff the bear by gently brushing the Minky fur with your fingers.
- Add embroidered eyes (safety eyes are discouraged for small children, so embroidery is safer).
- Adjust stuffing if needed by massaging the body evenly.
Care and Gifting
- The finished Minky bear is machine washable on a gentle cycle (inside a pillowcase).
- Air-dry or tumble on low.
- Package the bear with love, whether for a child in need, a hospital patient, or as a heartfelt handmade gift.