
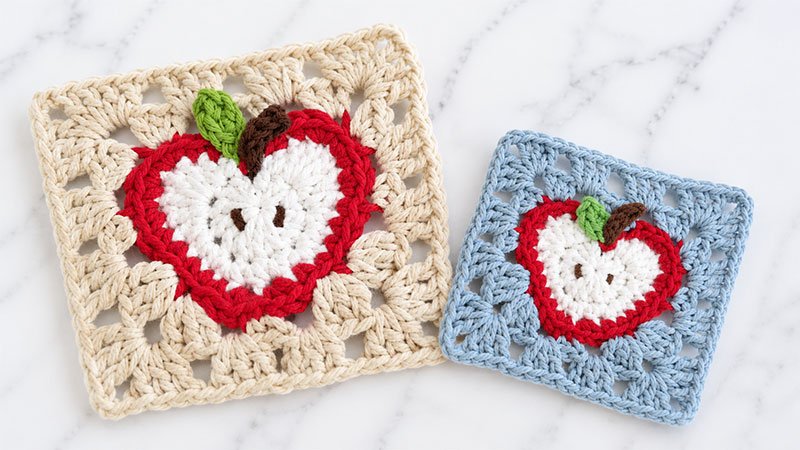
This charming crochet pattern creates a classic granny square with, textured apple sitting right in the center.
Worked from the inside out, you will first craft the apple shape using a magic ring and clever stitch heights, before transforming the round shape into a crisp square.
Perfect for autumnal blankets, festive dishcloths, or whimsical tote bags, this design beautifully blends color changes and basic stitches to create a delightful 3D effect.
Materials & Tools
-
Yarn: Aran weight (Medium, Size 4) cotton or acrylic yarn.
-
Colors needed: Background color (Off-white/Cream), Apple body (Red or Green), Apple core background (Light cream), Stem (Brown), and Leaf (Green).
-
-
Hook Size: 4.5 mm (US 7) crochet hook
-
Notions: Tapestry needle for weaving in ends and embroidering the seeds, scissors.
Pattern Abbreviations (US Terms)
-
Ch: Chain
-
Sc: Single crochet
-
Hdc: Half double crochet
-
Dc: Double crochet
-
Sl St: Slip stitch
-
BLO: Back loop only
-
Inc: Increase (2 stitches worked into the same stitch)
-
MC: Magic Circle / Adjustable Ring
-
Sp: Space
-
St(s): Stitch(es)
-
[ ]: Work all instructions inside these brackets into the exact same stitch.
Step-by-Step Instructions
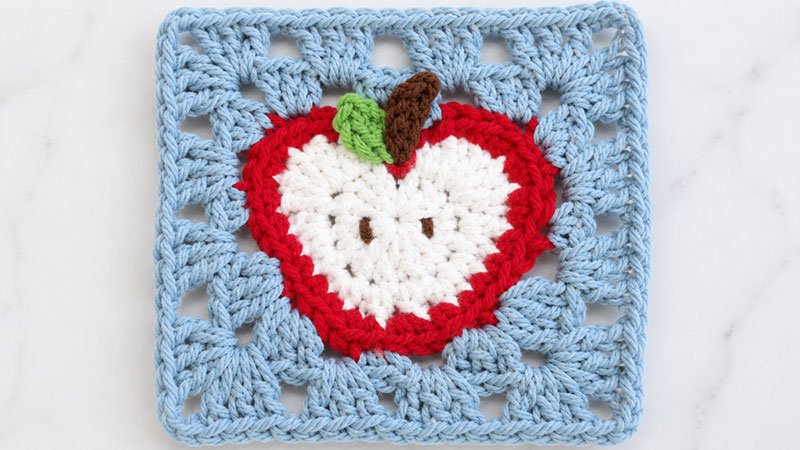
Step 1: The Apple Core (Color A)
We will begin by creating the inner circular base of the apple.
Round 1: Start by forming a Magic Circle. Chain 2 (this does not count as a stitch). Work 12 double crochets directly into the ring. Pull the yarn tail to close the circle tight. Secure the round by slip stitching into the very first double crochet you made. (Total: 12 stitches)
Round 2: Chain 1. In the first stitch, work 1 hdc. In the next stitch, place 4 dc. In the following stitch, work [1 hdc and 1 sc]. Sc in the next stitch, then work a sc increase in the next. Hdc in each of the next 2 stitches.
Work a sc increase in the next stitch, followed by 1 sc in the next. In the following stitch, work [1 sc and 1 hdc]. Place 4 dc in the next stitch. In the final stitch, work [1 hdc, chain 1, and 1 slip stitch].
-
Finishing the Core: Cut your yarn, fasten off Color A, and weave in the ends. (Total: 22 stitches)
Step 2: The Apple Skin (Color B)
With the right side facing you, join your red yarn into the space between the last double crochet and the starting chain-2 from Round 1.
Round 3: Sc in the first 2 stitches, then complete a sc increase in each of the next 3 stitches. Sc across the next 5 stitches. Next, create the bottom cleft of the apple by working [1 hdc, 1 sc, 1 sl st] into the next stitch, and [1 sl st, 1 sc, 1 hdc] into the following stitch.
Sc across the next 5 stitches, then work a sc increase in each of the next 3 stitches. Sc in the last 2 stitches. Chain 1, skip the next chain and slip stitch from the previous round, and slip stitch into the same space where you joined this color.
-
Finishing the Skin: Fasten off the red yarn and secure the ends. (Total: 33 stitches)
Step 3: Squaring the Circle (Color C)
Turn the apple upside down so the bottom cleft is facing upward. With the right side still facing you, join your background yarn into the back loop only (BLO) of the second slip stitch at the bottom cleft.
Round 4: Working strictly in the BLO for this round: Sc in the joining stitch, ch 1, skip 3 stitches. First Corner: [3 dc] in the next stitch, ch 2, [3 dc] in the following stitch. Ch 1, skip 2 stitches, sc increase in the next. Ch 1, skip 2 stitches. Second Corner: [2 sc, 1 hdc] in the next stitch, ch 2, [3 hdc] in the following stitch.
Ch 1, skip 2 stitches, hdc 1, ch 1. Skip over the chains and slip stitches, then hdc 1 into the first sc from Round 3. Ch 1, skip 2 stitches. Third Corner: [3 hdc] in the next stitch, ch 2, [1 hdc, 2 sc] in the following stitch.
Ch 1, skip 2 stitches, sc increase in the next. Ch 1, skip 2 stitches. Fourth Corner: [3 dc] in the next stitch, ch 2, [3 dc] in the following stitch. Ch 1, skip 3 stitches, sc in the first slip stitch of the apple’s bottom cleft. Join with a slip stitch to the very first sc of this round.
Round 5: Slip stitch into the next chain-1 space. Chain 2 (this acts as your first stitch post). Work 2 dc into that same space. Standard Granny Square Growth: Ch 1, then work your corner cluster [3 dc, ch 2, 3 dc] in the corner ch-2 space. (Ch 1, 3 dc in the next ch-1 space) twice, ch 1. Work your next corner cluster [3 dc, ch 2, 3 dc] in the ch-2 space.
Ch 1, 3 dc in the next ch-1 space, ch 1, skip the next ch-1 space entirely, 3 dc in the following ch-1 space. Ch 1, work your third corner cluster [3 dc, ch 2, 3 dc] in the ch-2 space. (Ch 1, 3 dc in the next ch-1 space) twice, ch 1.
Work your final corner cluster [3 dc, ch 2, 3 dc] in the last ch-2 space. Ch 1, 3 dc in the remaining ch-1 space, ch 1. Secure the round by slip stitching into the top of your first actual double crochet (not the chain-2).
-
Finishing: Cut the yarn, pull through to lock, and weave in all background ends.
Step 4: Details & Flourishes
The Stem (Color D)
With the right side facing you, attach your brown yarn to the final slip stitch from Round 3 (at the top indent of the apple). Chain 4. Starting in the second chain from your hook, slip stitch down the 3 chains.
Finish by slip stitching back into the exact stitch where you attached the yarn. Fasten off and hide the ends.
The Leaf (Color E)
With the right side facing you, attach your green yarn to the first slip stitch from Round 3. Chain 4. In the second chain from the hook, work 1 sc.
Hdc in the next chain, and slip stitch in the last chain. Secure it by slip stitching back into the base joining stitch. Fasten off and weave in the ends.
Embroidery
Thread a tapestry needle with a strand of brown yarn (Color D). In the center of the apple core (Round 1), stitch two small, angled vertical lines to represent apple seeds. Knot securely on the back of the square and snip any excess yarn.
Your beautiful Apple Granny Square is now complete and ready to be blocked!


