Pattern Description:
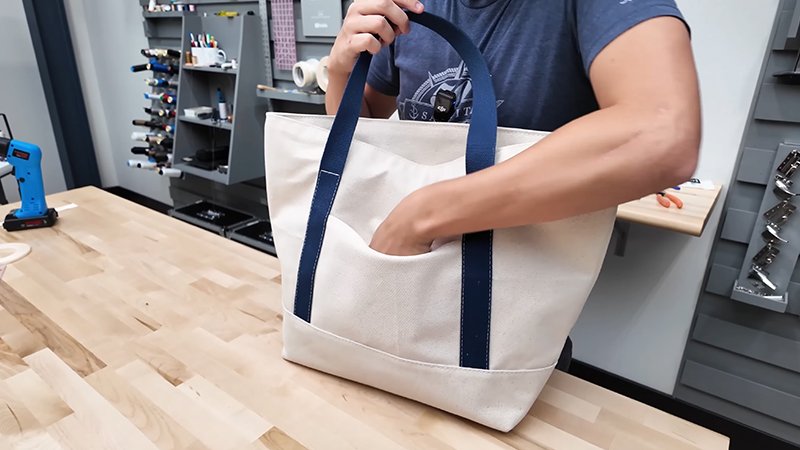
This is an adorable canvas tote bag that is easy to sew and features two exterior side pockets. The bag is constructed using durable, economical cotton canvas and colorful quilting cotton for the padded straps.
Since the canvas is durable, no lining is needed. The finished tote, not including the handles, measures 10” tall and 15” wide. It is perfect for holding a ‘grab and go’ stash of reading material or groceries.
Materials Needed & Measurements:
To sew this bag, you will need the following materials:
- 1/2 yard cotton duck canvas fabric.
- From the canvas fabric, cut 2 rectangles 12 1/2” x 16” for the bag front and back, and 2 rectangles 5” x 15” for the pockets.
- 1/2 yard lightweight print fabric for the handles (quilting cotton is suggested).
- From this fabric, cut 2 rectangles, 6” x 42”.
- 1 yard of 2” wide bias trim (use extra wide double fold if purchasing store-bought trim).
- 2 strips of cotton quilt batting at least 42” long and 1 1/2” wide. These strips can be cut new, or fusible fleece can be used.
- If cutting, the batting strips should be 2 strips 1 1/2” x 42”.
- heavy duty thread is needed for sewing and topstitching.
- heavy duty needles such as Superior Titanium coated Topstitch needles, size 100/16.
- A pencil and a bowl with a diameter of about 7 1/2” are needed to round the two bottom corners of the bag pieces.
The finished tote measures 10” tall and 15” wide (not including the padded handles).
Instructions for Making the Canvas Book Bag Pattern:
Cutting
To begin the pattern, several pieces must be cut from the materials.
From the cotton duck canvas fabric:
- Cut 2 rectangles 12 1/2” \times 16” for the bag front and back.
- Cut 2 rectangles 5” \times 15” for the pockets.
From the lightweight print fabric (such as quilting cotton):
- Cut 2 rectangles, 6” \times 42”.
From the cotton quilt batting or fusible fleece:
- Cut 2 strips 1 1/2” \times 42”. These strips can be cut new or repurposed from pieces trimmed away from a previous quilt project.
Finally, the bottom corners of the main bag pieces must be shaped. Use a pencil and a bowl that has a diameter of about 7 1/2” to round the two bottom corners of the bag front and back rectangles. Cut along these marked lines.
Preparation
Prior to beginning the stitching process, every piece of fabric needs to be pressed.
For the bag front and back pieces:
- Fold the top edge down 1” and press.
- Fold the top edge down another 1” and press again. This creates a 1” hem.
For the pockets:
- Fold each pocket piece in half to form a 5” \times 7 1/2” rectangle, and press it.
For the straps:
- Press each strap piece in half lengthwise.
- Open the piece and press the raw edges almost to the center.
- When both raw edges are pressed inward, there should be a small gap of about 1/4” remaining between them; this spacing allows the batting to fit properly.
- Open one side of the strap and place the batting or fusible fleece strip inside.
- Fold the strap in half once more and press it.
Sewing
When sewing, use heavy duty thread for all sewing and topstitching. It is recommended to use heavy duty needles, such as Superior Titanium coated Topstitch needles, size 100/16.
Stitching the Straps and Pockets:
- Sew the straps by stitching close to both long edges.
- Next, sew right down the middle.
- Lastly, sew between the middle line and the outer edges. You should end up with five lines of topstitching that are more or less even, though it is acceptable if they are not perfect.
- Sew along the top folded edge of each pocket piece.
Attaching the Pockets and Straps:
- Fold both a bag side piece and a pocket piece in half to locate the centers.
- Center the pocket onto the bag side, ensuring the bottom edges are aligned. Pin the pocket in place.
- Baste the sides of the pocket piece 1/8” from the edges. Repeat this process for the pocket on the other side of the bag.
- Pin a strap in place, positioning the raw edges at the bottom of the bag. The strap edges should overlap the pocket sides by approximately 3/8”. The top of the bag should still be folded as it was during the pressing stage.
- Place horizontal pins on each side of the strap, specifically halfway between the pocket opening and the top fold of the bag; this point serves as the turning point.
- Stitch each handle securely to a bag side. Sew directly on top of the outer lines of topstitching, crossing the strap where the horizontal pins were placed.
Finishing the Bag Structure:
- Unfold the top hem. Pin the bag pieces together with the right sides facing. Ensure that the handles are sticking out the top.
- Sew around the sides and bottom of the bag using a 1/2” seam allowance.
- Clip notches into the rounded corners.
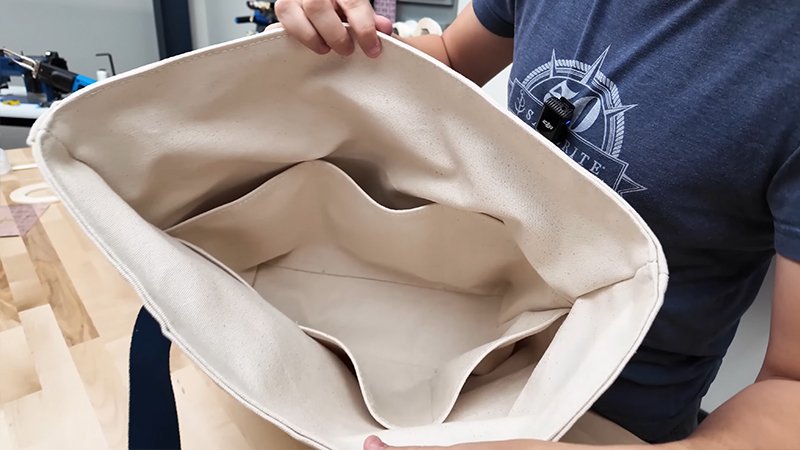
- To create a clean and cute finish on the interior, bias binding must be sewn to the seam.
- Open the binding and position it against the seam, right sides together. With the bag’s top hem unfolded, the short end of the bias trim should be situated just under the second fold (this will become the top edge of the finished bag).
- Sew the binding strip around the bag using a 3/8” seam allowance.
- When you reach the hem on the opposite side, trim the extra binding away just under the second fold.
- Flip the bag over, wrap the binding around the edge, and sew it down close to the folded edge.
- Use small scissors to clip to the stitching at the fold lines on both sides of the bag.
- Finally, re-fold the hem and push the seam allowances to whichever side allows the hem to lay the flattest.
Once completed, the canvas tote bag is ready to be filled with reading material, road trip travel games, groceries, or other items.