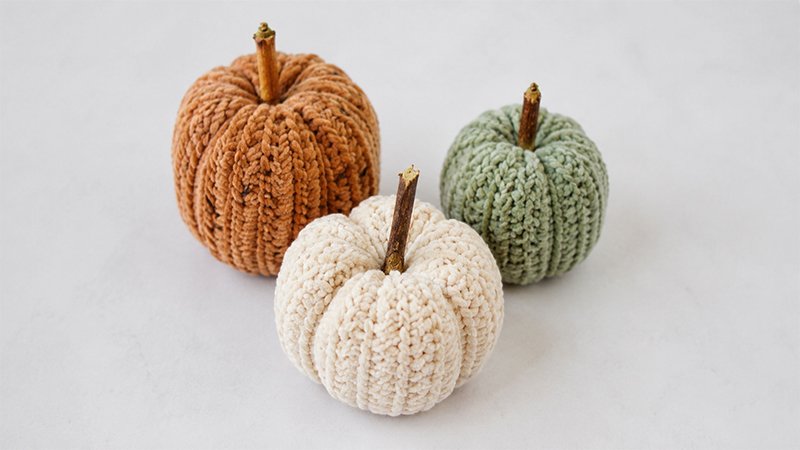
This pattern creates a textured, ribbed pumpkin using a unique variation of Tunisian crochet. Inspired by the elongated shape of Delicata squash, the design relies on a specific stitch combination to form clean, vertical ridges.
By altering your yarn choice and row count, you can easily customize the final size and shape—ranging from a tall, structured gourd to a classic, squat pumpkin.
Project Details
-
Skill Level: Advanced Beginner
-
Sizing:
-
Bulky Yarn (with a 7.0 mm hook): Approx. ()
-
DK Yarn (with a 5.0 mm hook): Approx. ()
-
-
Gauge: Not critical. Tension and yarn choice will dictate the final dimensions.
Required Materials
-
Yarn: Bulky weight yarn (approx. 7 WPI) or DK weight yarn
-
Hook: 7.0 mm (UK 2) Tunisian crochet hook for bulky yarn, or a 5.0 mm hook for DK yarn
-
Stuffing: Fiberfill or cotton stuffing
-
Notions: Darning needle
-
Stem: A small wooden twig or a cinnamon stick
Abbreviations (US Terms)
-
Ch: Chain
-
St(s): Stitch(es)
-
Yo: Yarn over
-
Sl St: Slip stitch
-
Tss: Tunisian Simple Stitch
-
TssBL: Tunisian Simple Stitch in the Back Loop
-
Return: Standard Tunisian Return Pass
Stitch Guide & Special Techniques
1. Foundation Row
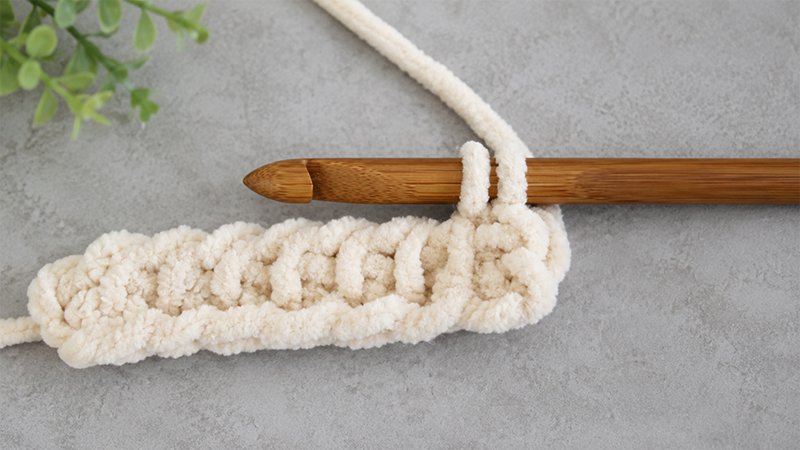
Chain your required number of stitches. Turn the chain slightly to locate the back bumps. Insert your hook into the back bump of the second chain from the hook, yarn over, and pull up a loop. Keep your loops on the hook. Repeat this process by pulling up a loop in the back bump of every remaining chain across.
2. Standard Tunisian Return Pass (Return)
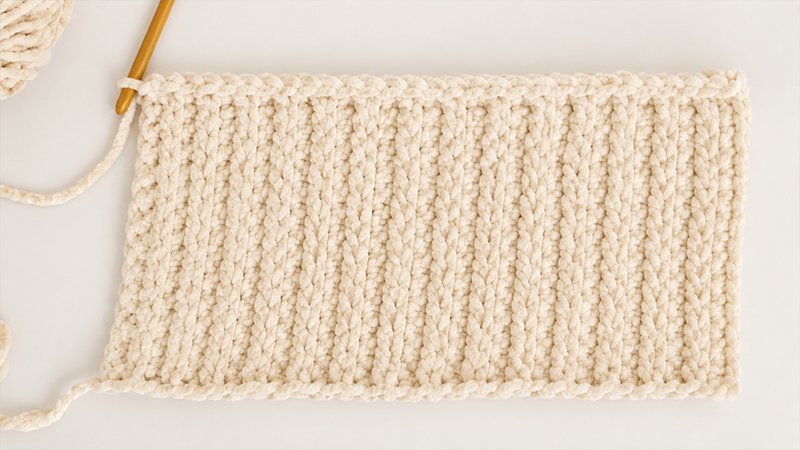
Yarn over and pull through only the first loop on your hook. Next, yarn over and pull through two loops. Repeat from * to * across the row until only a single loop remains on your hook.
3. Tunisian Simple Stitch in the Back Loop (TssBL)
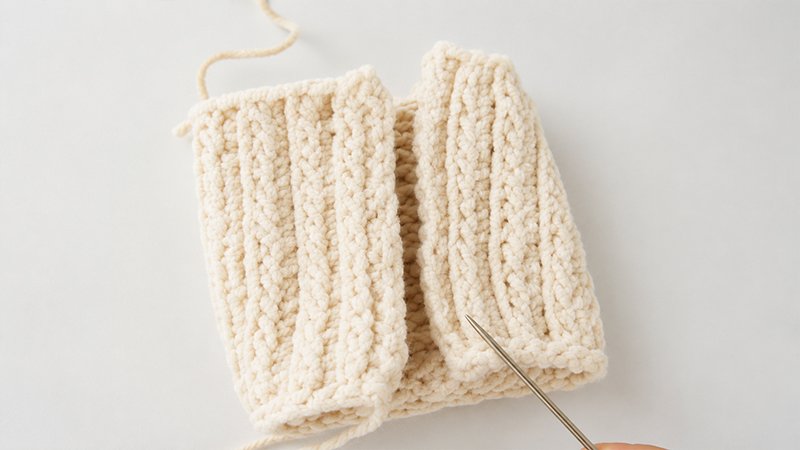
Look at the next unworked stitch. Insert your hook from front to back through the space between the stitch you just completed and this next stitch. Guide the tip of your hook underneath the back vertical bar of the stitch (moving from right to left). Yarn over and pull up a loop.
Working Notes
-
Skip the very first vertical bar of each row. The loop already on your hook at the start of the row serves as your first stitch.
-
This initial loop counts toward your final stitch total.
-
Always work the final stitch of the row under both loops of the edge chain from the row below to ensure clean edges.
-
The total stitch count throughout this pattern is 30.
Step-by-Step Pattern Instructions
Foundation: Chain 30. Complete a standard Foundation Row by pulling up a loop in each back bump across. (30 loops on hook). Complete a Standard Return Pass.
Row 1: Skip the first vertical bar. Work a Tss into each of the next 2 stitches. Work 1 TssBL in the next stitch, then 1 Tss in the following stitch. Repeat from * to * a total of 13 times. Work 1 TssBL in the next stitch. Work the final stitch under both loops of the edge. (30 loops on hook). Complete a Standard Return Pass.
Rows 2–20: Repeat the instructions for Row 1.
-
Note: If you prefer a shorter, traditional pumpkin shape rather than the elongated Delicata shape, stop after completing Row 14.
Binding Off: Slip stitch into each vertical bar across the row to seal the top edge. Fasten off, ensuring you leave a long yarn tail for assembly.
Assembly & Finishing
-
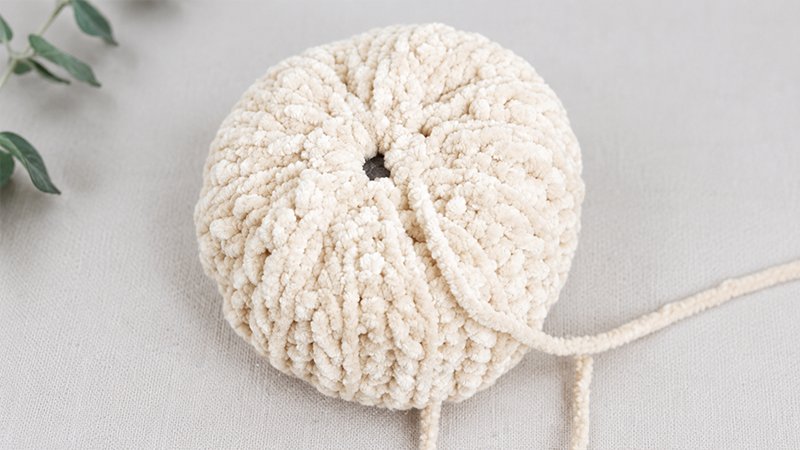
Seam the Sides: Keep the right side of the fabric facing outward. Bring the two short ends together to form a tube, and sew them closed using a mattress stitch.
-
Close the Base: Thread your yarn tail onto a darning needle. Weave the needle in and out of the stitches around the bottom opening of the tube. Pull the yarn tail firmly to draw the opening closed, then secure it with a knot.
-
Stuff the Pumpkin: Bring your yarn up through the inside of the tube to the top edge. Pack the inside firmly with fiberfill or cotton stuffing.
-
Close the Top: Weave your needle through the stitches around the top opening. Pull the yarn tight to cinch the top closed around the stuffing. Knot the yarn securely to hold the shape and weave in any loose ends.
-
Add the Stem: Insert your wooden twig or cinnamon stick into the center of the cinched top opening.
-
Optional Shaping: If you opted for the shorter 14-row version, you can create defined pumpkin segments. Take a long strand of matching yarn, wrap it tightly around the outside of the pumpkin from top to bottom to create ridges, secure it at the base, and hide the ends inside the body.