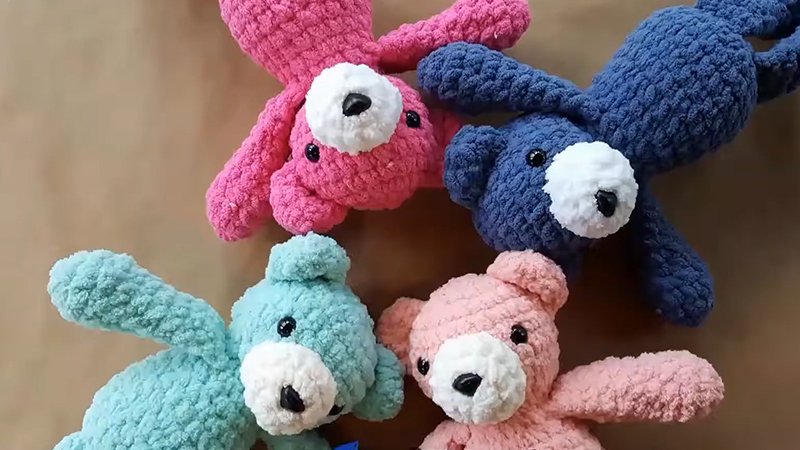
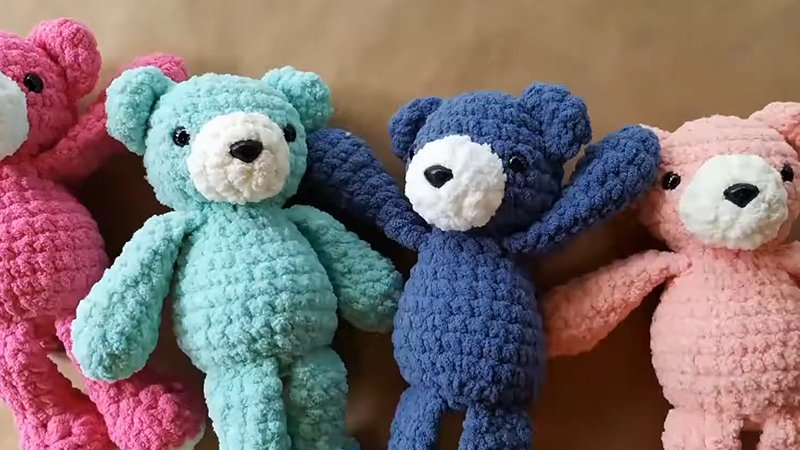
Pattern Description:
The Cuddle Buddy Bear is a super soft, cuddly project crafted from Shannon Fabrics’ Cuddle fabric and flannel.
This lovable companion features appliqué details for eyes and a heart, an embroidered mouth, and charming knotted arms and legs. It’s designed for snuggling and even fits into a pocket pillowcase.
Materials Needed & Measurements:
Materials Needed:
- Cuddle™ Fabric from Shannon Fabrics: Specifically, Cuddle 3 from the Kozy Cuddle Solids™ Collection in Honey and Turquoise.
- Wild by Ann Kelle from Remix Flannel from Robert Kaufman.
- Snaps.
- Embroidery floss.
- Double-sided fusible.
- Poly fil.
- Bear template.
Measurements and Cutting Instructions:
- From flannel: Cut 2 body pieces, 2 ears, and 1 nose.
- From Cuddle™ color A: Cut 2 ears and 1 face.
- From Cuddle™ color B: Cut pieces for the eyes, heart, and 4 strips measuring 6″ long x 2 1/2″ wide. These strips will be used for the arms and legs.
For the appliqué details, you will trace them onto the paper side of the fusible, then fuse them to the wrong side of the fabric following manufacturer’s instructions. After peeling off the paper backing, position them on the bear’s body and fuse them in place. An optional row of stitching can be added for extra security.
Instructions for Making the Cuddle Buddy Bear Pattern:
Cut the Fabric Pieces
Once your materials are ready, proceed with cutting the fabric pieces:
- From the flannel, cut 2 body pcs, 2 ears, and 1 nose.
- From Cuddle™ Color A (Honey), cut 2 ears and 1 face.
- From Cuddle™ Color B (Turquoise), cut pieces for the eyes, heart, and 4 strips measuring 6″ long x 2 1/2″ wide. These strips will be used to form the arms and legs of the bear.
Appliqué Application
For the appliqué details, such as the eyes and heart cut from Cuddle™ Color B, follow these steps:
- Trace the appliqué details onto the paper side of the double-sided fusible.
- Following the manufacturer’s (mfg’s) instructions, fuse these traced details to the wrong side of the respective fabric (Cuddle™ Color B).
- Peel off the paper backing from the fused appliqué pieces.
- Carefully position the appliqué pieces in place on the body of the bear.
- Fuse them securely onto the bear’s body.
- For added security, you may optionally add a quick row of stitching all around each appliqué detail.
Creating Facial Features
Once the appliqué eyes are in place, the bear’s face can be completed:
- Hand embroider the mouth detail onto the bear’s face.
- Attach snap eyes as indicated by your template or design.
Ears, Arms, & Legs Prep
Before assembling the bear’s main body, prepare its ears and limbs:
- To create the ears, take the two ear pieces (one from flannel and one from Cuddle™ Color A). Match them with wrong sides together and stitch all around the edge.
- After stitching, clip the curves and turn the ears out.
- Lightly press the ears. If necessary, use a dull object to smooth out any curves.
- To create the arms and legs, take the 4 Cuddle™ strips (6″ long x 2 1/2″ wide) cut from Cuddle™ Color B.
- Fold each strip in half lengthwise.
- Tie a knot close to the end of each folded strip to form the arm and leg shapes. Remember the creator’s note about reducing the arm length by 1″ if you desire a similar look.
Bear Body Construction
Now it’s time to bring all the parts together:
- Take one of the flannel body pieces. Pin the prepared ears at the top of the body piece.
- Pin the arms at the side marking, which should be indicated on your bear template.
- Pin the legs 1/2″ in from the corners along the bottom edge of the body piece.
- Crucially, ensure that all these parts (ears, arms, and legs) are positioned entirely on the body piece and are not extending past its edges.
- Take the other flannel body piece. Sandwich the two body pieces with right sides together, ensuring the attached ears, arms, and legs are tucked inside.
- Pin everything securely in place to prevent shifting during sewing.
Sewing the Body & Finishing
The final stages involve sewing the bear and adding its stuffing:
- Bring the pinned bear assembly to your sewing machine.
- Starting at the bottom edge, straight stitch all around the perimeter of the bear body.
- Be sure to leave an opening of approximately 2″ along the bottom edge. This opening will be used for turning and stuffing the bear.
- Once stitched, turn the bear right side out through the 2″ opening.
- Lightly press the bear to smooth out any wrinkles.
- Stuff the Cuddle Buddy Bear with poly fil until it reaches your desired firmness.
- Finally, pin the opening together. Slip stitch it closed using a needle and thread, or machine stitch with matching thread if preferred.
Your Cuddle Buddy Bear is now complete!
Download Free PDF: