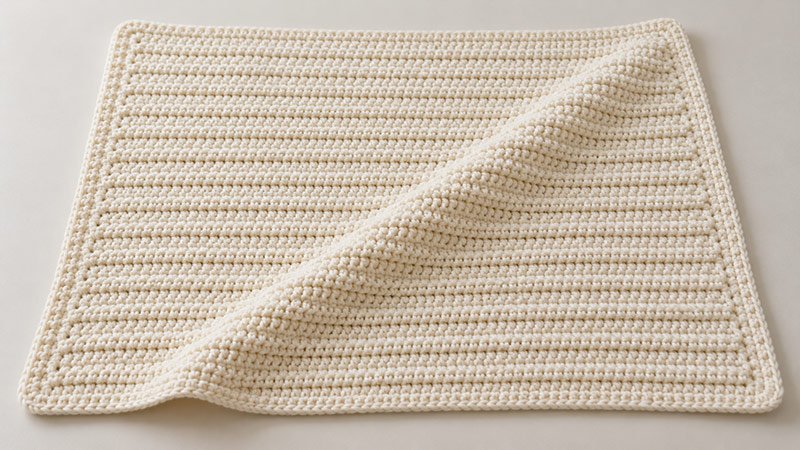
This easy crochet baby blanket uses half double crochet stitches to make a soft fabric with gentle ridges.
After the first row, you work into the back loop of each stitch. The repeat is simple, so this project suits beginners who know how to chain and work a half double crochet.
The pattern includes an optional single crochet border. Use one color for a plain blanket or add broad stripes with yarn left from other projects.
These instructions are written in US crochet terms.
Supplies
- Yarn: Approximately 900–1,100 yards of light worsted or DK-weight baby yarn. Choose a soft, machine-washable yarn.
- Crochet hook: 5 mm (US H/8), or the size needed to meet gauge.
- Yarn needle: For weaving in loose ends.
- Scissors
- Measuring tape
- Stitch markers: Optional, for marking the first and last stitch of each row.
Yarn use will vary with your tension, yarn choice, and whether you add a border.
Abbreviations
- ch: Chain
- hdc: Half double crochet
- sc: Single crochet
- sl st: Slip stitch
- BLO: Back loop only
- st / sts: Stitch / stitches
- rep: Repeat
- RS: Right side
Half double crochet: Yarn over, insert the hook into the stitch, yarn over and pull up a loop. Yarn over and draw through all three loops on the hook.
Back loop only: Look at the two loops that form the “V” at the top of a stitch. Work into the loop farther from you.
Pattern Notes
- Work the blanket flat in rows.
- The ch 2 at the start of each row does not count as a stitch.
- Work the first hdc into the first stitch of the row.
- Each blanket row contains 96 hdc.
- Work Row 1 into the foundation chain. Work all later rows in BLO.
- Count your stitches after the first few rows to check that the sides stay straight.
- For stripes, change colors during the final yarn-over of the last stitch in a row.
- Leave yarn tails at least 6 inches long and weave them securely into the fabric.
- Avoid tassels, buttons, or other small decorations on a baby blanket. Keep loose blankets out of an infant’s sleep space.
Gauge
12 hdc and 9 rows = 4 inches, worked in BLO and measured after washing and drying the swatch according to the yarn label.
To check gauge:
- Ch 20.
- Hdc in the third ch from the hook and in each remaining ch. You will have 18 hdc.
- Ch 2 and turn.
- Hdc in BLO of each st across.
- Rep Steps 3–4 until the swatch measures at least 6 inches tall.
- Wash, dry, and measure the center of the swatch.
If you have more than 12 stitches across 4 inches, try a larger hook. If you have fewer than 12 stitches, try a smaller hook.
Finished Size
- Blanket body: Approximately 32 inches wide × 36 inches long.
- With optional border: Approximately 33–34 inches wide × 37–38 inches long.
The finished measurements depend on your gauge and border tension.
Easy Crochet Baby Blanket Pattern Instructions
Step 1: Make the Foundation Chain
Ch 98 loosely.
If your chains tend to be tight, use a hook one size larger for the foundation chain, then return to your main hook for Row 1.
Step 2: Work Row 1
Hdc in the third ch from the hook. Hdc in each remaining ch across.
Stitch count: 96 hdc.
The two skipped chains do not count as a stitch.
Step 3: Work Row 2
Ch 2, turn.
Hdc in BLO of the first st and each st across.
Stitch count: 96 hdc.
Do not work into the turning chain at the end of the row.
Step 4: Repeat the Main Stitch Pattern
Rows 3–81: Rep Row 2.
The back-loop stitches form soft horizontal ridges as the blanket grows.
After Row 81, the body should measure approximately 36 inches long at the stated gauge. If your row gauge differs, work until the blanket reaches the desired length.
If you plan to add the border, keep the yarn attached. Otherwise, fasten off and proceed to the finishing steps.
Step 5: Add the Optional Border
The border is worked through both top loops of each stitch.
Border Round 1:
- Ch 1. Do not turn.
- Work 3 sc into the last hdc of the final row. This forms the first corner.
- Work sc evenly down the first long side. Begin with approximately 4 sc for every 3 row ends.
- Work 3 sc into the first foundation stitch at the bottom corner.
- Sc across the foundation edge, working into the unused chain loops. Stop before the final foundation stitch.
- Work 3 sc into that final foundation stitch.
- Work sc evenly up the second long side, using the same spacing as the first side.
- Work 3 sc into the first hdc of the final row.
- Sc across the top edge, stopping before the corner stitch where the round began.
- Sl st into the first sc to join.
Lay the blanket flat as you work. If a side ripples, use fewer stitches along that edge. If it pulls inward, add a few stitches.
Border Round 2:
Ch 1. Sc in each st around, working 3 sc into the middle stitch of each corner group. Sl st into the first sc to join.
Fasten off.
Step 6: Finish the Blanket
- Thread each yarn tail onto a yarn needle.
- Weave the tails through several stitches on the back of the blanket, changing direction to help secure them.
- Trim the excess yarn.
- Wash and dry according to the yarn label.
- Shape the blanket gently while damp. Lay it flat without stretching the ridges.
Adjusting the Size
To change the width, chain any number of stitches, then add 2 turning chains. The number of hdc in each row will equal the starting chain count minus 2.
At the stated gauge:
- 90 stitches: Approximately 30 inches wide; start with ch 92.
- 108 stitches: Approximately 36 inches wide; start with ch 110.
- 120 stitches: Approximately 40 inches wide; start with ch 122.
To change the length, repeat Row 2 until the blanket reaches your preferred measurement. Larger blankets will need more yarn.