
Pattern Description:
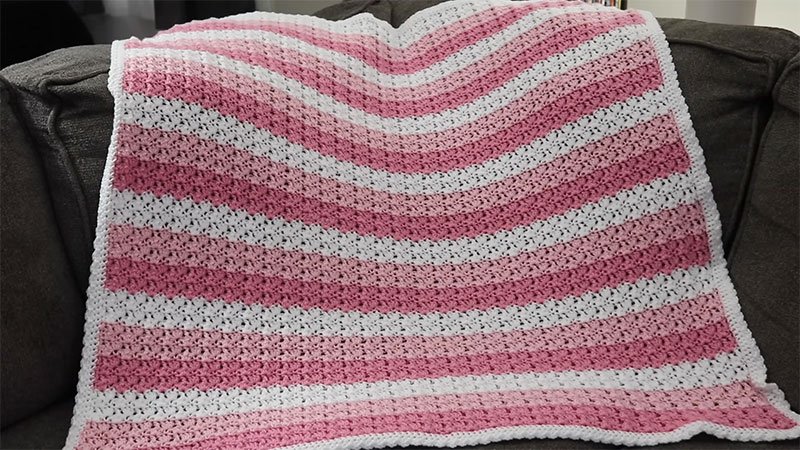
This is a small, quick-to-make car seat size baby blanket. It features a puffy stitch and stripes, using Bernat Softee Baby Cotton yarn which is very soft. The blanket is finished with a simple frilly border of shells and picot stitches.
Materials Needed & Measurements:
- Yarn:
- 3 skeins Bernat Softee Baby Cotton in Petal
- 3 skeins Bernat Softee Cotton in Clear White
- Hook: Size H 5.00 mm hook
- Notions: Scissors, tapestry needle
- Measurements: The finished size is 27 x 27 inches, designed as a car seat blanket.
Stitches & Abbreviations Used:
- SL ST – Slip Stitch
- SC – Single Crochet
- HDC – Half Double Crochet
- CH – Chain
- DC – Double Crochet
- YO – Yarn Over
Instructions for Making the Flamingo Stripes Baby Blanket Pattern:
Beginning the Blanket
The creation of the “Crochet Flamingo Stripes Baby Blanket” commences with the foundation chain and initial rows:
- Starting Color: Begin the blanket with the Clear White yarn.
- Foundation Chain: You will Chain 123 to start. A helpful tip for customizing the blanket’s size is to ensure your starting chain is a multiple of the number 3.
Main Blanket Body Pattern
The main body of the blanket is constructed by repeating a specific two-row sequence that creates the textured “puffy stitch”:
- Row 1:
- Starting in the 2nd CH from the hook, you will work 1 SC and 1 HDC into that same chain.
- Next, you will *Skip two chains. In the very next chain, work SC, HDC, HDC.
- Repeat from * across the row until there is only one chain left.
- Finally, work 1 SC into the final chain. To prepare for the next row, CH 1 and turn your work.
- Row 2:
- Work 1 SC and 1 HDC into the top of the SC of the previous row.
- Then, *Skip two stitches, followed by working SC, HDC, HDC into the next stitch.
- Repeat from * across the row, ensuring you end in the last stitch with 1 SC. As before, CH 1 and turn.
The remainder of the blanket’s body is created by simply repeating Row 2. This repetitive nature makes the pattern approachable once the initial rows are established.
Implementing Color Stripes
The distinct striped appearance of the blanket is achieved through regular color changes:
- You will change colors every 8 rows. This means you will work 8 rows with one color, then switch to the other color for 8 rows, and so on, alternating between the Petal and Clear White Bernat Softee Cotton yarns.
The Frilly Border
A “simple frilly border of shells and picot stitches” is added to complete the blanket, enhancing its charm:
- Round 1 (Single Crochet Base):
- Begin by pulling up a loop in any corner.
- CH 1, then work 1 SC in the same space.
- Work 1 SC into each HDC stitch across the top and bottom edges of the blanket.
- Along the sides, work 1 SC at the end of each row.
- Crucially, work 3 SC into each corner to maintain a flat edge.
- Join the round with a SL ST to the starting SC, then CH 1, but do not turn your work.
- Round 2 (Shells):
- SC in the same stitch as the join.
- Then, you will start the shell pattern: *Skip one stitch, then work 5 DC into the next stitch.
- Skip one stitch, then work SC into the next stitch.
- Repeat from * around the entire blanket.
- Finish the round by performing a SL ST to the starting SC. Again, do not turn at the end of this round. This round forms the prominent “shells” that define the border.
- Round 3 (Picot Edging):
- This round adds the decorative picot detail: *SL ST into the first DC, then CH 2, and finally SL ST into the next DC.
- Repeat from * across the tops of the DC stitches from the previous round.
- After completing the picots over the shell, SL ST into the SC that separates the DCs in the previous row.
Finishing the Blanket
Upon completion of the border, the final steps are straightforward:
- Join at the end of the round (Round 3 of the border).
- Tie off your yarn.
Finally, weave in all the ends using your tapestry needle to ensure a neat and finished appearance.
Download PDF


