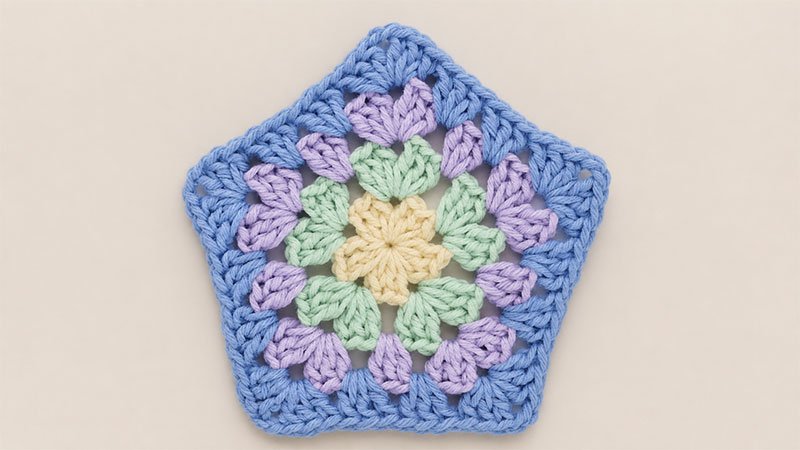
The granny pentagon is a fun twist on the classic granny square. By working five corners instead of four, you create a beautiful pentagon shape.
This pattern uses the traditional “granny cluster” (groups of 3 double crochets) separated by chain spaces.
It is highly customizable, easy to scale up by adding more rounds, and looks fantastic whether worked in a single solid color or vibrant color changes.
Essential Project Details
-
Skill Level: Easy / Advanced Beginner
-
Terminology: US Crochet Terms
-
Suggested Materials: Medium/Aran weight yarn paired with a 5.5 mm (I-9) crochet hook, a tapestry needle for weaving in ends, and scissors.
Abbreviations & Pattern Logic
Before diving into the steps, keep these standard abbreviations in mind:
-
Ch: Chain
-
Dc: Double Crochet
-
Sl St: Slip Stitch
-
Sp: Space
-
MC / MR: Magic Circle / Magic Ring
The Secret to the Pattern: Every corner consists of [3 dc, ch 2, 3 dc] worked into the same space. Every straight side consists of 3 dc worked into the gaps between clusters. Each round you add will increase your stitch count by exactly 15 double crochets (5 sides $\times$ 3 stitches).
Step-by-Step Instructions
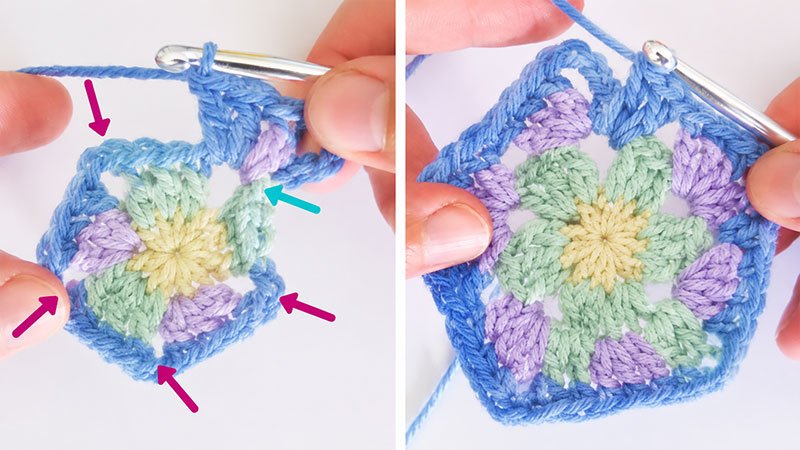
Step 1: Setting the Five-Sided Foundation
This round establishes the 5 corners of your pentagon.
-
Begin by forming a Magic Circle.
-
Chain 4 (this counts as your very first double crochet plus a chain-2 corner space).
-
Work a cluster of 3 double crochets, followed by 2 chains. Repeat this sequence 3 more times.
-
To finish the final side, work 2 double crochets into the ring.
-
Close the round by making a slip stitch into the 3rd chain of your starting chain-4. Pull the magic circle tail tight to close the center hole.
-
Round Total: 15 dc, 5 corner spaces.
Step 2: Expanding the Corners
This round builds out the five distinct points of the pentagon.
-
Slip stitch forward into the immediate chain-2 corner space.
-
Chain 4 (counts as 1 dc and a chain-2 space), then work 3 double crochets into that same corner space.
-
Move to the next corner space and work
[3 dc, ch 2, 3 dc]. Repeat this exact corner setup in the remaining 3 corner spaces. -
When you arrive back at your starting corner, work 2 double crochets into the space to complete the initial cluster.
-
Slip stitch into the 3rd chain of your starting chain-4 to close.
-
Round Total: 30 dc, 5 corner spaces.
Step 3: Adding the First Side Clusters
Now you will begin filling in the straight sides between the five corners.
-
Slip stitch into the first chain-2 corner space.
-
Chain 4 (counts as 1 dc and a chain-2 space) and work 3 double crochets into the same space.
-
Look at the side ahead of you: work 3 double crochets directly into the gap between the two large corner clusters of the previous row.
-
At the next corner, work your standard corner:
[3 dc, ch 2, 3 dc]. -
Repeat this pattern all the way around—working a 3-dc cluster in every side gap and
[3 dc, ch 2, 3 dc]in every corner space. -
To finish the round, work 2 double crochets into the starting corner space, and slip stitch into the 3rd chain of the starting chain-4.
-
Round Total: 45 dc, 5 corner spaces.
Step 4 & Beyond: Growing Your Pentagon
To make your pentagon larger, simply repeat the logic used in Round 3.
-
Start every round by slipping into the corner, chaining 4, and placing 3 dc in the same space.
-
Place 3 double crochets into every side gap along the edges. (Round 4 will have two side clusters per side, Round 5 will have three, etc.)
-
Place
[3 dc, ch 2, 3 dc]into the 5 corner spaces. -
Always finish the round by putting 2 dc in the first corner and slip stitching to the top of your starting chain.
Design Tip: Switching Colors
To create stripes or a rainbow effect, simply fasten off your current yarn at the end of any round.
Grab your new color, tie a slipknot on your hook, and join it with a slip stitch directly into any chain-2 corner space. Chain 4, work 3 double crochets into that same space, and continue the pattern instructions as normal!