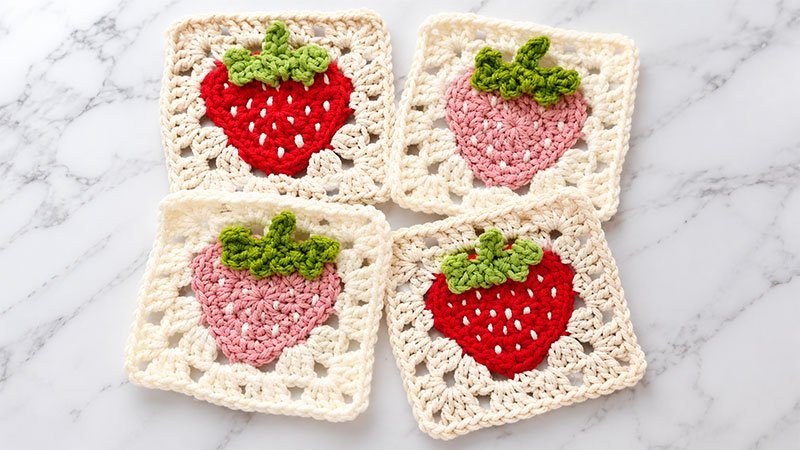
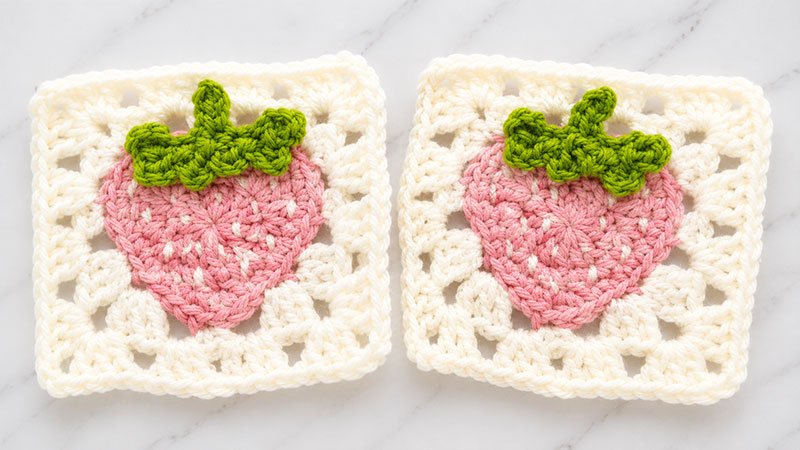
This charming granny square features a textured, 3D-effect strawberry sitting right in the center. You will first crochet the strawberry itself as a neat heart shape using pink yarn.
Then, you will switch to white yarn, working into the back loops to “square off” the round fruit into a classic 4-sided granny square.
Finally, you will overlay vibrant green leaves at the top and embroider tiny white seeds to bring the strawberry to life.
It is a perfect block for summer blankets, tote bags, or cardigans!
Materials & Quick Info
-
Yarn: Medium-weight Aran yarn in three colors: Color A (Blush Pink), Color B (Lime Green), and Color C (Champagne White).
-
Hook Size: 4.5 mm (US 7)
-
Finished Dimensions: 4″ x 4″ (10 cm x 10 cm)
-
Gauge: A standard 4-round granny square should measure 4″ across.
-
Key Techniques: Working in the Back Loops Only (BLO) to create depth, Front Loops Only (FLO) for the leaves, and utilizing a Magic Circle for a seamless center.
Step-by-Step Instructions
Part 1: Crocheting the Strawberry
Using Color A (Pink), this section creates a plump, rounded heart-shaped base.
-
Round 1: Begin by forming a Magic Circle. Chain 2 (this acts as a placeholder and doesn’t count as a stitch). Work 12 double crochets directly into the ring. Pull the yarn tail tight to close the center hole, and slip stitch into the top of your very first double crochet to finish the circle. (Total: 12 stitches)
-
Round 2: Chain 1. Work 1 half double crochet into the base of the chain. In the next stitch, place 4 double crochets all together. In the following stitch, make 1 half double crochet and 1 single crochet together. Single crochet in the next stitch, then make a single crochet increase (2 single crochets in one stitch). Half double crochet across the next 2 stitches, followed by another single crochet increase. Single crochet 1. In the next stitch, group 1 single crochet and 1 half double crochet. In the next stitch, place 4 double crochets all together. Finish by working 1 half double crochet in the last stitch, and slip stitch to the first stitch of the round. (Total: 22 stitches)
-
Round 3: Chain 1. Single crochet in the first 2 stitches. Work a single crochet increase in each of the next 3 stitches (expanding the top curves). Single crochet in the next 5 stitches. In the next stitch, work a single crochet and a half double crochet together, then chain 1—this forms the sharp bottom point of your strawberry. In the very next stitch, work a half double crochet and a single crochet together. Single crochet in the next 5 stitches, work a single crochet increase in the next 3 stitches, and single crochet in the final 2 stitches. Slip stitch to the first single crochet to close. Fasten off the pink yarn. (Total: 31 stitches, plus 1 chain at the bottom point)
Part 2: Squaring the Circle
Turn the strawberry upside down so the pointed tip faces upward. Join Color C (White) into the back loop only (BLO) of the point’s chain-1 space. We will use various stitch heights to flatten out the curves into a perfect square.
-
Round 4 (The Base Framing):
-
Secure your white yarn with a BLO single crochet in that starting point, chain 1, skip 3 stitches.
-
First Corner: Work 3 BLO double crochets in the next stitch, chain 2, and work 3 BLO double crochets in the following stitch.
-
First Side: Chain 1, skip 2 stitches, make a BLO single crochet increase. Chain 1, skip 2 stitches.
-
Second Corner: Work [2 BLO single crochets and 1 BLO half double crochet] in the next stitch, chain 2, then work 3 BLO half double crochets in the following stitch.
-
Second Side: Chain 1, skip 2 stitches, work 2 BLO half double crochets. Chain 1, skip 2 stitches.
-
Third Corner: Work 3 BLO half double crochets in the next stitch, chain 2, then work [1 BLO half double crochet and 2 BLO single crochets] in the following stitch.
-
Third Side: Chain 1, skip 2 stitches, make a BLO single crochet increase. Chain 1, skip 2 stitches.
-
Fourth Corner: Work 3 BLO double crochets in the next stitch, chain 2, and work 3 BLO double crochets in the following stitch.
-
Fourth Side: Chain 1, skip 3 stitches, and finish with a BLO single crochet in the starting space. Slip stitch to the first single crochet to secure the frame.
-
-
Round 5 (Classic Granny Round): Slip stitch into the next chain-1 space and chain 2. Place 2 double crochets into that same space. Chain 1. In the corner chain-2 space, work a classic granny corner: [3 double crochets, chain 2, 3 double crochets]. Chain 1, then work 3 double crochets into each of the next two chain-1 spaces along the side, separating them with a chain 1. Repeat this sequence around all four sides. At the end of the round, join with a slip stitch to your first actual double crochet. Fasten off.
Part 3: Adding the Greenery & Details
Now, turn the square back so the strawberry faces right-side up. We will anchor the leaves to the unworked front loops of the strawberry’s top edge.
-
Row 1 (The Stem): Attach Color B (Green) to the front loop only (FLO) of Round 3, right at the upper edge of the fruit. Chain 1, then FLO slip stitch across the next 2 stitches. To make the stem, chain 4, slip stitch into the second chain from your hook, and slip stitch down the remaining 2 chains. Anchor it back down with a FLO slip stitch into the next stitch on the fruit, then FLO slip stitch across the next 2 stitches.
-
Row 2 (The Leaves): Chain 4. Pivot your work slightly to access the exposed lower loops of the slip stitches you just created in Row 1. Slip stitch into the first lower loop, then create the leafy texture by repeating (chain 4, slip stitch into the next lower loop) 5 times across the top. Cut your yarn and weave in the green tails securely.
Part 4: Finishing Touches
-
Embroidering Seeds: Take a scrap piece of Color C (White) yarn and a tapestry needle. Stitch small, scattered vertical dashes across the pink body of the strawberry to replicate tiny seeds.
-
Final Step: Securely weave in any remaining loose ends on the back of your work. Give your square a light blocking if needed to crisp up the edges!