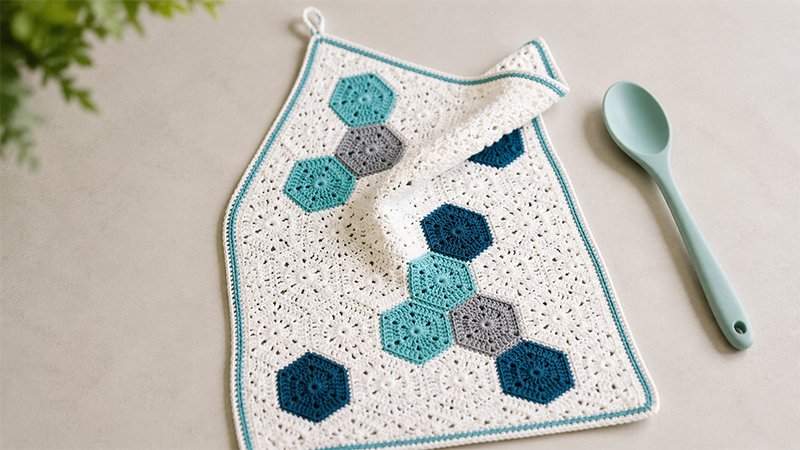
The Honeycomb Kitchen Towel is a beautiful, texture-rich hand towel perfect for bee lovers and modern kitchens alike. Built by joining individual hexagon motifs, this project mimics a natural honeycomb structure.
It combines full hexagons in a gradient of whites, yellows, and browns with half-hexagons to create straight, clean edges. It is finished with a crisp, multi-colored border and a durable integrated hanging loop.
Materials & Tools
-
Yarn: DK weight (Light, Category 3) 100% cotton yarn.
-
Color A (Main/Background): ~234 yards / 213 meters (e.g., Cream/Off-White)
-
Color B (Accent): ~69 yards / 62 meters (e.g., Mustard Yellow)
-
Color C (Accent): ~30 yards / 27 meters (e.g., Light Brown)
-
Color D (Accent): ~20 yards / 18 meters (e.g., Dark Brown)
-
-
Hook: 3.5 mm (US E/4) crochet hook
-
Notions: Tapestry needle for assembly and weaving in ends, scissors, and optional stitch markers.
Project Specifications
-
Finished Dimensions: Approximately 20 inches (50.5 cm) long by 14 inches (35 cm) wide.
-
Gauge: Each completed 3-round hexagon should measure roughly 2.6 inches (6.5 cm) across from flat edge to flat edge.
Key Abbreviations & Definitions
-
Ch: Chain
-
Sc: Single crochet
-
Dc: Double crochet
-
Sl St: Slip stitch
-
St(s): Stitch(es)
-
MC: Magic Circle (Magic Ring)
-
BLO: Back Loop Only (Insert your hook only into the strand of the stitch furthest away from you).
-
Ch-less Dc: Chainless Starting Double Crochet (Used instead of a traditional Ch 3 at the start of a row/round to create a cleaner, thicker edge that looks like a real double crochet).
-
Sk: Skip
-
RS: Right Side
-
[ ] / ( ): Work instructions within brackets into the exact same stitch; repeat instructions within parentheses the specified number of times.
Step-by-Step Instructions
1. Motif Construction
You will need to create a total of 31 full hexagons and 18 partial hexagons. When cutting your yarn after finishing each piece, leave a long tail (approx. 8–10 inches) on your Color A pieces to use later for sewing.
-
Full Hexagons (Make 31 Total): Each hexagon consists of 3 rounds. Work 12 dc into a magic ring for Round 1, then increase at 6 corner points in Rounds 2 and 3 to form the hexagon shape.
-
Color A: Make 21
-
Color B: Make 5
-
Color C: Make 3
-
Color D: Make 2
-
-
Half Hexagons – Pointed Side (Make 10):
-
Using Color A, work in rows rather than rounds for 3 total rows. This creates a half-hexagon split from corner to corner, leaving a pointed peak on one side.
-
-
Half Hexagons – Squared Side (Make 8):
-
Using Color A, work in rows for 3 total rows. This creates a half-hexagon split across the flat parallel edges, leaving a flat, squared-off side.
-
2. Layout & Assembly
-
Arrange the Motifs: Lay all of your completed hexagons and half-hexagons flat on a table with the Right Side (RS) facing up. Arrange them into a grid matching your desired honeycomb layout. Use the 18 half-hexagons along the perimeter to fill in the gaps and create straight outer edges for the towel.
-
Seaming: Thread your tapestry needle with the long yarn tails left over from Color A (or cut new lengths of Color A as needed). Align the edges of adjacent hexagons. Whipstitch or use the mattress stitch through the loops to sew the motifs together securely.
-
Secure: Fasten off your sewing yarn securely, but do not worry about weaving in the tiny edge ends just yet—the border will help cover them.
3. Outer Border & Hanging Loop
The border is worked in rounds directly around the raw edge of your assembled towel.
-
Round 1 (Color A): With the right side facing you, join Color A with a slip stitch in the top-left corner. Single crochet evenly around the entire perimeter of the towel.
-
Placement tip: Work 2 sc stitches around the body of any double crochet edge posts, 1 sc into the side of each joint where hexagons meet, and 1 sc directly into the center openings of the edge magic circles. Join with a sl st to the first sc of the round. Fasten off Color A.
-
-
Round 2 (Color B): Join Color B in any corner. Working in the Back Loops Only (BLO), sc in each stitch around. When you reach the 4 main corners of the towel, work
[1 sc, ch 1, 1 sc]into the corner space to keep the edges flat. Join with a sl st to the first st. Fasten off Color B. -
Round 3 (Color A & Hanging Loop): Join Color A. Continue working in the BLO, placing 1 sc in each stitch and
[1 sc, ch 1, 1 sc]in the corner spaces.-
Creating the Loop: When you reach the final corner of the towel, do not make a standard corner. Instead, Ch 25 to form a long loop chain, then slip stitch back into the very first stitch of Round 3 to anchor it.
-
Finishing the Loop: Ch 1, turn your work, and fill the loop by working 30 (or more) tight single crochet stitches directly into the chain loop ring until it is completely covered and sturdy. Fasten off.
-
Finishing
Weave in all remaining loose yarn tails securely on the wrong side of the towel using your tapestry needle. Block the towel lightly with steam if needed to sharpen the edges and flatten the seams. Your Honeycomb Kitchen Towel is ready for use!