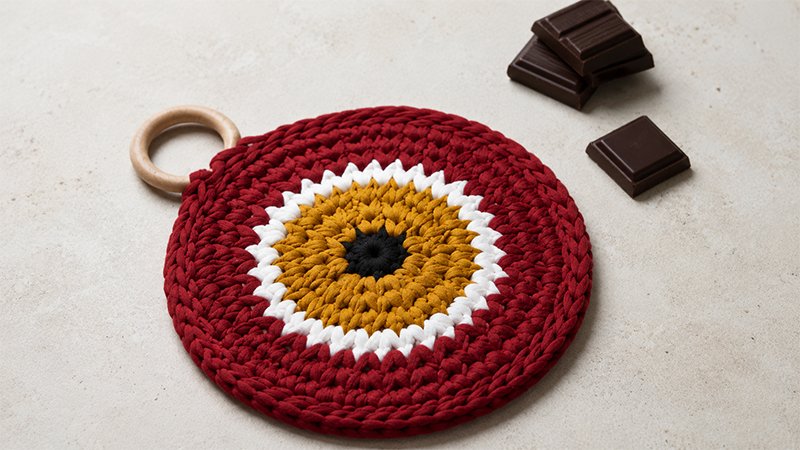
Protect your kitchen counters in style with this modern, textured hot pad inspired by the traditional Nazar amulet.
Made with thick, upcycled T-shirt yarn and a rustic wooden ring for hanging, this durable potholder works up quickly using the dense waistcoat stitch, which provides excellent heat protection.
Finished Dimensions
-
Diameter: 8 inches (20 cm)
Materials and Tools
-
Hook: Size 9.0 mm (US M/N-13)
-
Yarn: Super Bulky T-shirt yarn (roughly 5–6 wraps per inch). You will need four colors: Black, Mint Green, White, and Royal Blue.
-
Hardware: One 2.5-inch (5.5 cm) wooden craft ring.
-
Notions: Tapestry needle for weaving in thick ends, scissors.
Gauge
-
4 rounds of waistcoat stitch = 4 inches (10 cm)
Pattern Terminology (US Terms)
-
Ch: Chain
-
Sl St: Slip Stitch
-
Sc: Single Crochet
-
Inc: Increase (Work 2 stitches into the same space)
-
Knit St (Waistcoat Stitch): A modified single crochet. Instead of inserting your hook under the top two loops, insert it directly into the center of the “V” posts on the front of the stitch. This creates a dense, knit-like fabric.
-
MC: Magic Circle
-
BLO: Back Loop Only
Step-by-Step Instructions
Round 1 (Black): Form a magic circle. Work 6 sc into the ring. Pull the loop tight to close the center hole, then join with a sl st to the first sc. (6 stitches)
Round 2 (Switch to Mint Green): Ch 1. Place 2 sc into every stitch from the previous round. Join with a sl st to the first stitch. (12 stitches)
Round 3 (Mint Green): Ch 1. Repeat the following sequence 6 times: Work 1 Knit St in the first stitch, then work 2 Knit St into the next stitch to increase. Join with a sl st. (18 stitches)
Round 4 (Mint Green): Ch 1. Repeat the following sequence 6 times: Work 2 Knit St into the first stitch, then work 1 Knit St in each of the next 2 stitches. Join with a sl st. (24 stitches)
Round 5 (Switch to White): Ch 1. Repeat the following sequence 6 times: Work 1 Knit St in each of the next 3 stitches, then work 2 Knit St into the next stitch. Join with a sl st. (30 stitches)
Round 6 (Switch to Royal Blue): Ch 1. Repeat the following sequence 6 times: Work 2 Knit St into the first stitch, then work 1 Knit St in each of the next 4 stitches. Join with a sl st. (36 stitches)
Round 7 (Royal Blue): Ch 1. Repeat the following sequence 6 times: Work 1 Knit St in each of the next 5 stitches, then work 2 Knit St into the next stitch. Join with a sl st. (42 stitches)
Round 8 (Royal Blue): Ch 1. Repeat the following sequence 6 times: Work 2 Knit St into the first stitch, then work 1 Knit St in each of the next 6 stitches. Join with a sl st. (48 stitches)
Round 9 (Border & Ring Attachment): Ch 1.
-
Work a sl st into the BLO of each of the first 3 stitches.
-
Attach the Ring: Hold your wooden ring behind your work. Insert your hook into the BLO of the next stitch and pass the hook through the center of the wooden ring. Yarn over, pull up a loop through the ring and the stitch, then complete your slip stitch. Repeat this process in the same stitch to securely anchor the ring.
-
Finish the round by working 1 sl st into the BLO of every remaining stitch around the edge. Join with a sl st to the start of the round. (48 stitches)
Finishing
Cut your yarn, leaving a short tail. Fasten off completely. Using your tapestry needle, securely weave all yarn tails into the back of the project to hide them. Cut any excess yarn. Your potholder is ready for use!