Pattern Description:
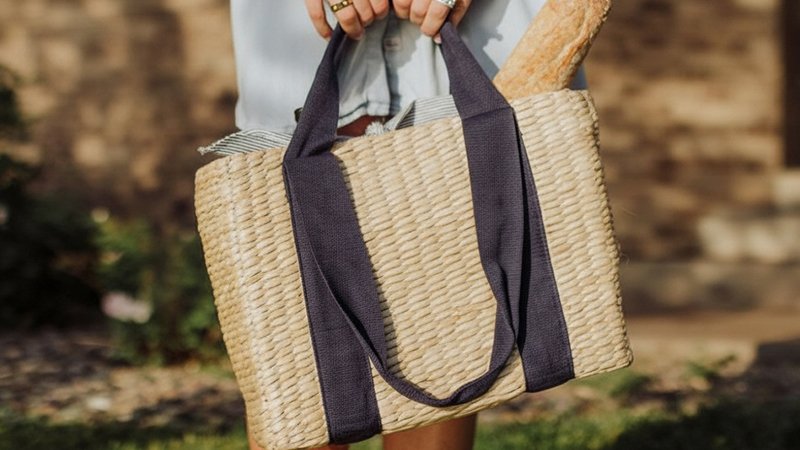
This free sewing pattern is for the Picnic Tote, an easy-to-sew bag. It is described as being reminiscent of summer fun, and it can also function as a lovely purse.
All instructions and pattern templates are included. The tote’s name was inspired by the checked fabric often used on the sides.
Materials Needed & Measurements:
- Fabric and Interfacing Requirements:
- Exterior center panels: 1/2 yard.
- Exterior side panels: 1/2 yard.
- Interior pocket: 1/4 yard.
- Lining: 3/4 yard.
- Straps: 1/2 yard.
- Fusible Fleece Interfacing: 3/4 yard, such as HeatnBond fusible fleece. (This stabilizes the exterior of the bag).
- Shape-flex Woven Interfacing: Needed for any pieces cut from lightweight or quilting cotton. You may choose to skip this interfacing if using home decor or heavier weight fabric.
- Cut Pieces:
- 2 Center Panel pieces on the fold for the exterior.
- 2 Center Panel pieces on the fold for the lining.
- 4 Side Panel pieces (2 reversed) for the exterior.
- 4 Side Panel pieces (2 reversed) for the lining.
- 2 Interior Pocket pieces on the fold for the pocket.
- 2 strips 6” x 50” for the straps (piecing fabric may be necessary to achieve the 50” length).
- Finished Dimensions and Seam Allowance:
- Finished dimensions: Approximately 10 1/2” tall x 18” wide (not including the straps).
- Seam allowance: All seam allowances are 1/2”.
Instructions for Making the Picnic Tote Bag Pattern:
Preparation and Interfacing
Prior to beginning construction, download and print the required pattern templates. If using lightweight or quilting cotton for any pieces, stabilize them with Shape-flex woven interfacing, which is noted for adding body and drape.
If using home decor or heavier weight fabric, this step can be skipped. The exterior of the bag is stabilized using fusible fleece interfacing.
Make the Straps
- Take the 6” x 50” fabric strips required for the straps. Fold each strip in half lengthwise and press it.
- Fold the long edges of the strip toward the center and press.
- Fold the strip in half again to form a 1 1/2” wide strap, and press.
- Topstitch close to both long edges of the strap. Use a longer stitch length (such as a 3) for topstitching that appears professional. Complete this process for both straps.
Make the Tote Exterior
- Mark the side panel pieces with a dot that designates the point where stitching should stop, as shown on the pattern piece.
- Pin a side panel in place, carefully referencing the side panel placement marked on the pattern pieces.
- Stitch the seam starting from the top and stopping at the marking, then backstitch.
- Press the seam toward the side panel. On the center panel, clip the fabric almost to the stitching line at the mark (or the end of the stitching line).
- Repeat this process to sew side panel pieces to both exterior center panel pieces.
- Lay the exterior bag sides onto the fusible fleece interfacing and cut around them. One tip is to press the bag sides onto the interfacing to partially fuse them before cutting, which helps in cutting quickly and accurately, then pressing again to fully fuse them.
- Pin each finished strap to a bag side. Begin pinning approximately 2 1/2” below the top edge. The strap should be positioned on the center panel, directly next to the side panel seam, and must extend down to the corner of the center panel. Verify that the strap is not twisted.
- Sew the straps to the bag sides, starting about 2 1/2” below the top edge. Sew directly on top of the existing topstitching on both sides of the strap. Prepare both sides of the bag.
- Pin the exterior pieces right sides together along the bottom and sides. Stitch these edges, and press the seams open.
- To create the boxed corners, flatten each corner and pin the side seam directly against the bottom seam. (Note: Whether the fusible fleece is trimmed away or the seam is simply pinned flat, the resulting corner shape is the same).
- Stitch across the corner. The edges of the straps will be caught in these corners.
- Turn the bag exterior right side out and set it aside.
Make the Interior Pocket
- Place the two interior pocket pieces right sides together and stitch both long edges.
- Turn the pocket right side out and press it flat. Topstitch along the top (narrower) edge.
- Place the completed pocket on top of one of the lining center panel pieces. When correctly positioned, the sides of the pocket will align perfectly with the lining panel. Pin the pocket in place along the sides and bottom edges.
- Topstitch along the bottom edge of the pocket to secure it to the lining center panel. Baste the sides of the pocket in place.
- If desired, sew one or more lines to divide the pocket into sections.
Make the Tote Lining
- Pin and stitch the side panels to each lining center panel piece, using the same method as the exterior tote. Ensure you stop sewing at the designated spot on the pattern piece. Press the resulting seams toward the side panels.
- Clip the center panel to the stitching line (or to the dot) on both sides of the center panel.
- Pin both lining pieces right sides together along the side and bottom edges.
- Stitch the pinned edges, but leave a 6” opening along the seam for turning the bag right side out later. Press the seams open.
- Flatten each corner, aligning the side seam against the bottom seam. Pin and stitch the corners. (If the corner does not align properly, verify that the center panel was clipped to the stitching as outlined in the previous steps).
Sew the Exterior and Lining Together
- Ensure the tote exterior is right side out and the lining is wrong side out. Place the lining over the exterior bag.
- Pin the top raw edges together, making sure to match the side seams and the seams on the sides of the bag.
- Stitch all the way around the top circumference of the bag.
- Turn the bag right side out by pulling it through the 6” opening left in the lining.
- Pin the opening in the lining closed and stitch it shut either by machine or by hand.
- Push the lining down fully into the bag and press the top edge carefully.
- Topstitch around the top edge of the bag, 1/4” from the edge.
- Pin the top 2” of the handles in place, ensuring the lining remains smooth and flat inside the bag.
- Stitch the handles in place, sewing directly on top of the previous topstitching and using neat backstitching at the start and stop points.