
Pattern Description:
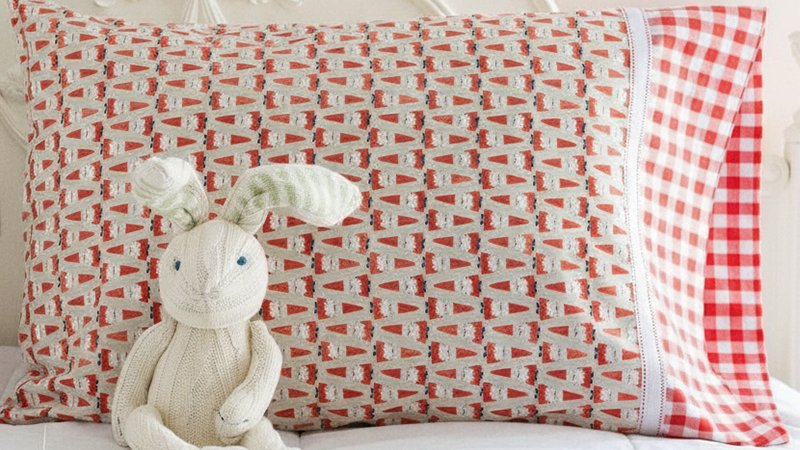
The Simply Squares Band pattern creates a standard-size 30×20″ pillowcase. The design features a decorative band constructed from ten 4 1/2″ assorted squares sewn into a row and framed by solid fabric strips.
This pieced band is then attached to the main 7/8 yard body print fabric to complete the project.
Construction requires 1/4″ seam allowances for piecing strips and 1/2″ seam allowances for the final pillowcase assembly.
Materials Needed & Measurements:
The following materials are needed for one pillowcase. Yardages and cutting instructions are based on 42″ of usable fabric width.
| Item/Fabric Category | Required Amount/Measurement | Purpose/Cutting Instruction | |
| Finished Pillowcase Size | 30×20″ | Fits a standard-size bed pillow | |
| Assorted Prints | 10 4 1/2″ squares | Used for the pillowcase band | |
| Solid Fabric | 3/8 yard | Used for the pillowcase band | |
| Solid Cut 1 | 1 6×40 1/2″ strip | Cut from the solid fabric | |
| Solid Cut 2 | 1 1×40 1/2″ strip | Cut from the solid fabric | |
| Body Print Fabric | 7/8 yard | Used for the pillowcase body | |
| Body Print Cut | 1 – 25 3/4×41″ rectangle | Cut from the body print fabric | |
| Seam Allowances | 1/4″ | Used for piecing strips (e.g., band assembly) | |
| Seam Allowances | 1/2″ | Used for pillowcase construction (e.g., assembling the body rectangle) |
Instructions for Making the Simply Squares Band Pillowcase Pattern:
Fabric Preparation and Cutting
The yardages and subsequent cutting instructions are based on using fabric widths of 42″ usable width.
The pattern requires three main fabric categories: assorted prints for the squares, solid fabric for the band framing strips, and a body print fabric.
For one pillowcase, the required cuts are as follows:
- Assorted Prints: Ten 4 1/2″ squares are needed for the central decorative portion of the pillowcase band.
- Solid Fabric: A total of 3/8 yard of solid fabric is required for the band. From this solid fabric, cut two strips:
- One strip measuring 6×40 1/2″.
- One strip measuring 1×40 1/2″.
- Body Print Fabric: 7/8 yard of print fabric is needed for the main pillowcase body. From this body print fabric, cut one large rectangle measuring 25 3/4×41″.
Assembling the Simply Squares Band
The pillowcase band assembly utilizes the assorted squares and the two solid strips. The seam allowance for all steps in this section is 1/4″.
- Create the Block Row: Begin by laying out the ten 4 1/2″ squares in a single row. Following the layout, sew these squares together sequentially. Once stitched, press the seams open. Upon completion, this row of squares, including seam allowances, should measure 40 1/2×4 1/2″.
- Attach Framing Strips: The next step involves attaching the solid framing strips to the long edges of the assembled block row. Sew the solid 1×40 1/2″ strip and the solid 6×40 1/2″ strip to the respective long sides of the central block row unit. Refer to the Band Assembly Diagram for placement guidance. After attaching both strips, press these seams open.
- Form the Band Loop: To prepare the band for attachment to the pillowcase body, the short edges of the newly created unit (from Step 2) must be joined to form a continuous loop. After joining the short edges, fold the loop in half lengthwise. Ensure that the wrong side of the fabric is inside this fold. Press the folded loop firmly; this pressed unit constitutes the final pillowcase band.
Final Pillowcase Assembly
The main pillowcase body is constructed using a 1/2″ seam allowance for stability, while the final band attachment reverts to a 1/4″ seam allowance.
- Construct the Pillowcase Body: Take the body print rectangle, which measures 25 3/4×41″, and fold it in half. When folded, the rectangle will measure 25 3/4×20 1/2″. Using the required 1/2″ seam allowance, sew together the long edges of the folded rectangle and one set of the short edges. This stitching creates the pillowcase body. Once sewn, turn the entire body unit right side out and press it flat.
- Attach the Band: The band is now joined to the pillowcase body. Slide the pillowcase band over the pillowcase body. When positioning the band, ensure that the pieced side of the band is facing the pillowcase body (as illustrated in Diagram 1). Match the raw edges of the band and the pillowcase body, making sure the side seams align, and pin the layers together securely. Using a 1/4″ seam allowance, sew through all of the layers to attach the band to the pillowcase body.
- Finish the Seam: To complete the pillowcase and secure the seam allowance, press the pillowcase band open. The seam allowance should be pressed toward the pillowcase body. Finally, topstitch 1/8″ from the band edge. This topstitching step secures the seam allowance and finishes the pillowcase (referencing Diagram 2).
Download Free PDF:


