
Pattern Description:
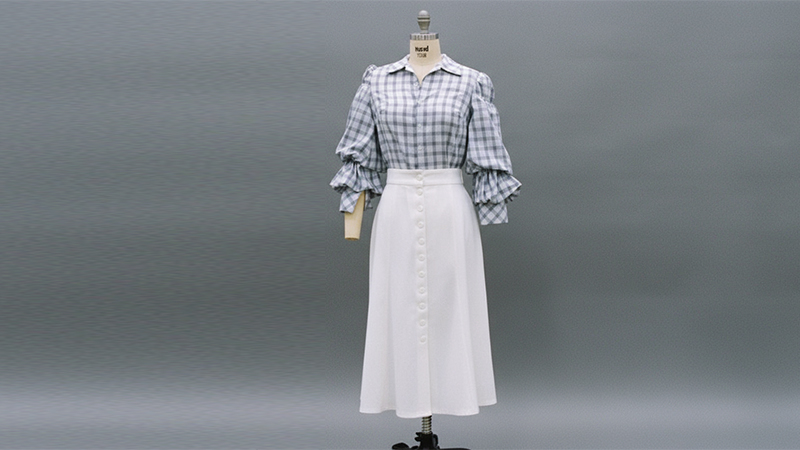
The Snapdragon Skirt is a free sewing pattern designed to evoke a dark academia aesthetic, making it ideal for a fall or winter wardrobe.
The skirt features godets, which are triangular pieces inserted into the garment to provide extra flair and movement. The pattern has a button closure and is often styled with the Wren Shirt.
Materials Needed & Measurements:
- Main Fabric:
- Amount: 3 yards.
- Fabric Used: Italian Gray and Pale Blue Plaid Wool Suiting.
- Alternative Recommended Fabrics: Medium Weight Linen, Cotton Sateen, or Cotton Flannel.
- Buttons: 12 Matte Dove Gray and Shiny Midnight Narrow Rimmed 4-Hole Plastic Buttons.
- Thread: 1 spool of 114 Graymore 100m Gutermann Sew All Thread.
- Interfacing: Fusible interfacing is used for the waistband pieces. For the front waistband, 4 pieces of fusing were cut, and for the back waistband, 2 pieces of fusing were cut.
Measurements/Notions:
- Seam Allowance: All seam allowances are 1/2″.
- Button Size: 36L/23mm.
- Hemming: A basting stitch ¼” from the bottom edge is used to help gather the curved edge of the skirt before folding and pressing.
- Notches: These T-shaped markings on the pattern lines are used to help keep the pattern pieces properly matched during assembly.
- Godets: Construction of the godets involves matching dots at the uppermost point and decreasing the seam allowance as the uppermost point is reached.
Instructions for Making the Snapdragon Skirt Pattern:
Sew the Godets
The Snapdragon Skirt features godets, which are triangular pieces inserted into the garment to give it extra flair and movement.
Although the godets in the pattern are much larger than a mini sample, the sewing technique remains the same.
- Step 1: Place the right sides of the fabric together. Line up one edge of the skirt slash with one edge of the godet, making sure to match the dots located at the uppermost point. It is important to note that the godet may begin to overlap the edge near the top, which is acceptable.
- Step 2: Begin sewing from the bottom edge. As you move up and reach the uppermost point, it is necessary to decrease the seam allowance. If needed, draw a guideline to assist with this decrease. Crucially, do not backstitch at the top.
- Step 3: Pin the godet to the other side of the slash, placing the right sides together. If the top of the godet does not lay flat, you may need to remove one or two stitches from the top before sewing this side.
- Step 4: Press the finished seam. You may choose to edgestitch the seam here for added stability.
Sew the Skirt
Once the godets are incorporated, the main skirt panels can be assembled.
- Step 1: The straight edges of the skirt must be double folded to the wrong side of the fabric. The folded edge is marked by the outermost notch, and the inner notch indicates the placement of the second fold. Sew along this edge. This process must be repeated on the opposite side.
- Step 2: Join the front skirt pieces to the back skirt pieces by sewing them together at the side seams, ensuring that the right sides of the fabric are facing each other.
Sew the Waistband
The waistband construction requires the use of interfacing.
- Step 1: Begin by attaching the fusible interfacing to the wrong side of each waistband piece.
- Step 2: Sew the front waistband pieces to the back waistband pieces, keeping the right sides together. Repeat this step to create a second, identical waistband assembly. You should now have two complete waistbands—an outer waistband and an inner waistband.
- Step 3: Pin the outer and inner waistbands together, right sides facing. Sew along the top edge of these pieces.
Finish the Skirt
The final steps involve attaching the waistband, hemming the curved bottom edge, and adding the button closure.
- Step 1 (Waistband Attachment): Pin the edge of the outer waistband, right sides together, to the top edge of the skirt, taking care to align the side seams. Sew the pieces together. After sewing, trim the seam allowance and press the allowance upward toward the waistband.
- Step 2 (Closing the Ends): Sew closed each end of the waistband. Use the existing skirt fabric as a guide to determine where to sew the waistband ends. Clip the corners of the waistband and trim the seam allowances on the band.
- Step 3 (Finishing the Inner Band): Fold the free edge (the bottom edge) of the inner waistband underneath so that it sits just clear of the seam created in Step 1. Press this fold, and then stitch in the ditch.
- Step 4 (Hemming the Curved Edge): Because the bottom edge of the skirt is curved, a specific technique is required for a clean hem. First, sew a basting stitch ¼” from the bottom edge. Gather the fabric slightly using this basting stitch. Next, fold the edge over and press it. Fold the edge over again, using the basting stitch line as the guide for the second fold, and press it again. Finally, sew the hem.
- Step 5 (Buttons and Buttonholes): For the closure, sew the desired number of buttonholes on the wearer’s right side of the garment. Sew the buttons (recommended size 36L/23mm) on the wearer’s left side. The sample project utilized 12 Matte Dove Gray and Shiny Midnight Narrow Rimmed 4-Hole Plastic Buttons.
Download Free PDF:


