Pattern Description:
This free holiday pillowcase pattern guides you through creating a charming envelope-style pillow slipcover, no zippers or buttons required.
It features a simple design using one square front panel and two overlapping back panels that form an easy opening for inserting or removing the pillow.
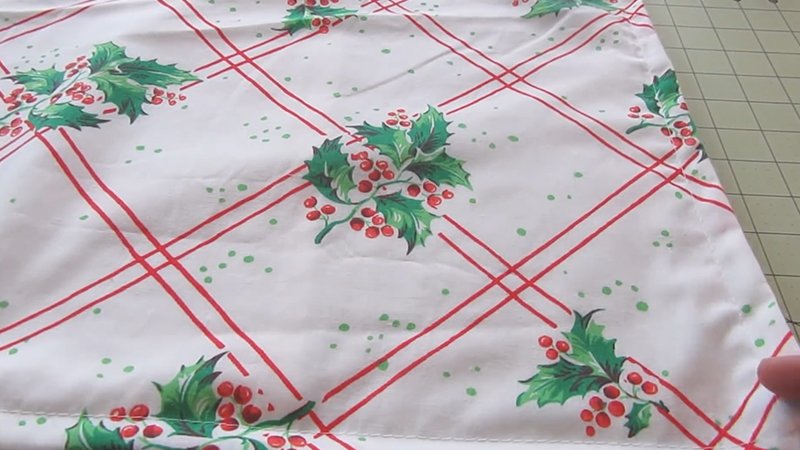
Ideal for festive or everyday use, this versatile project can be customized with holiday fabrics, felt appliqués, or decorative accents.
Materials Needed & Measurements:
- Materials: Sewing machine, thread, scissors, pins, ruler/tape, tailor’s chalk, fabric, felt sheets, jingle bells or buttons (optional).
- Measurements (for 18″ pillow):
- Front panel: 18½″ × 18½″ (½″ seam allowance)
- Back panels (2): 18½″ × 12½″ each
- Adjust dimensions to match pillow size.
Instructions for Making the Holiday Pillowcase Pattern:
Cut the Fabric Pieces
Using your measurements, carefully cut out the following pieces:
- Front Panel: Cut one square piece measuring 18½″ × 18½″.
- Back Panels: Cut two rectangles, each measuring 18½″ × 12½″.
Use tailor’s chalk or a fabric marker to mark cutting lines for accuracy. Always cut on a flat surface and double-check measurements before trimming.
Hem the Back Panels
The next step is to hem one long edge of each back panel. This hem will form the clean opening for your pillow insert.
- Place one back panel wrong side up (pattern facing down).
- Fold the long edge over 1″ toward the wrong side and press it flat with an iron.
- Fold it again by ½″ to enclose the raw edge, then press again.
- Pin the fold in place along the entire length.
- Stitch close to the inner folded edge using a straight stitch.
- Repeat the same process for the second back panel.
This double fold hem prevents fraying and gives a neat, durable finish.
Add Embellishments (Optional)
If you want to personalize your pillowcase for the holidays, now is the time to add decorations to the front panel before sewing the pieces together.
Ideas for Embellishments:
- Felt Appliqués: Print or trace patterns such as snowflakes, reindeer, or Christmas trees onto felt sheets, then cut and sew them onto the front fabric.
- Buttons or Bells: Sew on red buttons or jingle bells for a festive touch.
- Embroidery or Iron-on Designs: Add names, greetings, or holiday quotes for a custom look.
Make sure to secure all embellishments firmly so they withstand use and washing.
Assemble the Pillowcase
Now that your panels are prepared, it’s time to assemble the slipcover.
- Lay the front panel right side up on your work surface.
- Take one back panel and place it right side down on top of the front panel, aligning the edges along the top and sides.
- Position the second back panel on the opposite side, overlapping the first one in the center. The hemmed edges should face inward and overlap by several inches.
- Pin or clip all around the edges to hold the layers in place.
Double-check that the overlapping back panels form the envelope-style opening.
Sew the Pillowcase
Using a ½″ seam allowance, sew around all four sides of the pillowcase. Be sure to backstitch at the beginning and end to secure your stitches.
After sewing, trim the corners diagonally (without cutting through the stitching) to reduce bulk. This helps create sharp, clean corners when the pillowcase is turned right side out.
Turn and Finish
Gently turn the pillowcase right side out through the back opening. Use a blunt tool or the end of a pencil to push out the corners neatly. Give the entire pillowcase a good press with an iron to smooth the seams.
Finally, insert your pillow through the envelope opening. Adjust the corners until the pillow sits evenly inside the slipcover.
The overlapping flaps should conceal the pillow insert completely, creating a clean, tailored finish.
Enjoy Your Handmade Pillowcase
Your holiday pillowcase is now ready to display! Arrange it on your couch, bed, or reading nook for an instant festive touch.
Try experimenting with different fabrics, trims, and appliqués to make seasonal sets for other holidays or everyday décor.
Download Free PDF: