Pattern Description:
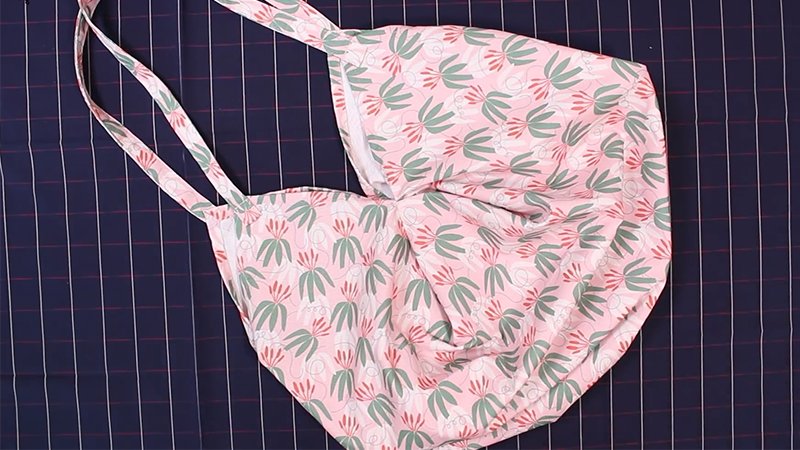
This sweet pattern creates two lined, zippered tote bags (a large and a medium-sized bag) using only one yard of exterior fabric and one yard of lining fabric.
The finished large tote is approximately 15” tall and 20” wide, and the smaller tote is about 10” tall and 15” wide. This project is considered very easy and fast because it requires few details.
Materials Needed & Measurements:
- Exterior Fabric: 1 yard (must be at least 40” wide).
- Lining Fabric: 1 yard (must be at least 40” wide).
- Zippers: 2 total, one at least 27” long and one at least 21” long.
- Fusible Fleece (Exterior Pieces): 2 yards (e.g., HeatnBond).
- Medium Weight Woven Interfacing (Lining Pieces): 2 yards (e.g., Pellon SF101).
- Handle Fabric: 3/4 yard.
- Fusible Fleece (Handles): 1 yard.
- Tools: A fabric marking pen.
Cutting Measurements (for Bag Body Pieces):
- Large Bag Exterior/Lining Pattern Piece: A 23” x 19” rectangle, with 3” squares cut from the bottom corners.
- Smaller Tote Exterior/Lining Pieces: Cut 13” x 17” rectangles (two exterior and two lining pieces), with 2” squares cut from the bottom corners.
Instructions for Making the More One Yard Magic Totes Pattern:
Cutting the Pattern Pieces
To cut the required two large exterior pieces, two smaller exterior pieces, and their corresponding lining pieces from one yard of 40″ wide fabric, a pattern piece must first be made for the larger bag.
- Using large tissue or craft paper, cut a rectangle measuring 23″ x 19″.
- Measure and cut 3″ squares from the bottom corners of this pattern piece.
- Using this large pattern piece, cut 2 exterior pieces and 2 lining pieces.
- From the remaining fabric, cut rectangles measuring 13″ x 17″ for the smaller tote (2 exterior and 2 lining pieces).
- Cut 2″ squares from the bottom corners of these smaller pieces.
Attach the Zipper
- Lay the zipper along the top edge of a bag exterior piece with the right side of the zipper facing down, and pin it in place. The opening edge of the zipper should be positioned on the left side, with the zipper teeth approximately 3/4″ away from the edge.
- Mark the end of the zipper 1″ away from the right edge using a fabric marking pen.
- Baste the zipper to the top of the exterior piece using a 1/4″ seam allowance. As you near the right side of the piece, curve the zipper downward so it is not sewn to the top of the bag starting at the 1″ mark. Pin the end of the zipper away from the top seam.
- Place a lining piece on top of the exterior piece. Stitch the lining to the exterior along the top edge using a 1/4″ seam allowance, sandwiching the zipper between them. Because the end of the zipper is pinned out of the way, it should not be caught in the seam for the last inch.
- Place the exterior and lining pieces wrong sides together. Press them away from the zipper and topstitch on the exterior, 1/8″ away from the edge.
- Place the top edge of the zipper against the top edge of the other bag exterior piece (right sides together) and pin it. Baste in place, starting 1″ from the edge where the zipper begins to curve away.
- Place the remaining lining piece on top (at this point, the lining pieces will be right sides together) and pin along the top edge. Pin the longer end of the zipper away, ensuring it is out of the seam.
- Stitch along the top edge using a 1/4″ seam allowance.
- Place this exterior and lining wrong sides together, press them away from the zipper, and topstitch 1/8″ from the edge.
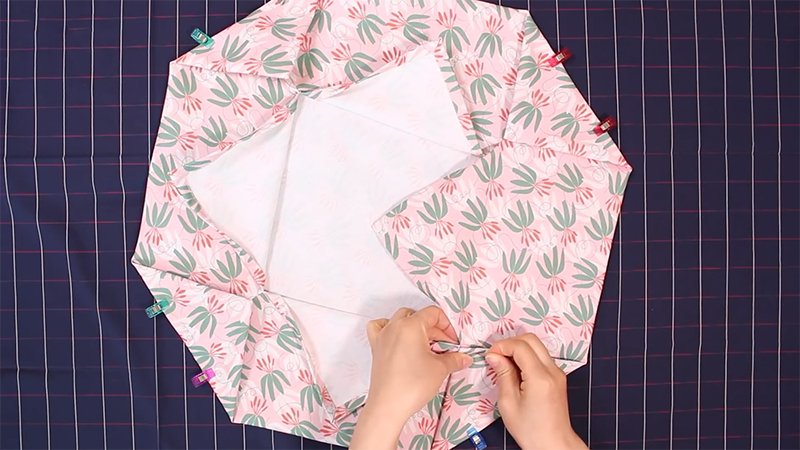
Finish Sewing the Tote
- Open the zipper halfway. Place the exterior pieces right sides together and the lining pieces right sides together, with the zipper running down the center.
- Pin all around the tote, avoiding the corner cut-outs. It is crucial to push the end of the zipper inside so that it is not caught in the seam.
- Sew the four straight edges using a 1/2″ seam allowance, but leave a 5″ opening at the bottom of the lining.
- Box the corners by aligning the side and bottom seams together. Stitch these corners using a 1/2″ seam allowance.
- Turn the bag right side out through the opening in the lining. Press the edges of the opening to the inside, and then sew the opening shut.
- Stuff the lining inside the bag and zip it closed.
Finishing the Zipper End
- Use old scissors to cut off the end of the zipper about 4″ from the edge of the bag.
- Measure the width of the end of the zipper (which is typically 1″ wide). Cut a fabric piece that is 3″ long by twice the width of the zipper.
- Press the long edges of this fabric to the center. Press the ends over 1/2″. Fold the piece in half and press.
- Fold the resulting fabric tab over the end of the zipper and pin it.
- Sew around the tab 1/8″ from the edge. If a metal zipper is used, sew slowly to avoid breaking the needle on the zipper teeth.
The tote is now complete.