Pattern Description:
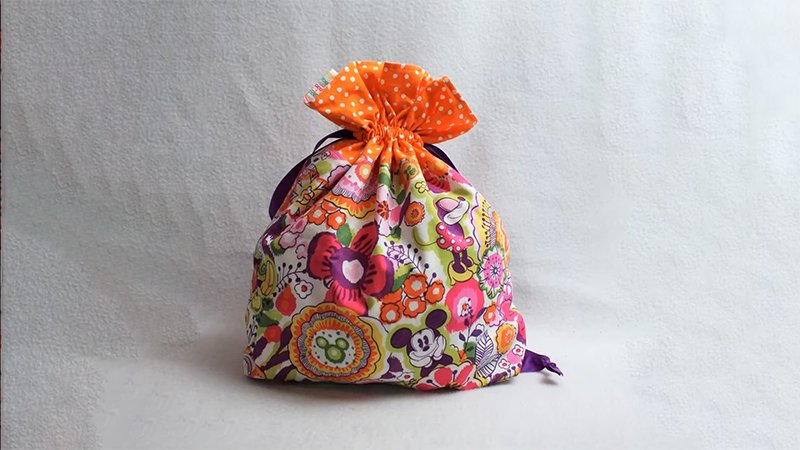
This free sewing tutorial provides instructions for making a Japanese Style Drawstring Bag Pattern.
The bag is reversible, allowing for either beautiful patchwork with internal pockets or exterior pockets with internal patchwork. The bag is versatile and looks adorable whether carried cinched or un-cinched.
Materials Needed & Measurements:
Fabric and Cut Pieces:
- 2 patchwork pieces, 18” x 21”.
- 3 patchwork strips, 2” x 21”.
- 2 bag exterior pieces, 18” x 21”.
- Linen, Essex Linen, or lightweight canvas.
- 1 pocket piece, 15” x 21”.
- 2 patches (can be store bought or DIY).
- 2 handle pieces from the exterior fabric, 3” x 14”.
- 2 print handle pieces, 3” x 14”.
Notions:
- 100” of cotton rope (clothesline), 1/4” thick.
- Pellon shape-flex woven interfacing. This is applied to all pieces except the 2” x 21” strips.
Instructions for Making the Japanese Style Drawstring Bag Pattern:
Preparation and Interfacing
Begin by constructing the two 18” tall x 21” wide pieces that will serve as the lining, even though the final bag is reversible.
Sew pieces together, perhaps in a quasi-log cabin style, until each piece reaches the required dimensions. Next, piece together three 2” x 21” patchwork strips.
For structure, apply Pellon shape-flex woven interfacing to all fabric pieces, excluding only the three 2” x 21” patchwork strips.
This single layer of woven interfacing helps the bag look more professional and prevents it from becoming too floppy. Since the interfacing is 20” wide and some pieces are 21” wide, the interfacing can be centered on the larger pieces, utilizing the 1/2” seam allowance margin.
Finally, cut 3” squares out of the bottom corners of both the bag exterior pieces and both the patchwork/lining pieces.
Creating the Pocket and Patch Application
Start the sewing process with the pocket piece (15” x 21”). Fold it in half, aligning the 15” edges with wrong sides together, and press. The raw edges form the top, and the fold forms the bottom.
Next, prepare one of the 2” x 21” patchwork strips: fold it in half lengthwise (wrong sides together) and press; then fold one of the long edges toward the center and press.
Pin this folded patchwork strip to the back of the pocket piece, aligning all raw edges. Ensure the side of the strip with the extra pressed fold is oriented toward the bottom (not in this seam).
Stitch across the top using a 1/4” seam allowance. Wrap the patchwork binding strip around to the front, pressing it again with the raw edge tucked under, and stitch it in place close to the fold.
Pin the completed pocket piece onto one of the exterior fabric pieces, positioning it about 1/2” above the 3” corner cut-outs.
Stitch across the bottom pocket edge close to the fold and baste the sides in place within the 1/2” seam allowance.
Although you can stitch vertical lines to divide the pocket, the original bag design featured a small patch placed over the center of the pocket to prevent it from gaping open. If desired, sew on the patch now.
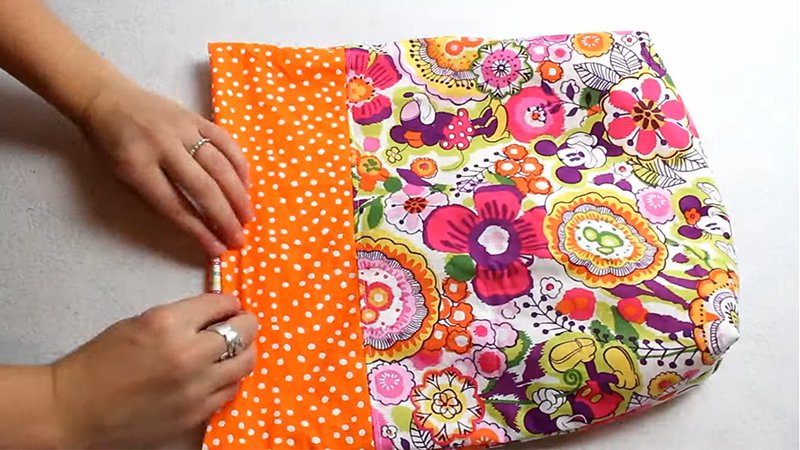
Preparing the Casings
Take the remaining two 2” x 21” patchwork strips, turn, press, and sew 1/4” hems at the ends. Press these strips in half lengthwise, wrong sides together.
To form the casing, pin one folded patchwork strip to the top edge of each exterior piece, aligning the raw edges.
Baste these casing pieces in place within the 1/2” seam allowance. If you wish to apply a patch to the back of the bag exterior, sew it on at this time.
Constructing and Basting the Handles
Pin each 3” x 14” exterior fabric handle piece to a 3” x 14” print handle piece. Stitch along both long edges. Turn the two handles right side out and press them flat. Topstitch close to the long edges.
Pin one finished handle to each side of the bag exterior, placing it directly over the basted patchwork casing.
Center the handles, positioning them approximately 6” from each edge. Baste the handles securely in place.
Assembling the Bag Exterior and Lining
Pin the bag exterior pieces right sides together. Stitch along the sides and the bottom, leaving the corner cut-outs open.
Press the seams open. To box the corners, pinch each cut-out flat, carefully aligning the center and bottom seams. Pin and stitch across both corners.
Assemble the two lining/patchwork pieces in the same manner (right sides together, stitching sides and bottom).
However, leave a 6” opening at the bottom of the lining pieces. Press the lining seams open. Box the corners of the lining.
Joining the Bag and Inserting the Drawstrings
With the bag exterior turned right side out and the lining still inside out, place the lining over the exterior bag.
Pin around the top edge, ensuring the side seams align. Stitch all the way around the top perimeter of the bag.
Turn the assembled bag right side out and press. Carefully press the top of the bag exterior and the lining fabric away from the prepared casings. Topstitch on the bag exterior close to the edge, then sew the 6” opening in the lining closed.
Cut the 100” length of 1/4” cotton rope (clothesline) in half, creating two 50” long pieces. Attach a safety pin or a bodkin to the end of the first rope piece.
Pull this rope through one casing and then through the casing on the opposite side. With the bag flat (not cinched), tie a knot in both ends of the rope together, approximately 1” from the edge of the bag, and trim the excess rope.
Repeat this step with the second rope piece, but start the insertion process from the opposite side of the bag.