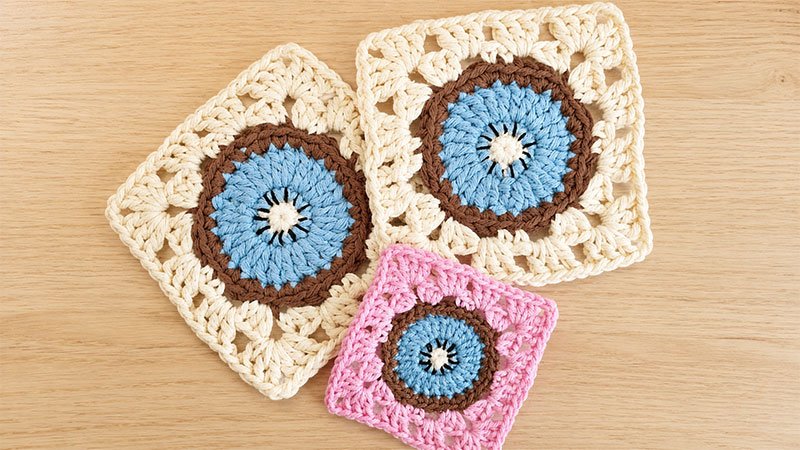
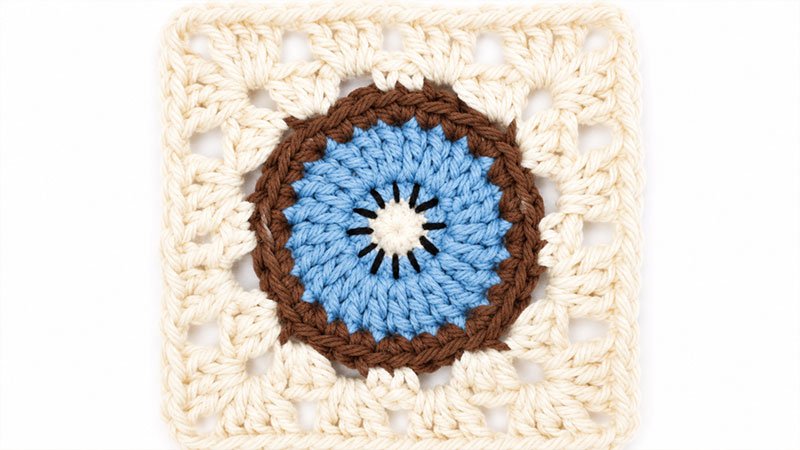
This cheerful square measures approximately 4 inches (10 cm) and mimics a sliced kiwi fruit, transitioning from a pale core to bright green flesh, a textured brown rind, and a clean cream-colored border.
What You’ll Need
-
Yarn: Aran weight cotton yarn in four colors:
-
Color A: Pale Cream/White (for the inner core)
-
Color B: Vibrant Lime Green (for the kiwi flesh)
-
Color C: Medium Brown (for the fuzzy kiwi skin)
-
Color D: Vanilla/Off-White (for the square border)
-
-
Hook: 4.5 mm (US 7) crochet hook
-
Finishing touches: Black embroidery floss and a tapestry needle.
Key Stitch Explanations
-
Magic Circle (MC): An adjustable yarn loop that allows you to pull the center tight, leaving zero hole in the middle of your fruit core.
-
Increase (Inc): Work two stitches into the exact same loop from the previous row to expand your circle without it curling.
-
Back Loop Only (BLO): Instead of inserting your hook under both top loops, insert it only into the loop furthest away from you. This creates a neat ridge on the front of your work, cleanly separating the round kiwi fruit from the squared background.
Step-by-Step Crochet Pattern
Part 1: Creating the Kiwi Slice (The Circle)
Round 1: The Inner Core (Color A)
-
Form a Magic Circle with your cream yarn.
-
Make 1 chain stitch to secure the loop (this chain does not count as a stitch).
-
Work 6 Single Crochets (sc) directly into the magic ring.
-
Grab the yarn tail and pull it firmly to close the center hole completely.
-
Finish by making a Slip Stitch (sl st) into the very first single crochet you made to close the ring.
-
Stitch count for this round: 6 stitches.
-
Cut Color A and pull the yarn through to fasten off.
Round 2: Expanding the Core (Color B)
-
Turn your work so the right side faces you. Tie your Lime Green yarn into any single crochet from Round 1.
-
Make 1 chain stitch.
-
Work 2 Single Crochets into that exact same starting stitch.
-
Continue around the circle, placing 2 Single Crochets into every single stitch from the previous round.
-
Join with a Slip Stitch into the first single crochet of the round.
-
Stitch count for this round: 12 stitches.
Round 3: The Green Fruit Flesh (Color B)
-
Chain 2 (this acts as a height riser and does not count as a stitch).
-
Double crochet twice into the first stitch.
-
Continue around the circle by working 2 Double Crochets (dc inc) into every single stitch from Round 2.
-
Secure the loop by making a Slip Stitch into the top of the first actual double crochet (not into the chain space).
-
Stitch count for this round: 24 stitches.
-
Cut Color B and fasten off.
Round 4: The Kiwi Rind (Color C)
-
With the right side still facing you, attach the Brown yarn to any double crochet stitch from the previous round.
-
Chain 1.
-
Work 2 Single Crochets into the first stitch to create an increase. Then, work 1 Single Crochet into each of the next 2 stitches.
-
Repeat this sequence around the circle:
[2 sc in next stitch, 1 sc in the following stitch, 1 sc in the stitch after that]. Repeat this pattern 8 times total. -
Close the round with a Slip Stitch into the first single crochet.
-
Stitch count for this round: 32 stitches.
-
Cut Color C and fasten off.
Part 2: Turning the Circle into a Square
Round 5: Creating the Corners (Color D – Working in BLO)
Note: Every stitch in this round must be worked into the Back Loop Only to create a defined frame around the kiwi fruit.
-
Join your Vanilla/Off-White yarn into the back loop of any brown stitch from Round 4.
-
Work 1 Single Crochet into that same back loop.
-
Chain 1, skip over the next 2 brown stitches entirely.
-
In the next stitch, create your first corner cluster: work 3 Half Double Crochets (hdc) into that single loop, chain 2, and work another 3 Half Double Crochets into the very next stitch.
-
Chain 1, skip the next 2 brown stitches.
-
Work 1 Single Crochet into each of the next 2 stitches.
-
Repeat the corner sequence:
-
Chain 1, skip 2 stitches, [3 hdc] in the next loop, chain 2, [3 hdc] in the next loop, chain 1, skip 2 stitches, then work 1 single crochet into each of the next 2 stitches. -
Cycle through this pattern 3 times around.
-
-
To finish the final side, chain 1, skip 2 stitches, make your final corner cluster
([3 hdc], chain 2, [3 hdc])in the remaining stitches, chain 1, skip the last 2 stitches, and place 1 Single Crochet in the last remaining loop. -
Join with a Slip Stitch to the very first single crochet of the round.
Round 6: The Traditional Granny Border (Color D)
-
Slip stitch sideways into the first open chain-1 space. Chain 2 (this counts as your first double crochet post).
-
Work 2 Double Crochets into that exact same chain-1 space, then chain 1.
-
Work the Corner: In the corner chain-2 space, crochet 3 Double Crochets, chain 2, and 3 Double Crochets all into that same corner opening. Chain 1.
-
Work the Sides: In each of the next two chain-1 spaces along the flat edge, work 3 Double Crochets followed by a chain 1.
-
Repeat this sequence around all four sides:
[Corner Cluster, Chain 1, 3 dc in next space, Chain 1, 3 dc in next space, Chain 1]. -
When you reach the beginning, complete your final side stitches, chain 1, and join with a Slip Stitch into the top of your initial double crochet.
-
Cut your yarn and pull it through to fasten off completely.
Adding the Finishes Details
       .---.
    .-'     '-.      <- Light Core (Color A)
  .'     *     '.
 /   *       *   \   <- Seeds embroidered with
|  *   ( O )   *  |     black embroidery floss
 \   *       *   /
  '.     *     .'    <- Green Flesh (Color B)
    '-.     .-'
       '---'         <- Brown Rind (Color C)
-
Weave in the Tails: Take your tapestry needle and thread all loose yarn ends through the back of your corresponding colored stitches to hide them safely.
-
Embroider the Seeds: Cut a length of black embroidery floss. Thread it onto your tapestry needle and make small, radiating straight stitches right along the border where the cream core (Color A) meets the green flesh (Color B). Space them out evenly around the center to mimic real kiwi seeds. Fasten off the floss on the back of the square.
Your handmade Kiwi Fruit Granny Square is complete and ready to be blocked or joined into a colorful blanket, bag, or coaster set!