

Pattern Description:
This super-easy, beginner-level crochet heart pattern is perfect for stash-busting and creates an absolutely adorable outcome.
These super cute hearts can be used for gift wrapping, wall hangings, appliques, or as part of self-care kits. The pattern uses basic stitches and is designed to be quick and easy.
Materials Needed & Measurements:
- Yarn: Lion Brand yarn scraps.
- Hook: A 6.5mm crochet hook.
- Notions: Scissors.
Stitches & Abbreviations Used:
- Sl St: Slip Stitch
- Ch: Chain
- Sc: Single Crochet
- Dc: Double Crochet
- Tr: Treble Crochet
Instructions for Making the Sweet Little Heart Crochet Pattern:
This pattern consists of two rounds, building upon each other to form the characteristic heart shape.
Round 1: Establishing the Heart’s Shape
Round 1 creates the initial foundation of the heart, including its two rounded top lobes and the beginning of the point.
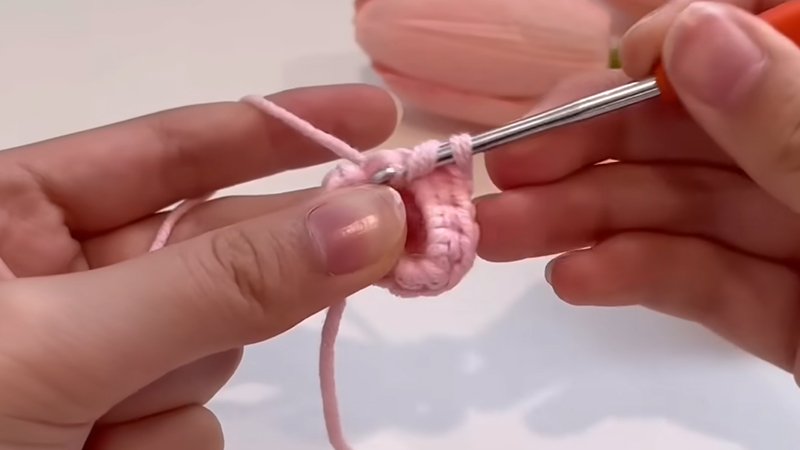
- Make a magic ring and then Ch 3 (chain 3). The magic ring forms the adjustable center of your heart, allowing you to pull it tight later for a neat finish. The chain 3 often counts as your first stitch in this type of work, providing height.
- Tr 2 (work 2 Treble Crochets) into the magic ring. These first two treble crochets will contribute to forming the first rounded lobe at the top of your heart.
- Dc 3 (work 3 Double Crochets) into the magic ring. Following the treble crochets, these three double crochets will continue to build up the first lobe, adding to its curvature and volume.
- Tr 1 (work 1 Treble Crochet) into the magic ring. This single treble crochet stitch serves as the central, lowest point of the heart in this round, separating the two lobes and initiating the heart’s tip.
- Dc 3 (work 3 Double Crochets) into the magic ring. These three double crochets will begin to form the second rounded lobe of the heart, mirroring the first side.
- Tr 2 (work 2 Treble Crochets) into the magic ring. These two treble crochets complete the second lobe, bringing its height up to match the first.
- Ch 3 (chain 3). This chain 3 will help to finish off the symmetry of the second lobe and prepare for closing the round.
- Pull the magic ring to close it off and finish the round with a Sl St (slip stitch) through the center of the magic ring. Carefully pull the tail of your magic ring to cinch the center stitches together tightly, forming a neat circle. Then, connect the end of your round to the beginning with a slip stitch through the very center of the pulled-tight magic ring, effectively closing the circle and completing your first round.
Round 2: Defining the Heart’s Outline
Round 2 further shapes the heart, creating a distinct border and the characteristic pointed bottom.
- Sl st 1 (slip stitch 1) and sc 1 (single crochet 1) into the ch space from the previous round. You will begin by making a slip stitch into the chain-3 space from Round 1, then immediately work a single crochet into the same chain-3 space. This helps transition smoothly to the next stitches and defines the edge.
- 2sc (work 2 single crochets) into each of the next 2 tr sts (treble stitches). Locate the next two treble crochet stitches from Round 1. Into the first of these, work two single crochets. Then, move to the second treble crochet stitch and work two single crochets into it as well. This increases the stitch count along the curve of the heart’s lobe.
- Sc 1 (work 1 single crochet) into each of the next 3 dc sts (double crochet stitches). Next, you will work a single crochet into each of the following three double crochet stitches from Round 1, one stitch per double crochet.
- Sc 1, ch 2, sc 1 (work 1 single crochet, chain 2, then 1 single crochet) into the tr st at the tip of the heart. Find the single treble crochet stitch that formed the central bottom point in Round 1. Into this one stitch, you will work a single crochet, then chain two, and then work another single crochet. The chain-2 space here is critical as it creates the sharp, defined point at the bottom of your heart.
- Sc 1 (work 1 single crochet) into each of the next 3 dc sts (double crochet stitches). Continue along the second lobe by working a single crochet into each of the next three double crochet stitches from Round 1.
- 2sc (work 2 single crochets) into each of the next 2 tr sts (treble stitches). Similar to the beginning of the round, you will now work two single crochets into each of the next two treble crochet stitches from Round 1, increasing the stitch count to form the curve of the second lobe.
- Sc 1 (work 1 single crochet) and sl st 1 (slip stitch 1) into the ch space. In the final chain-3 space from Round 1, work one single crochet, followed by one slip stitch. This mirrors the start of the round and brings the two sides together.
- Sl st (slip stitch) through the center of the heart. To finish Round 2 and stabilize the center, make a slip stitch directly through the tight center of your magic ring again.
- Ch 1 (chain 1), then cut the yarn and fasten off. Make one final chain stitch to secure your work, then cut your yarn, leaving a tail. Pull the cut yarn tail completely through the loop on your hook to fasten off securely.
Tip: If you intend to tie your heart onto something, such as a gift, make sure to leave longer tails at both the beginning and the end of your project. This will give you ample length to create a knot or a bow.
Finishing Instructions
Once you have completed both rounds and fastened off, follow these steps to finish your adorable heart:
- Insert your hook into the center of the heart. Carefully guide your crochet hook into the small opening at the very center of your magic ring.
- Pull the ending tail through to the back of the heart. Use your hook to gently pull the yarn tail you just fastened off from the front side of the heart to the back side.
- Tie both tails together. Locate both the starting tail (from your magic ring) and the ending tail on the back of your heart. Tie these two tails together in a secure knot. This not only further tightens the center but also secures any loose ends.
- Weave in the ends, or leave them out if you plan on tying your heart onto something else. If you do not plan to tie your heart onto another object, use a yarn needle to carefully weave the remaining tails into the stitches on the back of your heart, hiding them neatly. If you followed the tip and left longer tails, you can skip weaving them in if you intend to use them for tying the heart onto gifts or other items.
You’re all done! Your super cute crocheted heart is now complete and ready to spread some love.
Download Free PDF:


