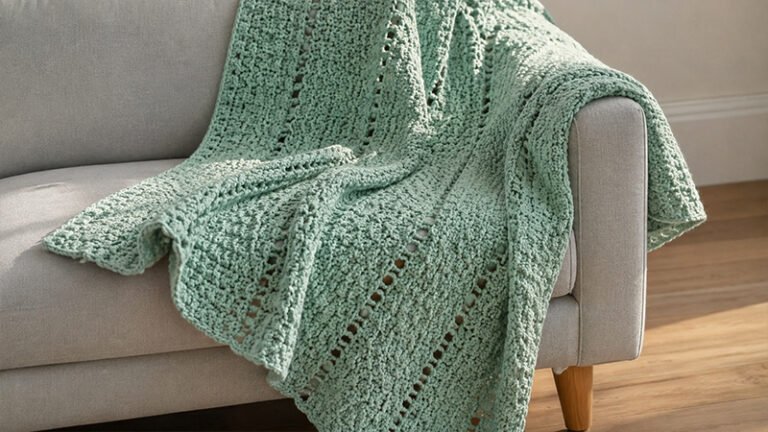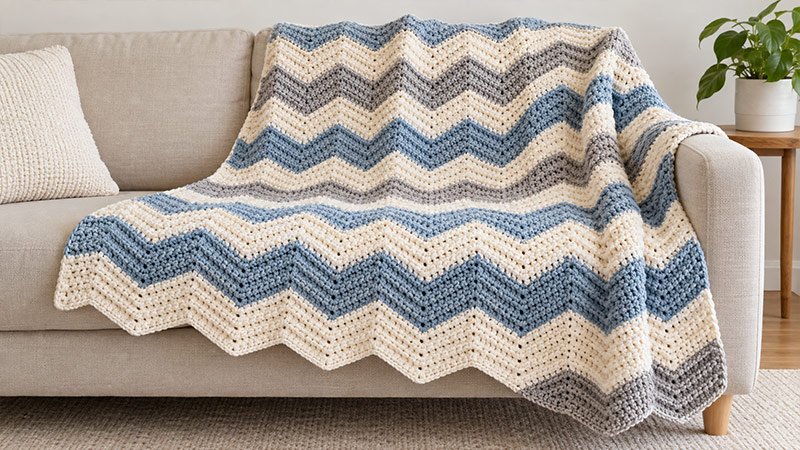
The Textured Chevron Blanket has soft peaks and dips. Simple stitch changes form the chevron shape. Raised rows give the blanket a nice feel.
Work the blanket flat in rows. Start at the base and work up. Most rows use basic crochet stitches. The row repeat is easy to learn.
Some rows use back loops. This adds more depth to the fabric. It also keeps the stitch work simple.
Use one color, two colors, or a few soft shades. You can change the size, too. Add or take out full chevron repeats to change the width.
The final size and yarn use may vary. Make a gauge swatch before you start.
Pattern Details
Skill Level
Easy to Intermediate
You should know how to:
- Chain.
- Work single crochet and half double crochet.
- Crochet in the back loop.
- Work increases and decreases.
- Change yarn colors.
- Weave in yarn ends.
Size
Finished size: About 44 inches wide × 56 inches long.
The final size may change based on your yarn, hook, gauge, and stitch tension.
Gauge
14 hdc × 11 rows = about 4 inches in the main pattern.
Gauge does not need to be exact for a blanket. Still, checking it will help you plan the size and yarn amount.
Materials
- Worsted-weight yarn, Category 4: About 2,200–2,600 yards total.
- Color A: About 800 yards.
- Color B: About 700 yards.
- Color C: About 700 yards.
- Extra yarn may be needed if you make the blanket larger.
- Crochet hook: US H/8, 5 mm, or size needed for gauge.
- Yarn needle.
- Scissors.
- Stitch markers.
- Measuring tape.
Abbreviations
- beg – beginning
- BLO – back loop only
- ch – chain
- hdc – half double crochet
- hdc2tog – half double crochet 2 stitches together
- rep – repeat
- sc – single crochet
- sk – skip
- sl st – slip stitch
- sp – space
- st(s) – stitch(es)
US crochet terms are used throughout this pattern.
Adjust the Size
The main chevron repeat uses 14 stitches.
To change the width, add or remove starting chains in groups of 14.
For a wider blanket, add one or more full repeats. For a smaller blanket, remove full repeats.
To change the length, simply work more or fewer rows.
Make a short sample first if you plan to change the size. This will help you see the width of one full chevron repeat with your yarn and hook.
Colors
The sample layout uses three colors:
- Color A: Cream
- Color B: Dusty blue
- Color C: Soft gray
Use each color for 8 rows before changing to the next shade.
Repeat:
A → B → C
Keep repeating this color order until the blanket is close to the length you want.
You can also use one color for the whole blanket.
Pattern Notes
- Turn the work after each row.
- The turning ch does not count as a st.
- Keep the first and last sts in view.
- Use stitch markers on the edge sts if you need them.
- Each chevron has one peak and one dip.
- Add sts to make each peak.
- Join sts to make each dip.
- Work in the BLO when the pattern says to do so.
- BLO rows make raised lines.
- Keep the yarn loose and even as you work.
- Do not pull the decrease sts too tight.
- Count your sts often at first.
- Keep the same st count in each row.
- Change yarn at the end of a row.
- To change yarn, use the new color to end the last st.
- Weave in yarn ends as you go or when you are done.
Pattern Instructions
Foundation
With Color A, ch 156.
The extra chains allow for the turning ch and the chevron pattern.
Row 1
- Hdc in the 2nd ch from the hook.
- Hdc in the next 5 ch.
- Work 3 hdc in the next ch. This makes a peak.
- Hdc in the next 6 ch.
- Hdc2tog over the next 2 ch.
- Hdc2tog over the next 2 ch once more.
- Hdc in the next 6 ch.
- Work 3 hdc in the next ch.
- Rep this set of sts across the row.
- Keep both ends of the row even.
- Ch 1 and turn.
Check the first row as you work. You should start to see the peaks and dips.
Row 2
- Hdc in the first st.
- Hdc in each st until you reach the center st of the first peak.
- Work 3 hdc in the center peak st.
- Hdc across to the valley.
- Work hdc2tog twice across the four center valley sts.
- Hdc across to the next peak.
- Work 3 hdc in the center peak st.
- Continue this pattern across.
- Hdc in the last st.
- Ch 1 and turn.
Row 3 — Textured Row
Work this row in the BLO.
- Hdc BLO in the first st.
- Hdc BLO across to the center peak st.
- Work 3 hdc BLO in the center peak st.
- Hdc BLO across to the valley.
- Work hdc2tog BLO twice across the center valley.
- Continue the same way across the row.
- Hdc BLO in the last st.
- Ch 1 and turn.
Working through the back loops leaves a small ridge on the front of the blanket.
Row 4
Repeat Row 2.
Row 5
Repeat Row 2.
Row 6 — Textured Row
Repeat Row 3.
Rows 7–8
Repeat Row 2.
At the end of Row 8, change to Color B.
Rows 9–16
Continue the established chevron pattern.
Work every third row in the BLO to keep the raised texture even.
At the end of Row 16, change to Color C.
Rows 17–24
Continue with Color C.
Keep all peaks lined up over the peaks from the rows below. Keep all decreases centered over the valleys.
At the end of Row 24, change back to Color A.
Continue the Blanket
Repeat the 8-row color sections:
Color A – 8 rows
Color B – 8 rows
Color C – 8 rows
At the same time, keep working the established chevron pattern.
Continue until the blanket measures about 54 inches long, or until it is about 2 inches shorter than your planned finished length.
Try to finish after a full color section for a balanced look.
Final Texture Rows
Use Color A for the final section.
Work 6–8 rows in the established chevron pattern.
Make the last row a regular hdc row rather than a BLO row. This gives the top edge a softer finish.
Fasten off.
Optional Side Edging
The chevron shape can be left open along the top and bottom. A small edge can be added to the two straight sides.
Join Color A at one lower side corner.
Side Edge Row 1
- Ch 1.
- Work sc evenly along the side edge.
- Aim for about 2 sc for every 3 hdc rows.
- Adjust the spacing if the edge begins to pull or wave.
- Fasten off at the top corner.
Repeat on the other side.
Side Edge Row 2
Join Color A at the bottom of one side.
- Ch 1.
- Sc in each sc across the side.
- Fasten off.
Repeat on the second side.
Finishing
Cut the yarn. Leave a long tail.
Use a yarn needle to hide all loose ends. Weave each tail through a few sts on the back.
Lay the blanket flat. Use your hands to shape each peak and dip.
You can block the blanket if the yarn allows it. Check the yarn label first.
Let the blanket dry all the way. Then you can fold or use it.
The blanket should have clear zigzag lines. Small raised rows add a soft look and feel. The color blocks help the zigzag shape stand out.