
Pattern Description:
The Slow Hat pattern creates a stylish, stretchy hat using slip stitches worked in the back loop only.
Constructed sideways with short rows for shaping, it’s finished with a neat seam and foldable brim.
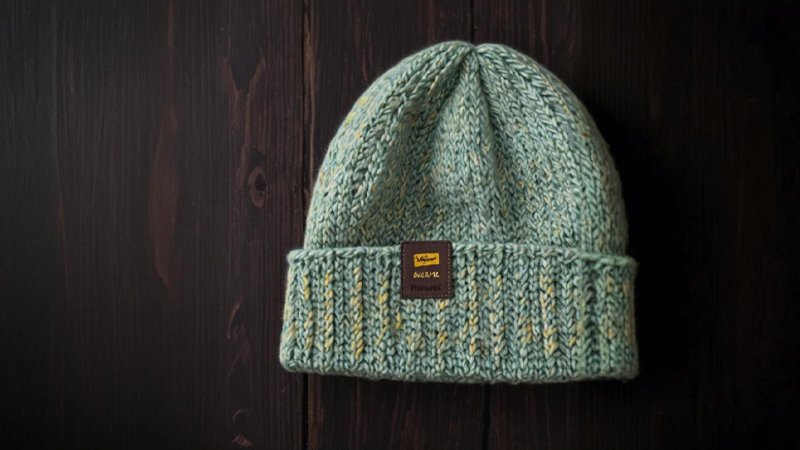
Designed in sport, worsted, or bulky yarn, each version measures 19″ around by 11″ long, perfect for crocheters seeking a mindful, non-beginner project.
Materials Needed & Measurements:
- Yarn:
- Sport weight: Merino Sport by Emily Gillies (1 skein, 282 yards)
- Worsted weight: Patons Classic Wool Worsted (2 skeins, 210 yards each)
- Bulky weight: Patons Shetland Chunky (2 skeins, 148 yards each)
- Yarn Weight: Sport, Worsted, Bulky
- Hook:
- Sport weight: 5.5 mm
- Worsted weight: 6.5 mm
- Bulky weight: 10 mm
- Notions:
- Custom vegan tag by Millie Marty Co. (optional, as used in one example)
- Measurements: All three versions (sport, worsted, bulky) make a hat that is 19″ around and 11″ in length (with brim unfolded).
Stitches & Abbreviations Used:
- ch: chain
- sl st: slip stitch
- st: stitch
- BLO: back loop only
- skip: skip a stitch
- turn: turn your work
- remaining st: remaining stitch
Instructions for Making the Slow Hats Pattern:
Setup Row:
- Row 1 (setup row): ch 55 (40, 33).
- Make a sl st in the second ch from hook, then continue to sl st in each ch to the end of the row.
- Stitch count clarification: For the sport weight yarn, this row will result in 54 stitches.
First Set of Short Rows:
- Row 2:ch 1. sl st in each st until there is one st left. Skip the remaining st, then turn your work.
- Stitch count clarification: For the sport weight, this row will have 53 stitches.
- Starting point clarification: You begin the short rows right at Row 2 after the setup row.
- Row 3:ch 1. Skip the first st. sl st in each st to the end of the row. Turn your work.
- Stitch count clarification: Since the turning chain does not count as a stitch and you skip the first stitch, for sport weight, this row will result in 52 stitches.
- Repeat rows 2 and 3 six (four, three) more times.
Transition After First Set of Short Rows:
- Next row: ch 1, then sl st in each st.
- Continue on by making a sl st into each end of the short row and into the visible space in between each row you’ve created. You will make a total of 14 (10, 8) stitches across these short rows. After this, sl st into the remaining last stitch from the original Row 2 (referring to the second stitch of the initial setup row).
- Clarification: The “space in between each row” is formed by the turning chain or a skipped chain. The aim is to create an even 14 (10, 8) slip stitches across the edge of the short rows.
- Next row:* ch 1, then sl st in each st to the end.
- Clarification: For this specific “Next row*”, simply slip stitch in every stitch you see in the row until you reach the bottom edge of the hat. You would have turned your work at the end of the previous row.
Second Set of Short Rows:
- Row 1: ch 1. sl st in each st until there are 14 (10, 8) stitches left in the row. Turn your work.
- Row 2:ch 1. sl st in every st to the end of the row. Turn your work.
- Clarification: After turning, ch 1, then sl st in every stitch.
- Row 3: ch 1. sl st in every st, then sl st in the next two st in the row that was marked with * (this is the row made before Row 1 of this second set of short rows). Turn your work.
- Repeat rows 2 and 3 six (four, three) more times.
Full Pattern Repetition:
- Once you have completed the second set of short rows, you will repeat the entire first and second sets of short rows four more times.
- Do not fasten off after completing the final repeat.
Finishing:
- Crochet the seam together right side out.
- Seaming clarification: The seam will be visible whether you crochet or sew it, though sewing might make it slightly less noticeable. The author suggests exploring methods for “invisible seams” typically used for granny squares, as the finishing edges are similar.
- Turn the hat inside out.
- Weave the yarn through each stitch in the crown opening.
- Cinch the opening closed and tie off securely.
- Weave in any remaining yarn ends.
- Turn the hat right side out.
- Fold up the brim.
- Following these instructions will create a hat where the top is angled by decreasing and increasing, while the brim edge remains straight, with the sections connected as you crochet.
Download Free PDF:


