Pattern Description:
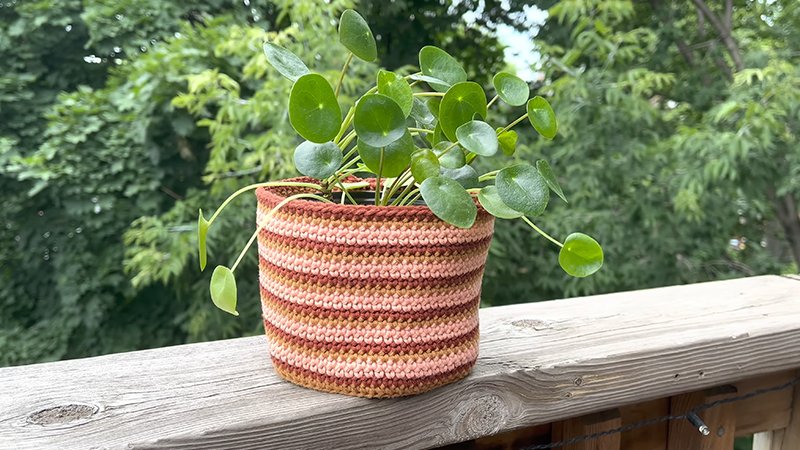
The Geo Potted Plant Covers are modern, fabric pot sleeves designed to give your planters a clean, geometric look.
Each cover is made from a circular base and a rectangular side panel, sized specifically for your pot and tray.
The reversible design allows you to showcase two fabrics, while the structured shape helps your plant pots sit neatly and stylishly in any room.
Materials Needed & Measurements:
Materials Needed:
- Planter pot with drip tray
- Outer fabric (medium-weight cotton, canvas, or home-decor fabric)
- Lining fabric (lightweight cotton or similar)
- Optional interfacing for added structure
- Sewing machine and matching thread
- Fabric scissors or rotary cutter
- Pins or clips
- Measuring tape
- Fabric marking tool
Measurements:
- Base Circle:
- Trace around the pot tray or the widest point of your pot.
- Add approximately 2 cm for seam allowance.
- Side Rectangle:
- Length: Circumference of your traced base circle (diameter × 3.14) plus 2 cm seam allowance.
- Height: About 1.5 × the height of your pot to allow room for a fold-over cuff, plus 2 cm seam allowance.
- Seam Allowance:
- Use 1 cm throughout unless otherwise noted.
Abbreviations Used
- SA – Seam Allowance
- RS – Right Side (of fabric)
- WS – Wrong Side (of fabric)
- RSO – Right Side Out
- WSO – Wrong Side Out
- cm – Centimeter
- mm – Millimeter
- Sts – Stitches (used in general sewing/turning context)
- Press – Iron the fabric to flatten seams
- Topstitch – Stitch close to the edge on the RS for finishing
- Backstitch – Reverse stitches at the beginning and end to secure
- Fuse – Apply interfacing using heat
- Clip SA – Make small cuts into the seam allowance to reduce bulk
- Quarter Mark – Marks dividing the circle or edge into four equal sections
Instructions for Making the Geo Potted Plant Covers Pattern:
Prepare Your Template and Fabrics
Begin by measuring your pot and tray to ensure the fabric cover fits neatly. Trace a circle around the tray or the widest part of your pot to form the base template. Add 1 cm SA around the tracing. This circle will be used to cut the base pieces for both the outer fabric and the lining.
Next, measure the circumference of your base circle (diameter × 3.14). Add 2 cm for SA and use this measurement for the length of your side rectangle. For the height, measure your pot and multiply by 1.5 to allow room for a decorative fold-over cuff. Add 2 cm SA to the height. Cut one rectangle in the outer fabric and one in the lining.
Press all fabric pieces before sewing to ensure accuracy. If adding structure, fuse interfacing to the WS of the outer rectangle and base.
Form the Outer Cylinder
Place the outer rectangle RS together, aligning the short edges. Pin or clip in place. Sew the short edge using a 1 cm SA, forming a fabric tube. Press the seam open or to one side, depending on fabric thickness.
Turn the tube right-side out temporarily just to confirm the seam is smooth and the rectangle forms a clean cylinder. Turn it back so the WS faces out.
Repeat this step with the lining rectangle to create the inner cylinder.
Attach Bases to Cylinders
Take the outer cylinder and the outer base circle. With RS together, pin the circle to the bottom edge of the cylinder. Divide both the circle and the cylinder into four equal sections using pins to ensure even ease. Match the quarter points before adding additional pins around the circumference.
Sew the base to the cylinder using a 1 cm SA, taking care to sew slowly around the curve. If your fabric is thick, clip the SA slightly to reduce bulk, being careful not to cut through the stitching. Turn the outer piece right-side out and check for smooth attachment.
Repeat the same steps to attach the lining base to the lining cylinder. Press lightly if needed.
Join Outer and Lining Layers
With the outer piece RS out and the lining WS out, slide the lining inside the outer piece so that RS are touching. Align the top raw edges of both layers, matching seams and quarter points. Pin all the way around.
Sew around the top edge with a 1 cm SA, leaving a 7–8 cm opening for turning. Backstitch at the beginning and end of the opening for reinforcement. After sewing, trim the SA slightly to reduce bulk and make the final shape smoother.
Turn and Shape the Cover
Pull the entire cover through the opening, turning it RS out. Ensure the base sits flat and the seams are fully pushed out. Use a blunt tool like a chopstick to gently shape the edges if needed.
Press the top edge neatly. Fold the raw edges of the turning opening inward by 1 cm and press flat.
Topstitch around the entire top edge using a narrow seam (about 0.3 cm) to close the opening and give the cover a crisp finish. This also keeps the lining from shifting.
Create the Fold-Over Cuff
Slide the finished cover over your pot and adjust it so the base sits smoothly. Fold the extra height downward to create a cuff, revealing the lining fabric. Shape the cuff evenly around the pot for a clean geometric appearance.
Final Adjustments
Check the fit. If the cover feels loose, add a second row of topstitching or a line of understitching at the top to help stabilize the layers. If the cover is slightly snug, stretch and press the fabric gently to relax the fibers.
Your Geo Potted Plant Cover is now complete and ready to display your favorite plants in style.