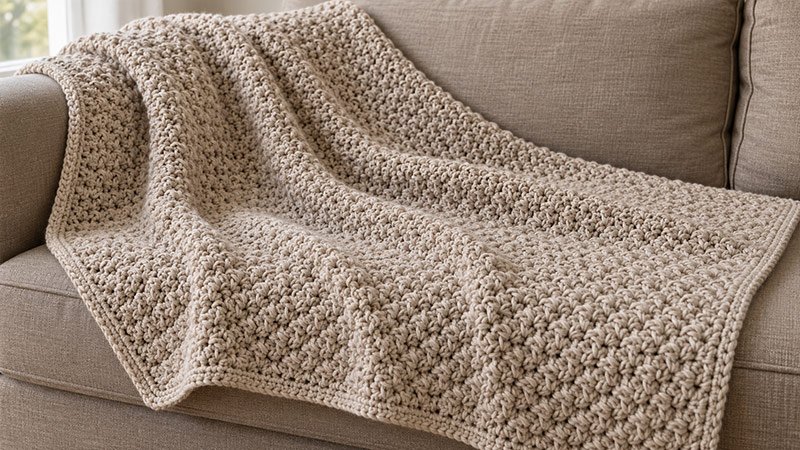
This blanket uses single and double crochet stitches to make a soft fabric with a close texture. The same row repeats throughout, which helps you settle into a steady pace.
Make it in one shade, or add stripes with yarn from your stash. The blanket is worked flat, then edged with a plain border.
Each row has a clear stitch count to help keep the sides straight. Use the gauge swatch to check your hook size before you start. The steps below make a throw for a chair or couch.
Skill Level
Easy. You should know how to chain, work single and double crochet, skip stitches, and turn your work.
Materials
- Yarn: Approximately 2,000–2,400 yards of worsted-weight yarn, including the border and swatch.
- Hook: 5.5 mm crochet hook, or the size needed to meet gauge.
- Yarn needle.
- Scissors.
- Measuring tape.
- Two stitch markers.
Choose a soft yarn that suits how you plan to wash the blanket. Yarn needs will vary with your gauge and chosen fiber.
Abbreviations
US crochet terms
- ch: Chain.
- sc: Single crochet.
- dc: Double crochet.
- sl st: Slip stitch.
- st / sts: Stitch / stitches.
- sk: Skip.
- rep: Repeat.
- (sc, dc): Work one single crochet and one double crochet into the same stitch.
Gauge
14 sts and 12 rows = 4 inches in the Suzette stitch pattern, measured after washing and drying the swatch as you will the blanket.
Count each sc and dc as a separate stitch.
Make a Gauge Swatch
- Ch 24.
- Follow Row 1 below. You will have 23 sts.
- Follow Row 2 until you have 18 rows in total.
- Wash and dry the swatch according to the yarn label.
- Measure across the middle, away from the edges.
If you have more than 14 sts in 4 inches, try a larger hook. If you have fewer, try a smaller hook.
Finished Size
Approximately 42 × 52 inches, including a border about 1 inch wide.
The blanket body measures approximately 40 × 50 inches at the stated gauge.
Notes
- Work back and forth in rows.
- Ch 1 to start each row. It does not count as a st.
- Use both top loops unless told to do otherwise.
- Each body row has 141 sts. Work 70 groups of (sc, dc). End with one last sc.
- For the Suzette repeat, work sc and dc in the same st. Then skip the next st.
- From Row 2 on, work each group in an sc from the row below. Skip each dc.
- Mark the first and last st of each row.
- Keep the starting chain loose. Use a larger hook for the chain if needed.
- To change the width, start with any even number of chains. Each row will have one less st than the chain count.
- To change the length, add or remove rows.
Suzette Stitch Blanket Pattern Instructions:
Step 1: Make the Foundation Chain
- Ch 142.
- Check your chain count before starting Row 1.
Step 2: Work Row 1
- Work (sc, dc) in the second ch from the hook.
- Sk next ch, (sc, dc) in next ch.
- Rep Step 2 until two chains remain.
- Sk the next ch.
- Work 1 sc in the last ch.
- Turn.
Count: 141 sts — 70 groups of (sc, dc) and 1 final sc.
Step 3: Work Row 2
- Ch 1.
- Work (sc, dc) in the first st.
- Sk next st, (sc, dc) in next st.
- Rep Step 3 until two stitches remain.
- Sk the next st.
- Work 1 sc in the last st.
- Turn.
Count: 141 sts.
The groups should sit in the sc stitches from the row below. Do not work into the turning chain.
Step 4: Continue the Blanket Body
Rows 3–150: Rep Row 2.
Check your stitch count every few rows. Lay the blanket flat now and then to check that the sides stay straight.
After Row 150, the body should measure approximately 50 inches long at the stated gauge. Add or remove rows if needed.
Keep the yarn attached for the border.
Step 5: Add Stripes, if Desired
For stripes, change yarn at the end of a row:
- Work the final sc until two loops remain on the hook.
- Draw the new yarn through both loops.
- Turn, ch 1, and work the next row with the new yarn.
- Leave tails about 6 inches long to weave in later.
Use the same stitch repeat and count for every stripe.
Step 6: Work the Border
Round 1
- Ch 1. Do not turn.
- Work 3 sc in the first corner st. Mark the middle sc.
- Work 1 sc in each st across the top, stopping before the last corner st.
- Work 3 sc in the last corner st. Mark the middle sc.
- Work down the side, starting with 1 sc in each row end.
- Work 3 sc in the bottom corner.
- Work 1 sc in each unused foundation chain across the bottom, between the corners.
- Work 3 sc in the next bottom corner.
- Work up the remaining side, starting with 1 sc in each row end.
- Sl st to the first sc.
Keep corner placements separate from the side stitches so you do not work into them twice.
Lay the blanket flat. If a side pulls inward, add a few evenly spaced sc along that side. If it waves, remove a few. Adjust this round before continuing.
Round 2 and Following Rounds
- Ch 1.
- Work 1 sc in each st around.
- Work 3 sc in the marked middle stitch of each corner.
- Move each marker to the middle sc of the new corner group.
- Sl st to the first sc.
Rep this round until the border measures approximately 1 inch wide.
Fasten off, leaving a 6-inch tail.
Step 7: Finish the Blanket
- Weave each yarn tail through several stitches on the back.
- Change direction once to help secure the tail.
- Wash according to the yarn label.
- Lay the blanket flat and gently shape the edges.
- Let it dry fully before measuring or using it.